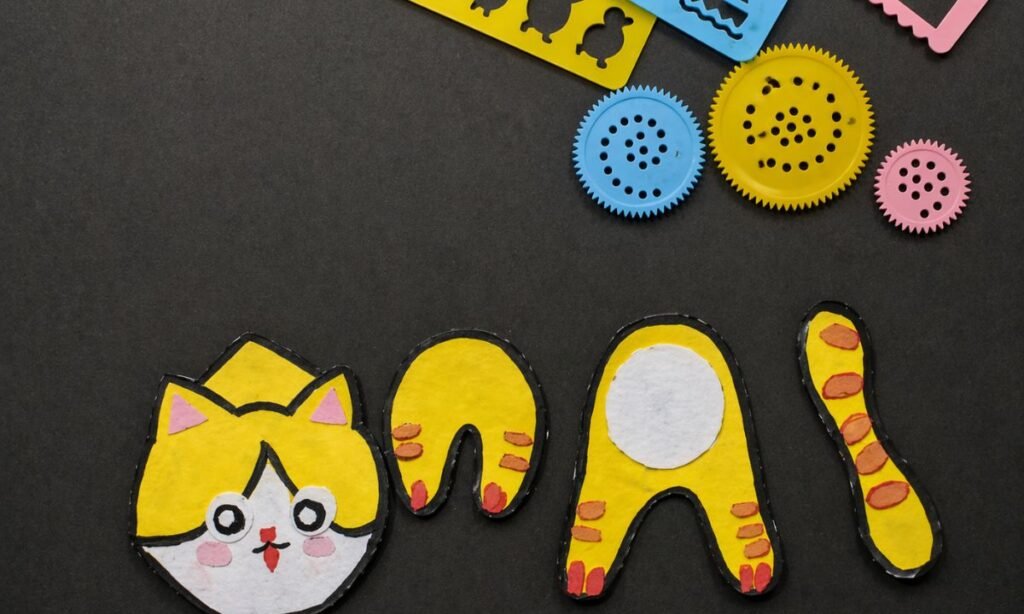
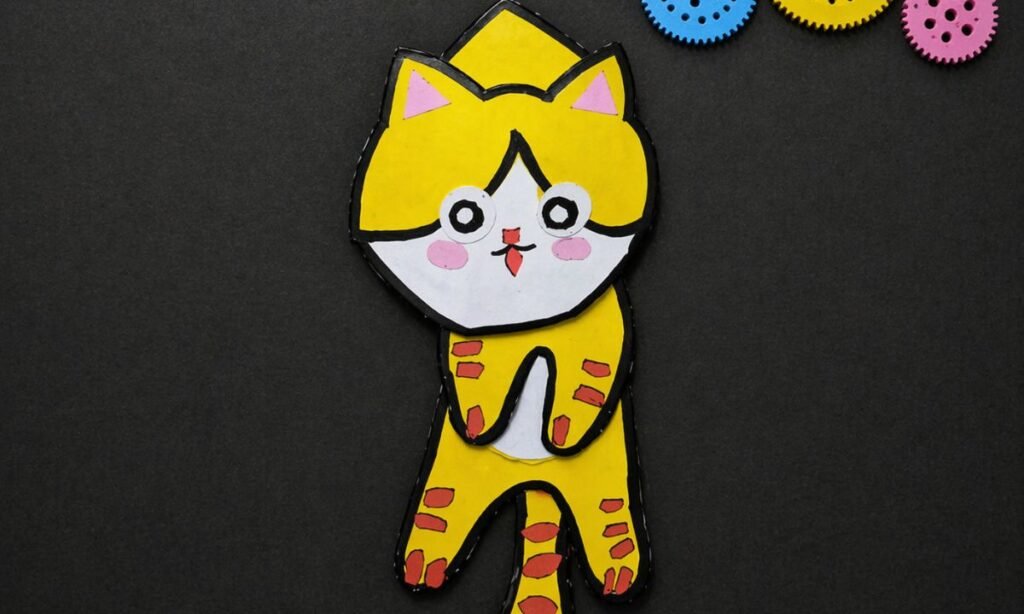
It’s so enjoyable and calming when you sit down with paper and you just make something cute out of it. This little paper cat craft is one of my favorites.
I did this on a calm afternoon when I just needed a simple creative break, and it turned out to be far cuter than I thought it would be.
The best part is that you don’t need any special tools or skills to make it, you can just start, and you can do it easily.
This project is great for beginners and it can make you feel good about yourself when you finish it.
I will show you step by step how I made mine and I will also give you some useful advice that I picked up along the way.
Let’s jump in!
- Why Won’t My Paper Cat Stand Properly After Finishing?
- Materials Needed:
- Step-by-Step Guide
- 1. Trace the Cat Parts
- 2. Choose Your Colored Paper
- 3. Cut Out the Cat Pieces
- 4. Make the Cat’s Face
- 5. Add the Tummy & Body Details
- 6. Decorate All the Pieces
- 7. Glue the Cat Together
- How Do I Make My Paper Cat Symmetrical On Both Sides?
- Is Paper Cat Craft Suitable for Beginners?
- FAQs
- Can I use different types of paper for this cat craft?
- How can I make my paper cat craft last longer?
Why Won’t My Paper Cat Stand Properly After Finishing?
Don’t worry if your small paper cat keeps falling over or you just can’t get it to stand up straight, you can go through this too.
And you’ll notice it happens all the time. Even I had the same problem when I made mine the first time.
Most of the time, you’ll find that it’s all about how you join the pieces and how well you fit them together.

If you make the legs too small, or if you don’t place them evenly, or if you don’t glue them properly. Your cat just won’t get that strong base you need.
If you’re using very thin paper, you might also notice that you’ll struggle a bit more because it won’t hold its shape easily, and you’ll feel like it keeps collapsing on you.
Try widening the legs a little more, or you can fold a small base at the bottom so you give your craft a stronger foundation that you can rely on.
Materials Needed:
- Colored paper sheets (yellow, white, pink)
- Pencil
- Black marker
- Scissors
- Glue
- Compass (for circles)
- Craft stencils (optional)
Step-by-Step Guide
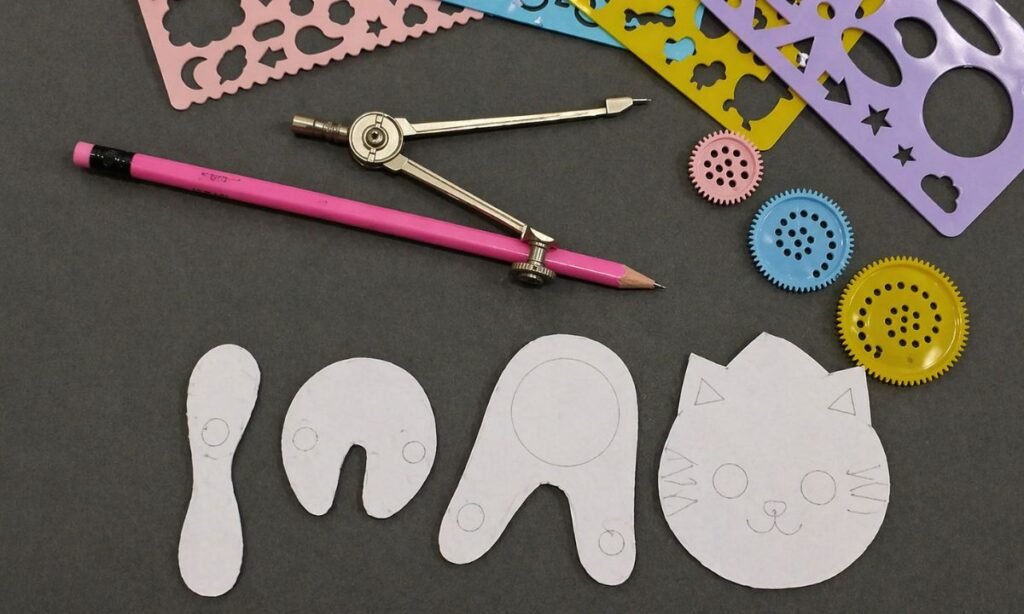
1. Trace the Cat Parts
First, you can draw all the basic pieces of a cat on white paper, you’ll need a head, torso, legs, tail, ears, paws, and even a small circle for the stomach.
You can do this easily, and you’ll see how simple it becomes once you start.
You can use plain white paper because it works like a template for you, and if anything looks a bit uneven, you can fix it before you cut out the final colorful pieces.
When you plan it properly, you will make things much easier for yourself later.
If kids are doing this craft with you, you should keep the shapes simple so they can understand them easily and follow along without confusion.
Your cat will look much cuter when you shape it carefully, if you make the head round with pointed ears.
The body slightly oval, and the tail nicely curved, you will notice how naturally cute your paper cat starts to look.

2. Choose Your Colored Paper
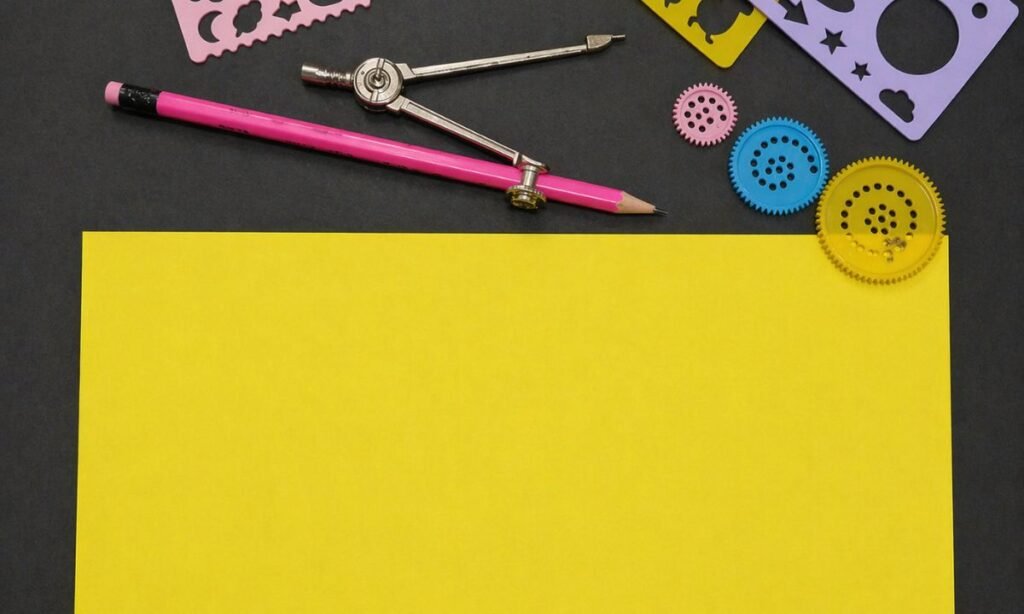
Now you can take a piece of paper in yellow, or any color you want your cat to be.
You can choose whatever you like, and you can make it feel more personal that way. I selected yellow because it makes your cat look so happy and vibrant.
But if you want, you can go for orange, brown, gray, or even pink, and you’ll still see how cute it turns out for you.
You can place your white templates on top of the colored paper. And you can lightly trace around them so you can keep everything neat and accurate.
This step helps you keep all your pieces tidy and almost the same size. And you don’t need to press your pencil too hard because if you do, you might see dark marks later even after cutting.
If you go gently while tracing, you will make things much cleaner for yourself. And this step will help you stay more organized and make the whole craft much easier when you put it together later.

3. Cut Out the Cat Pieces
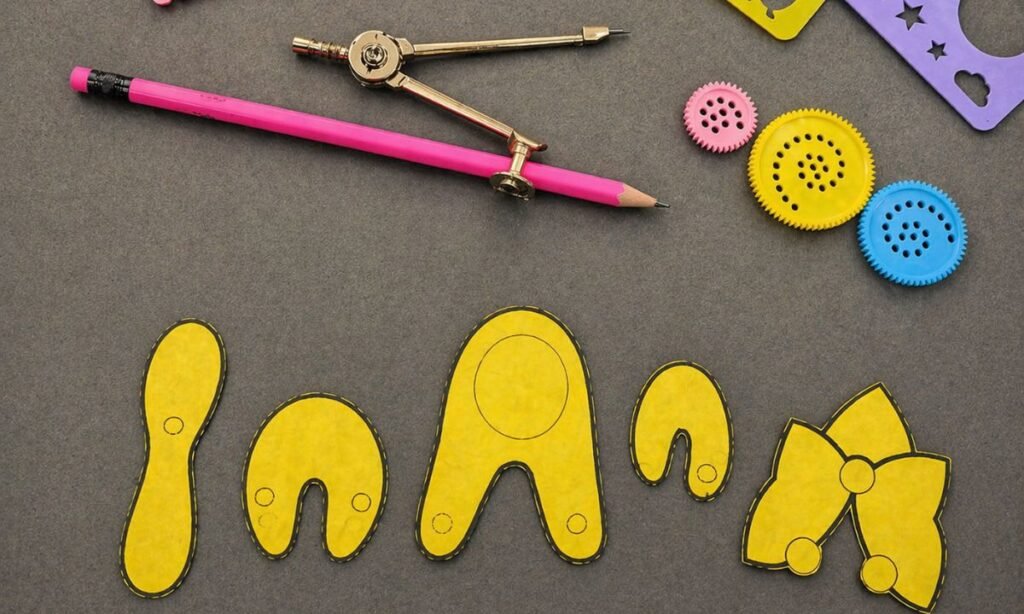
Now you can cut out all the cat parts from the yellow paper very carefully. And you should go slow because you don’t want to ruin the shape.
You need to be extra careful with the ears, legs, and tail because you can easily make them uneven if you rush.
If you take your time, you will notice your pieces come out much cleaner, and you can feel more confident while building your cat.
After you cut everything out, you can use a black pen and you can gently draw around each piece.
This simple outline can make a big difference for you because it helps each part stand out more clearly when you put your cat together.
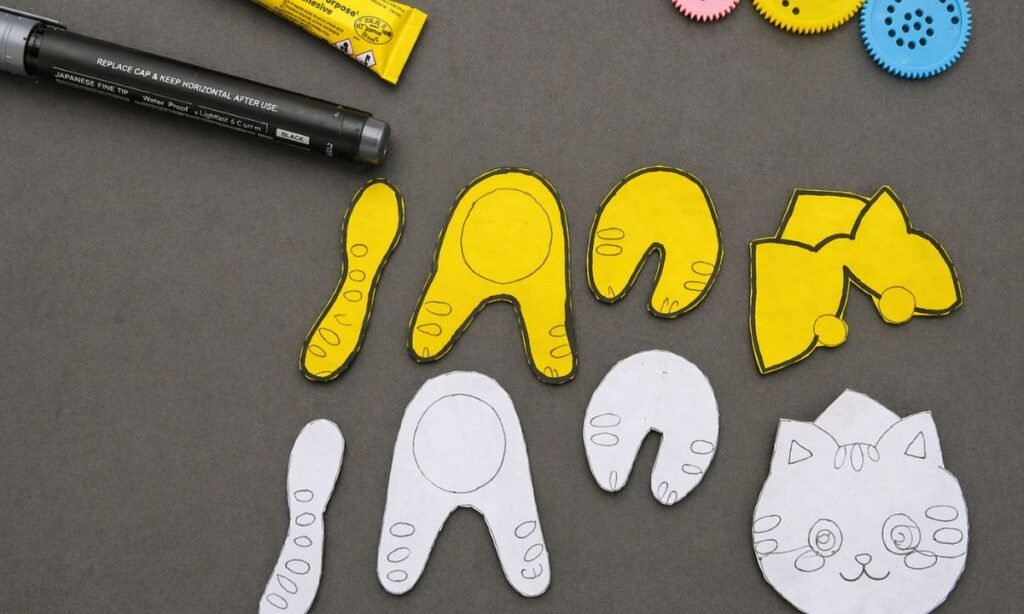
At this stage, you can also add small details like lines on the paws, tail stripes, and little face features.
And you’ll see how your cat starts looking more alive and complete with just these small touches.

4. Make the Cat’s Face
Now it’s time to make your cat come to life, and you can really enjoy this part because you get to give it a personality.
You can add the eyes, nose, mouth, whiskers, and ears to the head piece, and you will see how your cat starts looking real.
You can either draw everything using markers, or you can cut small shapes from colored paper. And you can glue them on, whichever way feels easier for you.
I like to use a black marker for whiskers because it gives your cat a cute handmade look. And you can also see how it instantly changes the face.
Don’t worry if both eyes don’t look exactly the same, you can let them be a little different. Because even a small difference can actually make your cat look more charming.
If you want a more playful style, you can also add rosy cheeks, eyelashes. Or a small smile, and you’ll notice how your cat suddenly feels more fun and full of life for you.

5. Add the Tummy & Body Details
You can cut out the white circle in the middle of your cat’s body piece and you can glue it on. And you’ll see how it instantly starts shaping the body more clearly for you.
This small touch can make your craft look softer and more complete. You will notice how your cat starts feeling more finished in your hands.
After that, you can use markers and you can draw little decorations like dots, stripes, or curved lines. You can also add stripes on the tail and tiny paw prints on the legs.
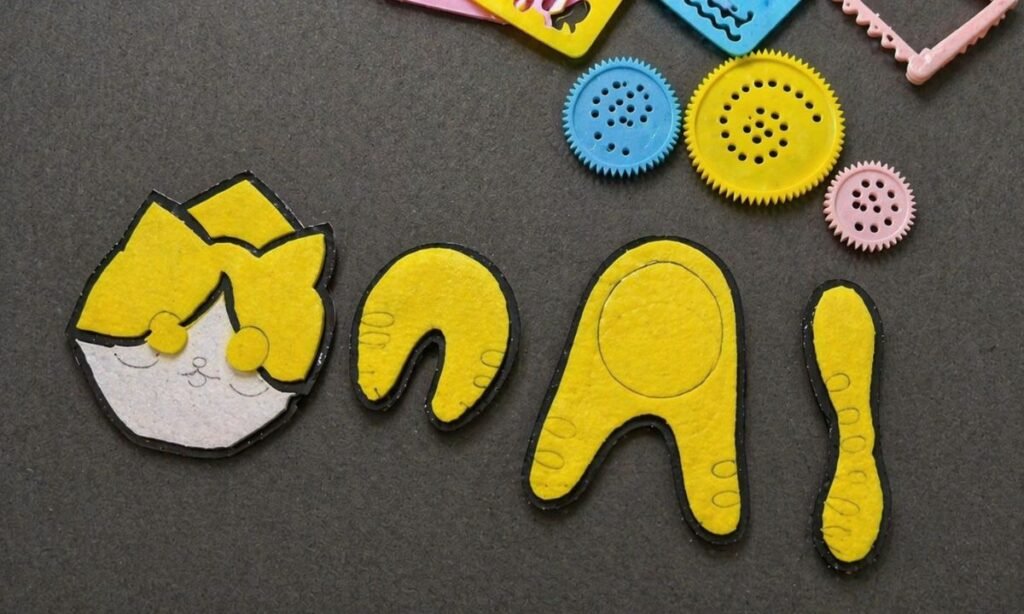
This is the fun part where you can really personalize your paper kitten, and you can make it your own style however you like.

6. Decorate All the Pieces
Before you glue your whole cat together, you can place all the pieces in front of you and you can carefully check if any of them need a little more detailing.
You can finish the face, ears, paws, legs, body, and tail at this stage, and you’ll find it much easier to adjust things while everything is still separate.
I always like to do this before putting anything together because you can work more freely, and you can sketch more neatly when everything is still flat in front of you.
You can add stripes on the tail, small lines on the paws, or any cute little designs on the body, and you can make it look exactly how you want.
This step also helps you see if your colors and details feel balanced, and you can fix anything early before you finally finish your craft.

7. Glue the Cat Together
Now you can put all the pieces together and you can slowly watch your kitty come to life.
You can begin with the body first, and then you can place the head right at the top so everything starts taking shape for you.
After that, you can glue the legs in place, and you can set the tail on one side or even behind the torso, depending on how you want your cat to look.
You should press down on each piece for a few seconds so you can make sure everything sticks properly and nothing shifts.
If you let your craft dry completely before you move it, you can avoid any parts coming loose, so it’s better for you to wait a little before handling it again.
When everything is done, you can place it on a card, hang it on a wall.
Or you can even use it as a fun display for kids or in a classroom, and you’ll see how nicely your little paper kitty stands out.

How Do I Make My Paper Cat Symmetrical On Both Sides?
It can feel a bit tricky for you to make both sides of your paper cat look even.
Especially when you’re cutting everything by hand, and you might notice small differences.
Don’t worry if one ear looks a little bigger or the legs don’t match perfectly, it happens to you, and it happens to everyone.
If you want to fix this easily, you can fold the paper in half before you sketch or cut the ears or legs.
When you do this, both sides can match without extra effort from you, and it makes your work much easier.
You can also use your first cut piece as a guide for the next one, just place it on top, trace around it.
If you take your time while trimming and go slowly and steadily. You will notice a big improvement in how neat everything looks for you.
Is Paper Cat Craft Suitable for Beginners?
This paper cat project can feel really great for you as a beginner, even if you’ve never made anything like this before.
You might think it will be hard at first, but once you start, you can see that it becomes more fun for you than difficult.
You only need simple things like paper, scissors, glue, and a marker, and you can easily get started without any stress.
The most important thing for you is to keep your shapes simple and not worry about making everything perfect, because you don’t need perfection here.
Even if your pieces turn out a little uneven, you will still end up with a really lovely cat that you can feel proud of.
This project is also excellent for kids because they can help you with drawing, coloring, and decorating, and you can enjoy making it together.
FAQs
Can I use different types of paper for this cat craft?
You can definitely try out different kinds of paper, and you can see what works best for you.
You can use construction paper, scrapbook paper, or even old magazines that you don’t need anymore, and you can still get creative results.
Regular craft paper can also work really well for you.
You should keep in mind that thicker paper can make your cat stronger and more stable, so you can rely on it more when you finish your craft.
On the other hand, thinner paper can be easier for you to cut, so you can choose based on what feels comfortable.
How can I make my paper cat craft last longer?
You can use high-quality glue and you should press each piece down firmly so your paper cat can last longer and stay strong for you.
You may also make your pieces more durable by covering them with transparent tape or even laminating them.
Another interesting thing you can do is glue your finished kitty onto a piece of cardboard, and you can instantly give it extra strength and stability.
When you do this, your paper cat will become stronger for you and you can help it keep its shape for a much longer time.
You may also like to make!