A few days ago, I was cleaning a drawer and found several colorful paper pieces left from older crafts, along with one green sheet I had not used yet.
They were too small for a big project, but the colors looked too nice to throw away.
Instead of wasting them, I started arranging the pieces together and turned them into a bright little paper flower.
It became a simple way to reuse leftover paper while making something cheerful enough to display afterward.
Let’s make this paper flower craft.
- Why Handmade Flowers Last Longer
- Materials Needed:
- Step-by-Step Guide
- 1. Green Paper Strips
- 2. Cutting Paper Strips
- 3. Rolling Paper Base
- 4. Shape Green Base
- 5. Colorful Paper Flowers
- 6. Paper Cup Base
- 7. Colorful Flower Bouquet
- 8. Paper Flower Arrangement
- Where to Display This Flower Arrangement
- Paper Flower Craft Challenges
- Fun Facts About Flowers
- FAQs
- Can I Make This Flower Arrangement Without a Paper Cup?
- What Paper Works Best for This Flower Craft?
Why Handmade Flowers Last Longer
A paper flower does not wilt or dry out, so you can keep it displayed much longer than a fresh flower.
It also stays the same color and shape without needing water, sunlight, or any regular plant care.
That makes handmade flowers useful for room decor, cards, small gifts, or displays you want to keep for several weeks.
If the paper stays dry and clean, the finished craft can be stored and brought out again later.
Materials Needed:
- Colored papers (green + different colors)
- Paper cup
- Glue
- Scissors
- Pencil
Step-by-Step Guide
1. Green Paper Strips
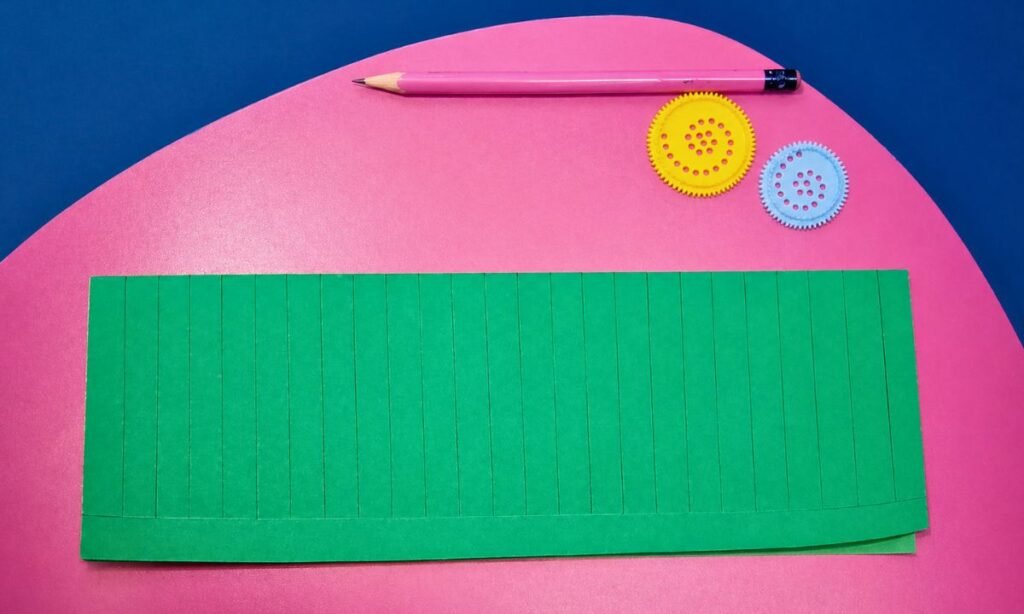
Fold a green paper sheet in half lengthwise and draw evenly spaced vertical lines, leaving a narrow border along one edge.
Use a ruler and pencil to mark straight lines across the folded paper, making each strip approximately the same width.
Leave the bottom section unmarked so all the paper strips remain connected when you cut along the drawn lines.
2. Cutting Paper Strips
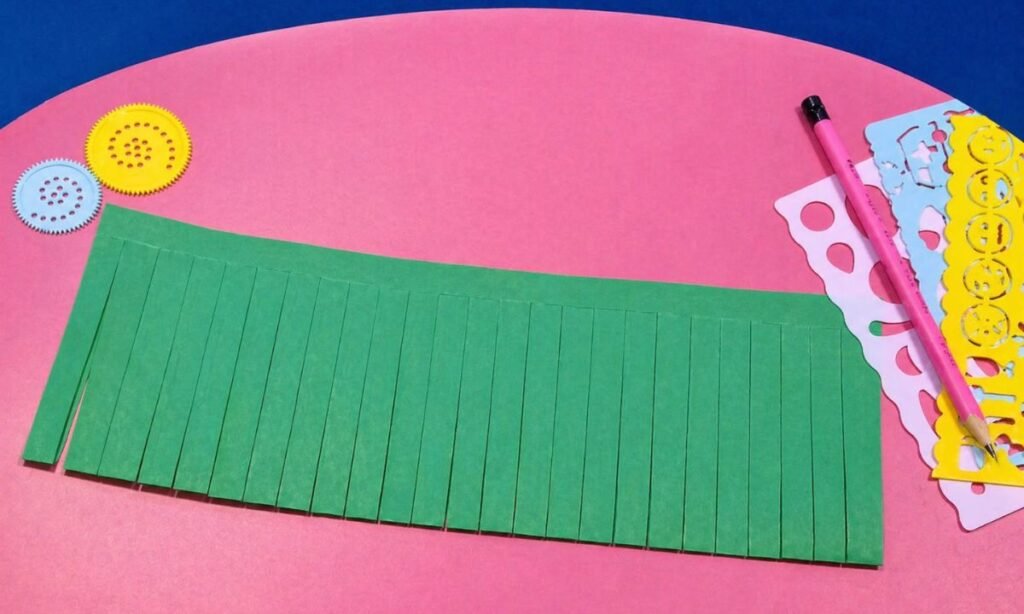
Cut carefully along each marked line using scissors, stopping before reaching the uncut border to hold the strips together.
Work from one side to the other, following the pencil marks to create evenly spaced strips across the folded sheet.
Avoid cutting through the solid border, as this section will hold the paper together when you start rolling it.
3. Rolling Paper Base
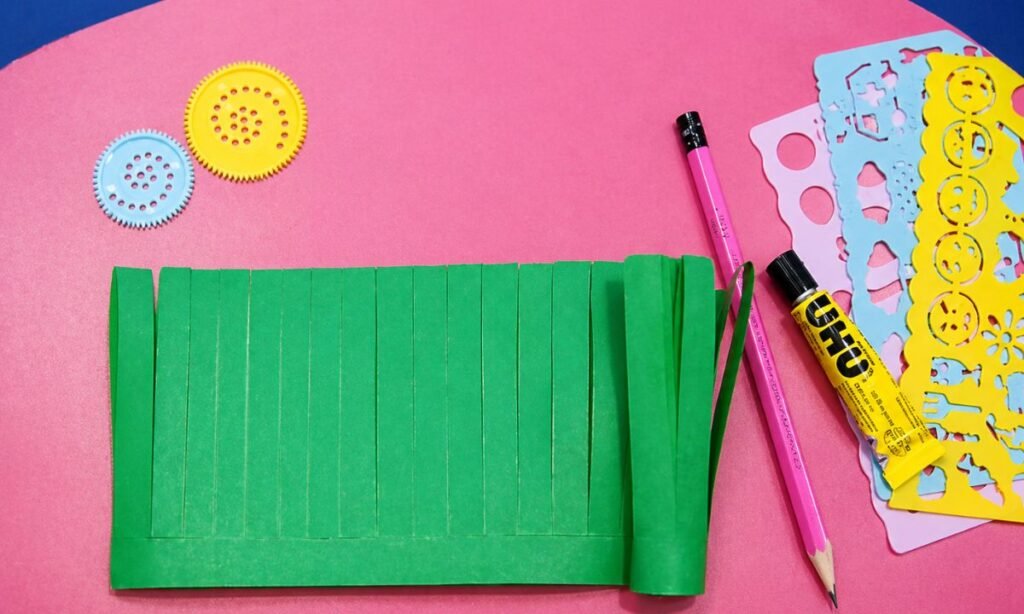
Apply glue along the uncut border and begin rolling the green paper tightly from one end to form a cylinder.
Continue rolling the paper while pressing the glued edge against the next layer to secure the base as you go.
Allow the cut strips to curve outward naturally, creating several overlapping loops above the rolled paper base for the flower.
4. Shape Green Base
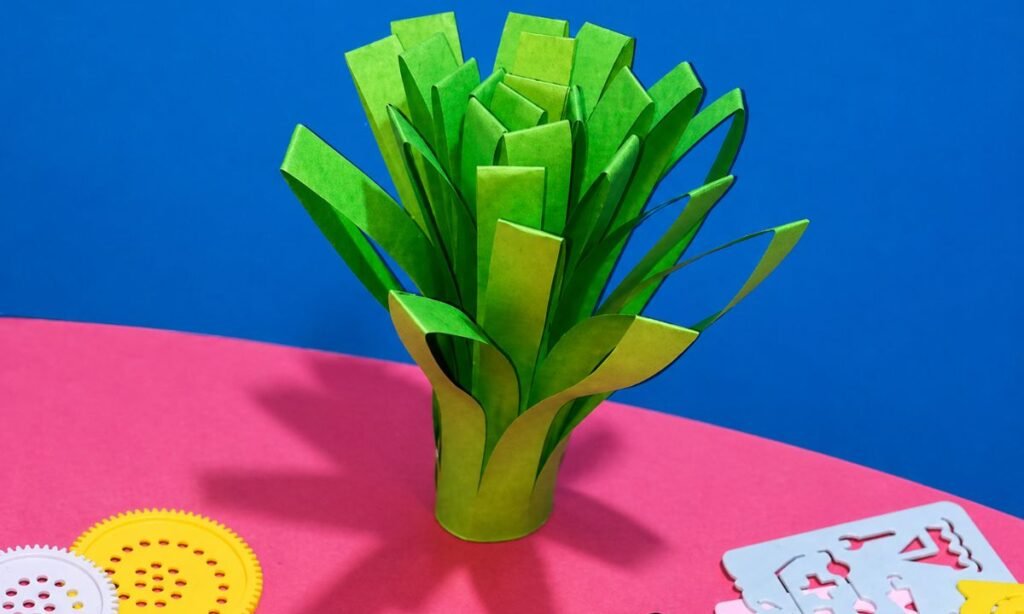
Stand the rolled paper cylinder upright and gently spread the cut loops outward to create a fuller green paper flower.
Adjust the outer strips so they bend away from the center, while the inner loops remain closer together at the top.
Press the bottom of the cylinder flat against the table to help the finished paper flower stand without falling over.
5. Colorful Paper Flowers
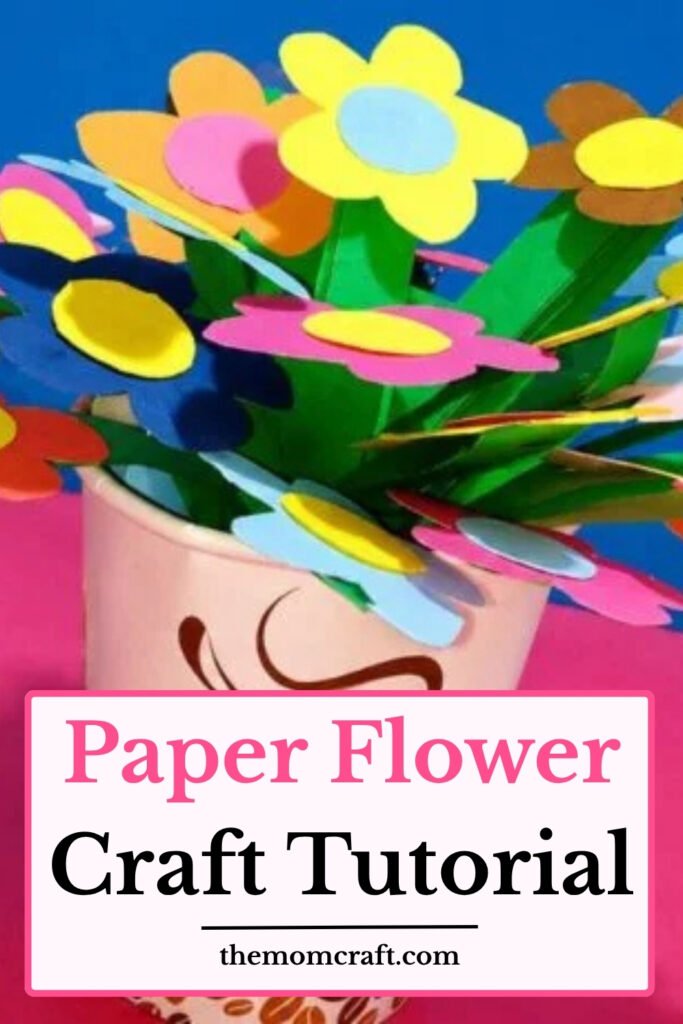
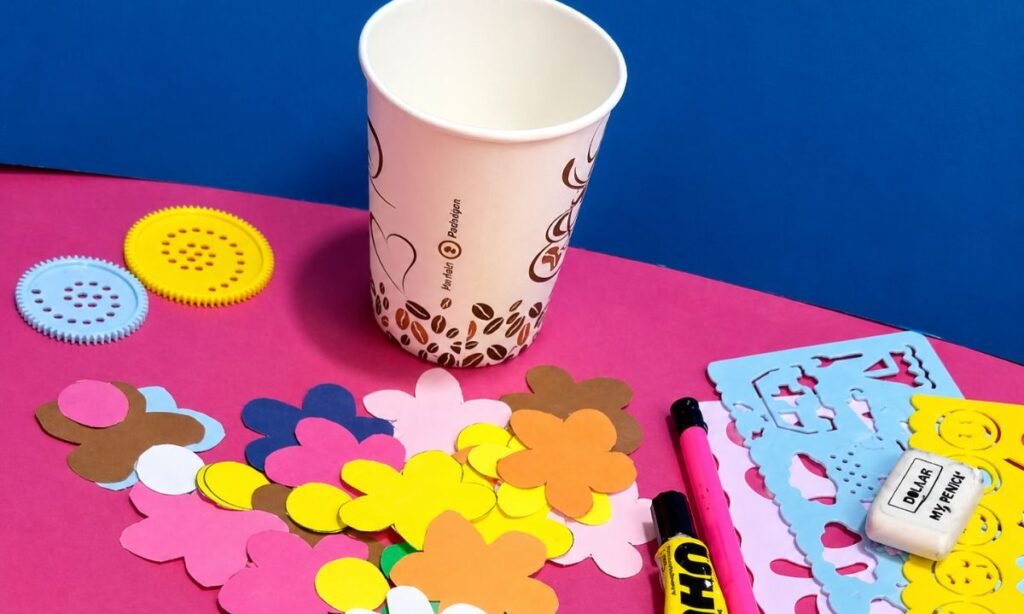
Cut simple flower shapes from pink, yellow, orange, blue, brown, and white paper, using a pencil to outline each one.
Cut small paper circles in contrasting colors and glue them onto the center of each flower to complete the petals.
Prepare several flowers in different colors and sizes, then place them beside a paper cup for the next step.
6. Paper Cup Base
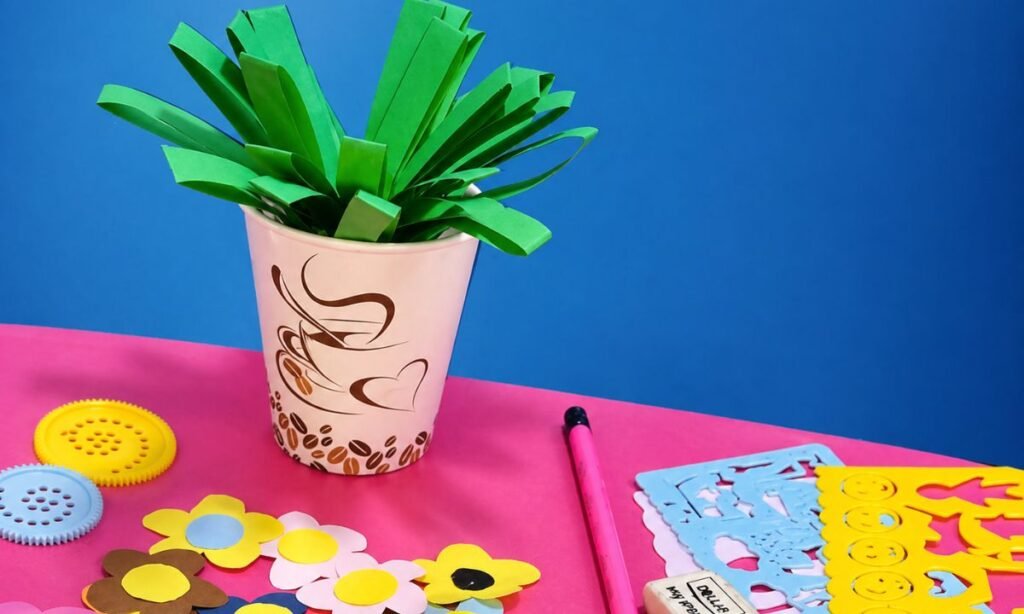
Place the rolled green paper strips inside an empty paper cup, allowing the loops to spread above the rim.
Adjust the green strips around the cup opening so the paper leaves spread outward instead of gathering on one side.
Arrange the prepared paper flowers nearby, with their colored centers attached, ready to secure them onto the green strips.
7. Colorful Flower Bouquet
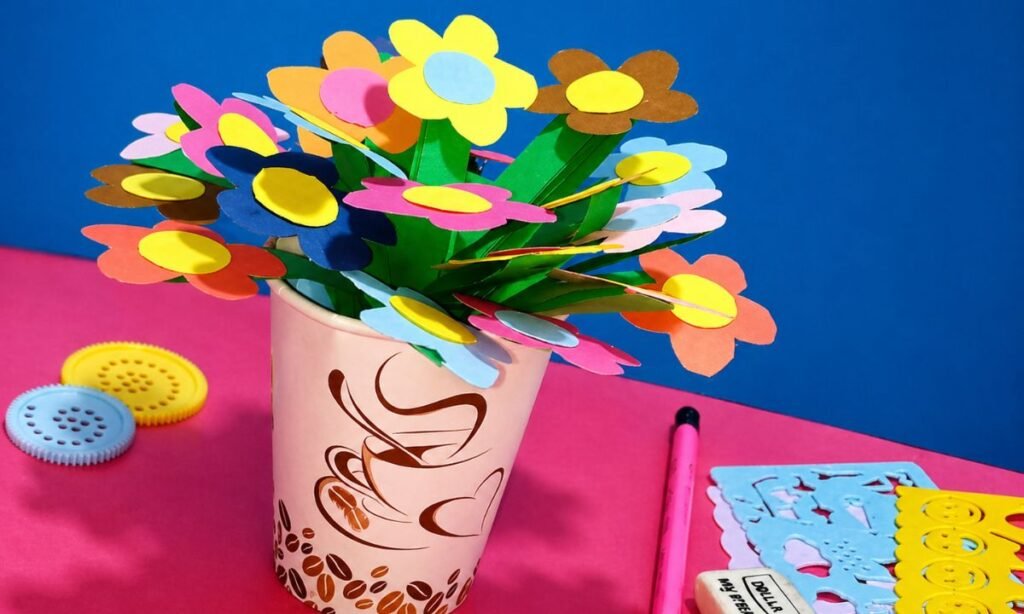
Attach the colorful paper flowers to the ends of the green strips, spreading different colors across the arrangement.
Position larger flowers toward the front and sides, then fill the spaces between them with smaller paper flower cutouts.
Spread the green paper loops gently so the attached flowers face outward, creating a full bouquet inside the paper cup.
8. Paper Flower Arrangement
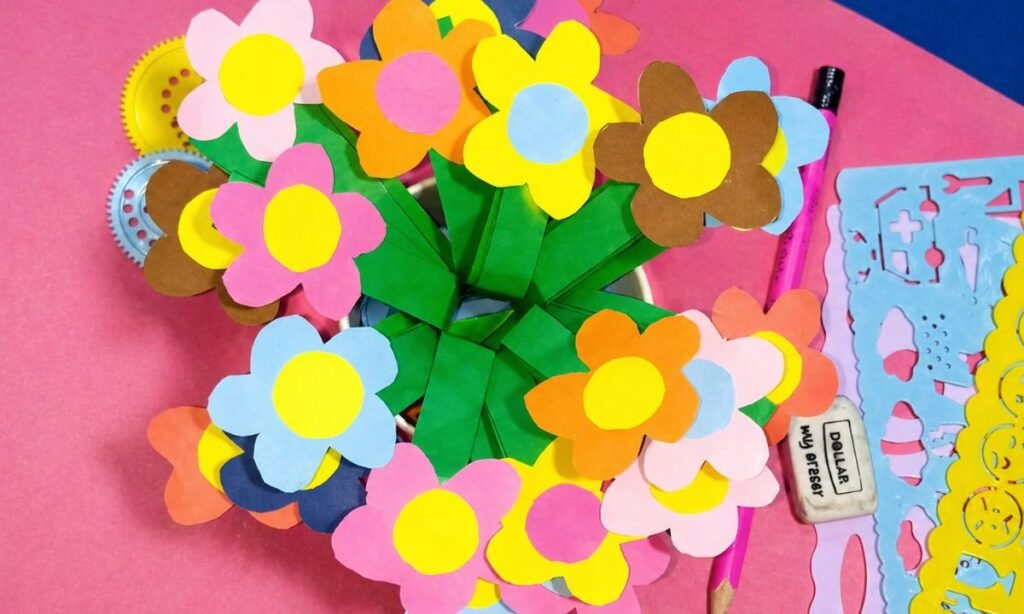
Arrange pink, orange, yellow, blue, and brown flowers around the green paper strips, placing contrasting colors beside each other.
Secure each flower to a separate green strip, allowing the petals to overlap slightly without covering the colorful circular centers.
Adjust the flower positions from above, spreading them evenly around the cup to complete the colorful paper flower arrangement.
Where to Display This Flower Arrangement
The finished paper flower arrangement works well on a desk, shelf, side table, or classroom display where its colors can stand out.
Because the flowers sit inside a paper cup, the craft already has its own base and does not need extra support.
You can place it near books, handmade cards, or other small decorations without taking up too much space.
It also works nicely as a simple centerpiece for a kids’ table, craft corner, or spring-themed display.
Paper Flower Craft Challenges
Keeping the flower shape neat can be tricky if the paper pieces shift while you are arranging or gluing them.
Small parts may also curl or move out of place when too much glue is added around the edges.
Using a small amount of adhesive helps the pieces stay flat and keeps the finished flower from looking messy.
It also helps to arrange everything first so you can fix the spacing before anything is permanently attached.
Fun Facts About Flowers
- Flowers use their colors and scents to attract pollinators such as bees, butterflies, birds, and other insects.
- Some flowers open during the day, while others bloom at night depending on the pollinators they rely on.
- The bright part people usually call the flower can be made from petals arranged around the center.
- Flowers come in thousands of shapes, sizes, and colors, from tiny wildflowers to very large tropical blooms.
- Some flowers grow alone on a stem, while others appear in clusters containing many smaller flowers together.
- After pollination, many flowers help produce seeds or fruits that allow new plants to grow.
FAQs
Can I Make This Flower Arrangement Without a Paper Cup?
Yes, you can use a small cardboard container, recycled paper holder, or handmade folded base if a paper cup is not available.
Choose something wide enough to hold the rolled green paper firmly so the flower arrangement does not tip over easily.
Keep the replacement base lightweight and decorate it with colored paper if you want it to match the flowers.
What Paper Works Best for This Flower Craft?
Medium-weight craft paper works well because it is easy to cut while still holding its shape after the pieces are glued together.
Very thin paper may curl or tear more easily, while thick cardstock can be harder for younger kids to cut neatly.
Using leftover craft paper is perfectly fine as long as the pieces are clean, flat, and large enough for the required shapes.
You may also like to make!