I have always liked fish, especially the bright colorful ones that make any space feel a little more lively.
I often think about keeping fish at home, but taking care of a fish tank is not always possible for me, so I started thinking of other ways to bring that same feeling into my room.
That is when I decided to make a simple fish craft that could work as both a fun activity and a little decoration.
It was an easy way to turn something I already liked into a craft I could actually keep on display.
Let’s make this fish craft.
- Why Can Fish Only Breathe in Water?
- Materials Needed :
- Step-by-Step Guide
- 1. Create Center Crease
- 2. Fold Into Triangle
- 3. Draw Cutting Lines
- 4. Cut Paper Strips
- 5. Open Cut Paper
- 6. Fold Top Strips
- 7. Shape Fish Body
- 8. Complete Fish Body
- 9. Add Fish Face
- Why Fish Make Great Room Decor
- How Fish Use Their Tails?
- FAQs
- Can I Make This Fish Craft in Different Sizes?
- Can I Use Other Colors for This Fish Craft?
Why Can Fish Only Breathe in Water?
Fish breathe through gills, which pull dissolved oxygen from the water as it moves across their thin surface.
These gills work best underwater because water keeps them open and allows oxygen to pass into the fish’s bloodstream.
When most fish leave the water, their gills collapse together and cannot absorb enough oxygen from the surrounding air.
That is why fish need water around their gills to breathe properly and stay alive for long periods.
Materials Needed :
- Yellow paper sheet
- Blue paper (for face)
- White and black paper (for eyes)
- Red paper (for mouth)
- Pencil
- Scissors
- Glue
Step-by-Step Guide
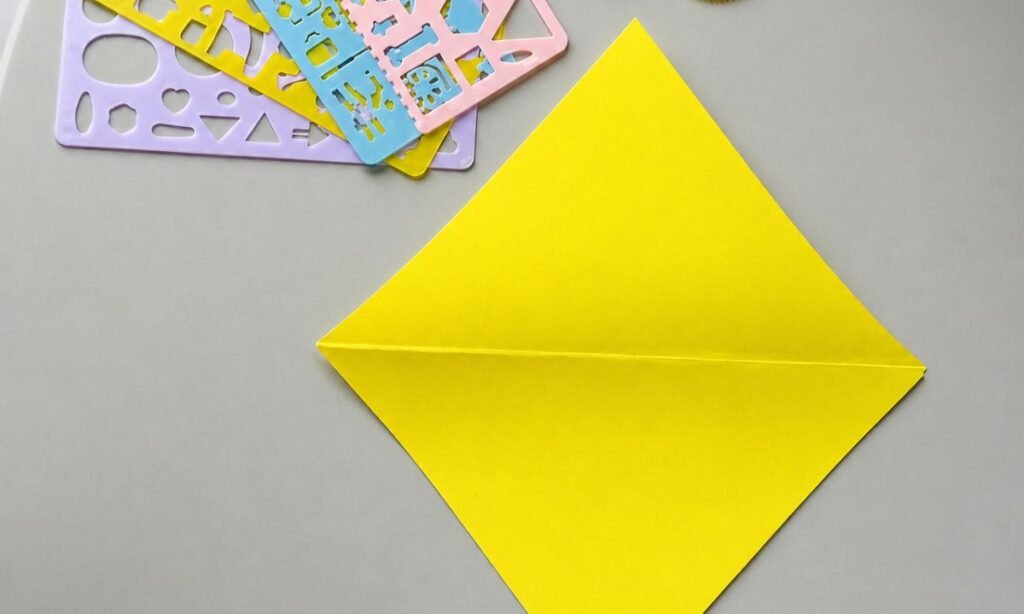
1. Create Center Crease
Fold the bottom corner of the yellow square up to the top corner, press the edge firmly, then open it again.
You should now have a clear crease running across the center, dividing the paper into two matching triangular sections evenly.
Keep the paper positioned like a diamond, with the crease visible, so the next folds stay straight and properly aligned.
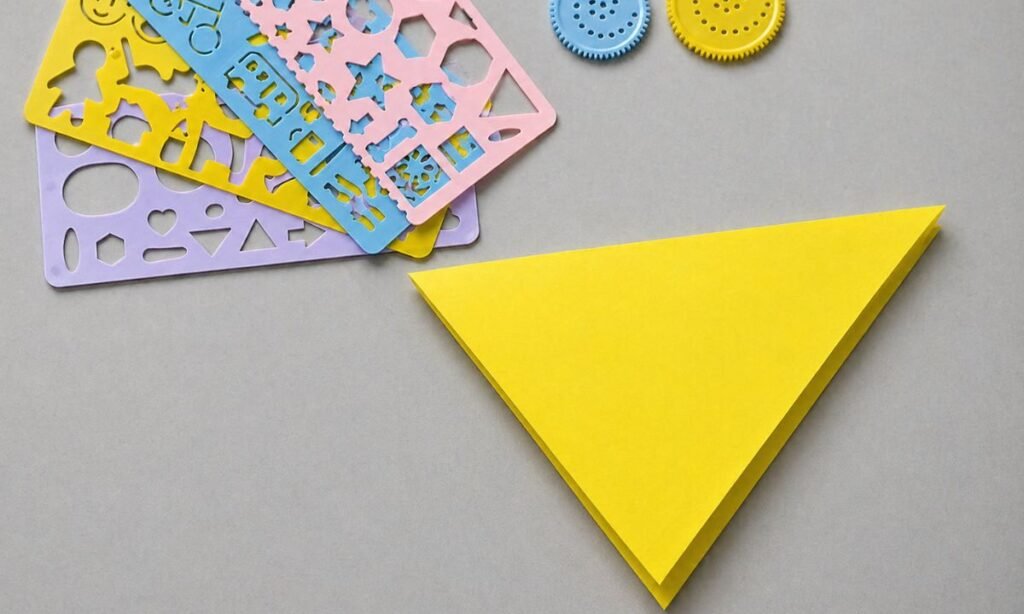
2. Fold Into Triangle
Fold the yellow paper along the center crease, bringing both corners together until the sheet forms one clean triangular shape.
Press firmly along the folded edge with your fingers so the triangle stays flat and the corners remain neatly aligned.
Check that all three points meet evenly, because a balanced triangle will make the next shaping steps easier and more accurate.
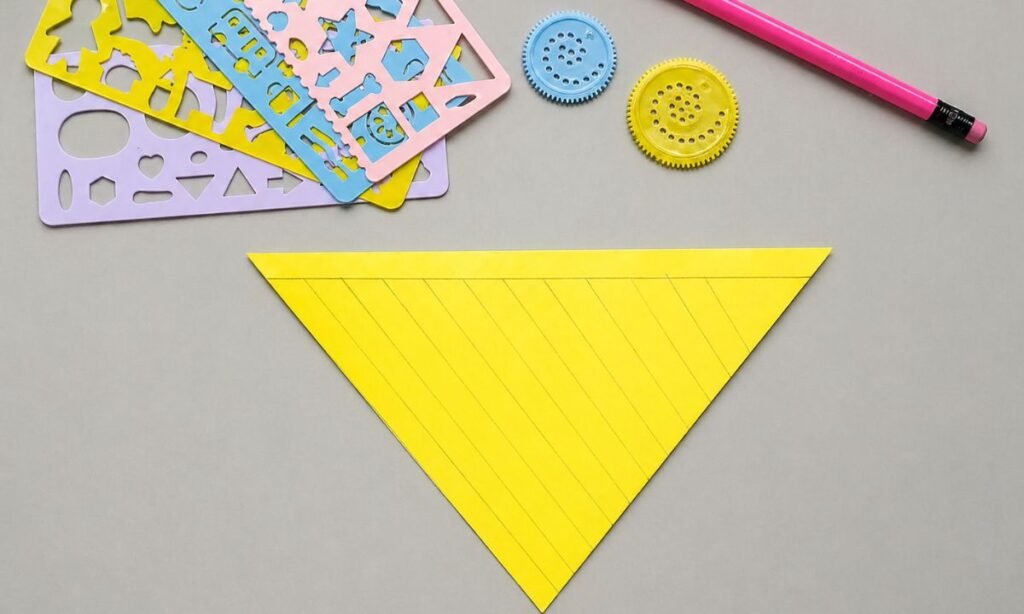
3. Draw Cutting Lines
Use a pencil to draw one straight guideline across the top of the folded triangle, just below the long edge.
Then add evenly spaced diagonal lines from that guideline down toward the pointed bottom, keeping each line similar in angle.
Keep the pencil marks light and consistent, because these guides will help you make neat, evenly spaced cuts across the paper.
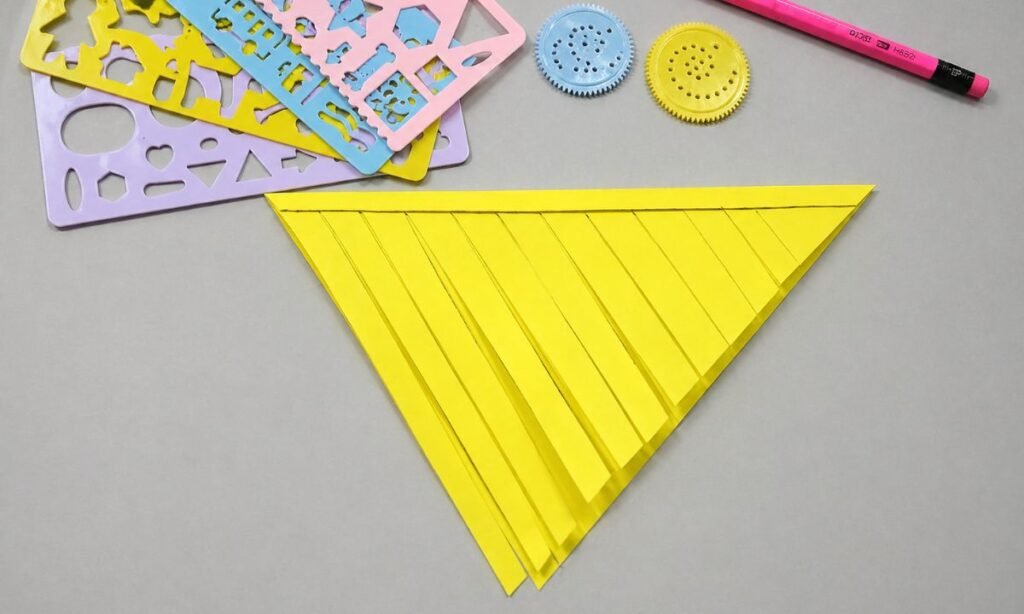
4. Cut Paper Strips
Cut along each diagonal pencil line from the bottom edge upward, stopping carefully when you reach the straight guideline near top.
Keep the cuts evenly spaced and avoid crossing the top guideline, because that uncut section will hold the paper together.
Check every slit before unfolding the triangle, making sure none are joined at the top or cut completely through the fold.
5. Open Cut Paper
Open the folded yellow paper carefully and spread both sides apart, revealing the matching cut strips along each outer edge.
Flatten the center crease gently while keeping every strip separated, so the paper stays open without bending or tearing the cuts.
Check both sides for uneven or joined strips, and trim any connected sections before shaping the paper into the fish body.
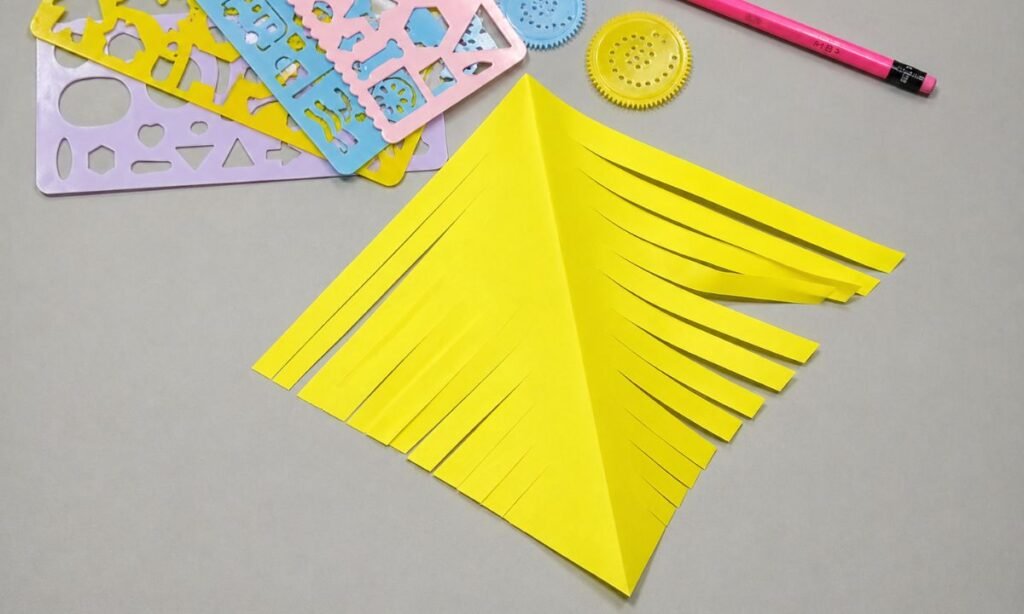
6. Fold Top Strips
Bring the top strip from each side inward toward the center crease, curving both ends gently so they form matching loops.
Apply a small amount of glue where the strip ends meet near the center, then press them down until they stay secure.
Keep both folded sides at the same height and angle, because an even shape will make the fish body look balanced.
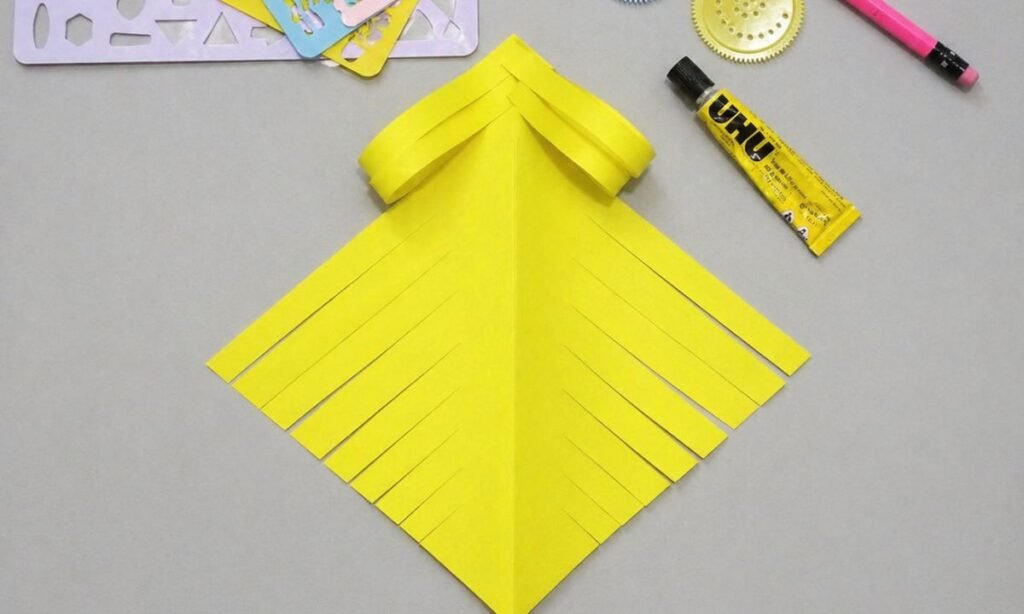
7. Shape Fish Body
Continue folding the remaining yellow strips inward from both sides, crossing them neatly over the center to build the fish body.
Work downward one pair at a time, keeping each folded strip close to the previous one so the pattern stays even.
Press each overlapping section firmly after gluing, and keep the pointed lower end free so the tail shape remains clearly visible.
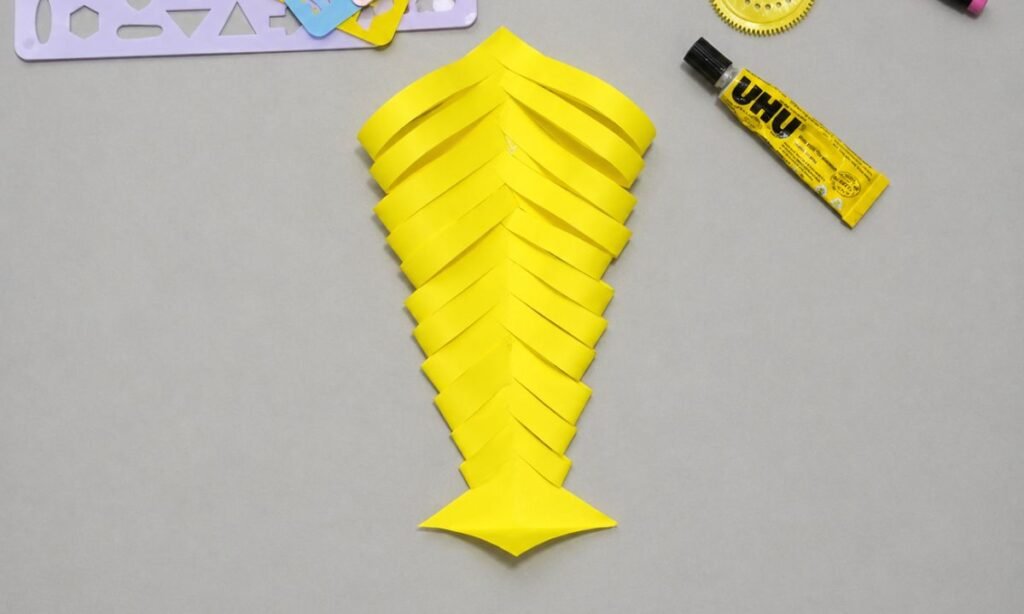
8. Complete Fish Body
Keep folding and gluing the remaining strips toward the center until the fish body becomes fully covered and neatly tapered.
Press each overlapping strip firmly in place, making sure both sides stay even and the center pattern remains straight throughout.
Leave the bottom point open and flat, because this wider section will later help form the fish tail shape clearly.
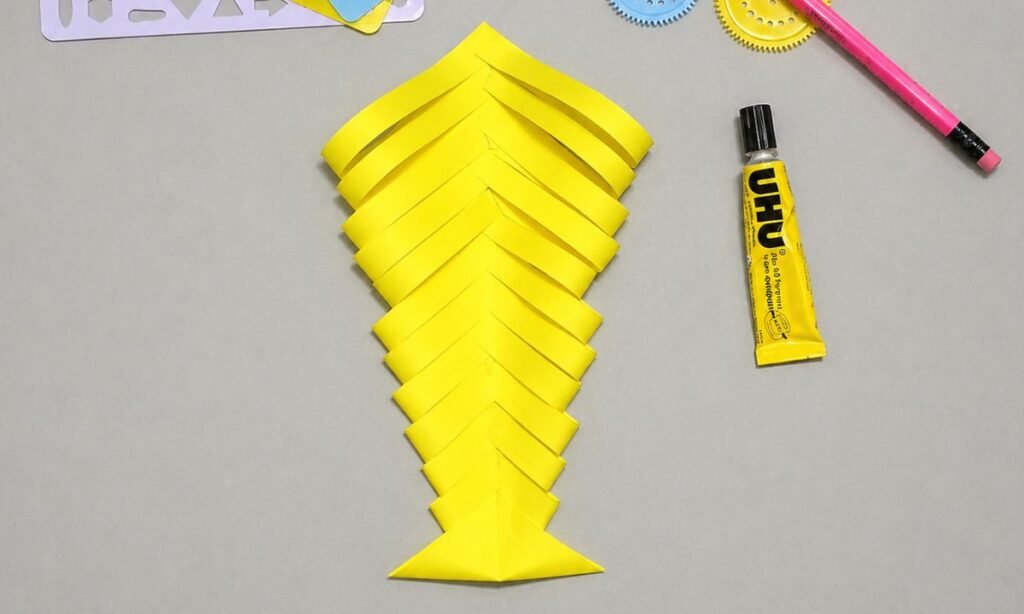
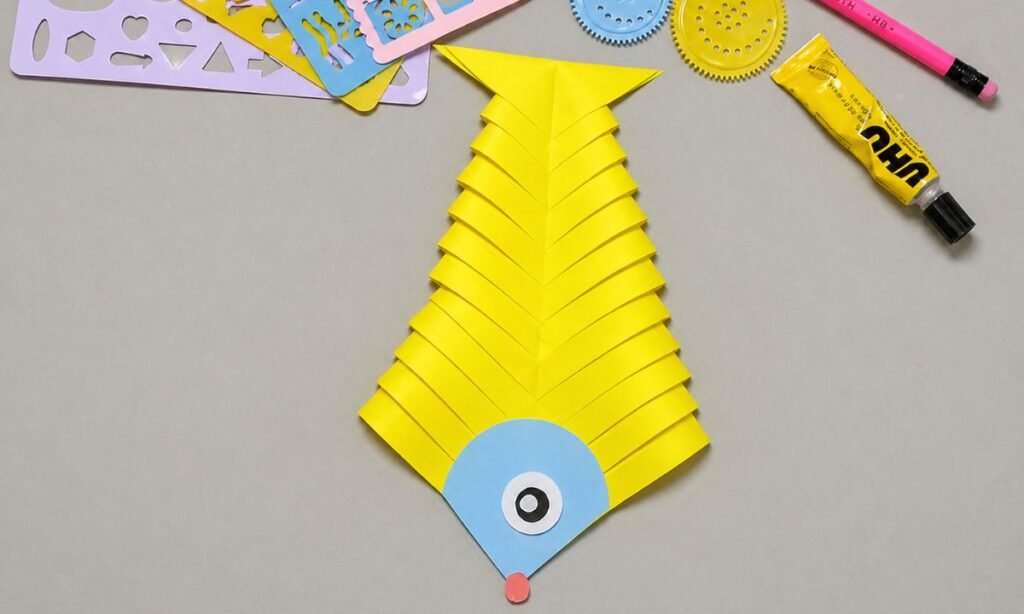
9. Add Fish Face
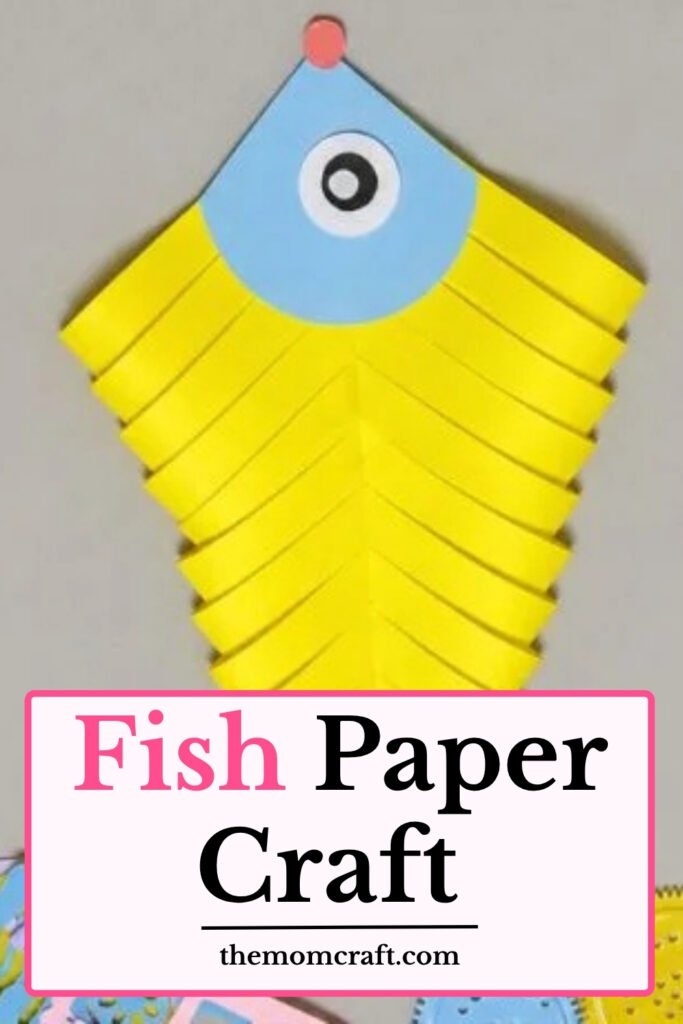
Cut a rounded blue paper piece for the head, then glue it across the wider end of the yellow fish body.
Add a layered paper eye near the center of the blue section, keeping it large enough to stand out clearly.
Finish the face with a small pink mouth at the pointed edge, making sure both details stay firmly attached in place.
Why Fish Make Great Room Decor
Fish shapes naturally bring color and movement into a room, even when they are made from simple craft materials.
Their fins, tails, and patterns give you plenty of room to play with different colors without making the decoration feel too busy.
You can use one fish as a small accent or make several and arrange them together for a more playful wall display.
They also work well in kid’s rooms, study spaces, or any corner that needs a little more color and personality.
How Fish Use Their Tails?
A fish uses its tail to push against the water, helping its body move forward with each side-to-side swing.
The tail also helps with turning, slowing down, and changing direction when the fish needs to move through tight spaces.
Different fish have different tail shapes, and those shapes can affect how quickly, smoothly, or sharply they move through the water.
FAQs
Can I Make This Fish Craft in Different Sizes?
Yes, you can start with a larger or smaller square sheet depending on how big you want the finished fish to be.
Keep the cuts evenly spaced on any size paper so the woven body still looks balanced and holds its shape properly.
Larger versions work well for wall decor, while smaller fish can be used for cards, displays, or hanging decorations.
Can I Use Other Colors for This Fish Craft?
Yes, you can use any color you like instead of yellow and choose shades that match your room or craft theme.
You can also mix two colors for the body and add a different shade for the face, eye, or small details.
Bright colors work especially well because they make the folded strips and fish shape stand out more clearly once the craft is finished.
You may also like to make!