

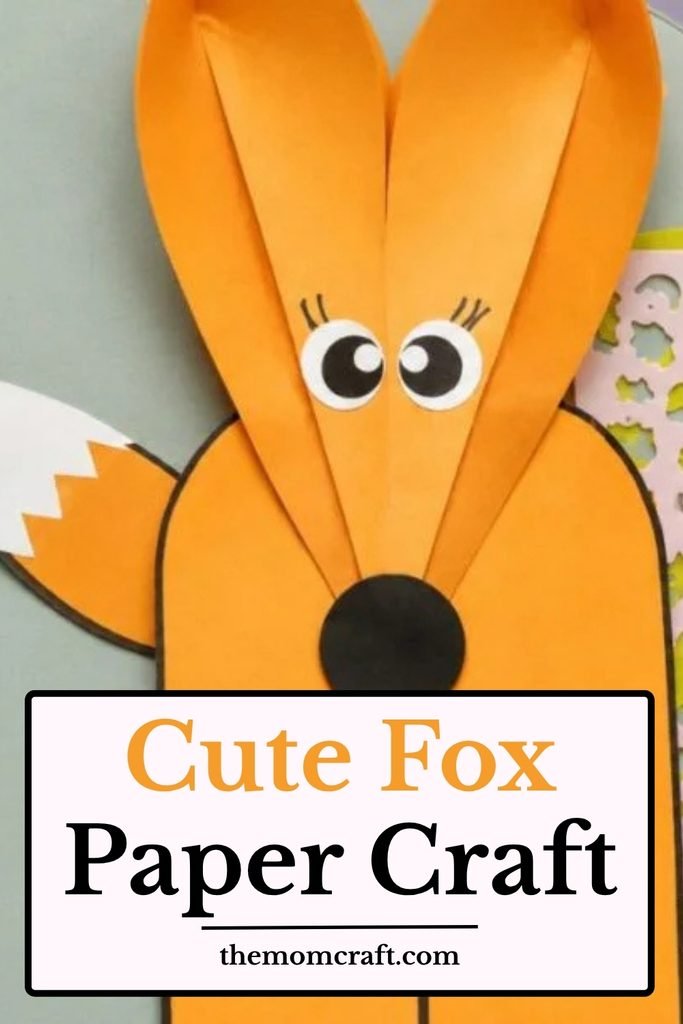
A few evenings ago, I noticed a fox-shaped decoration in a shop window while walking through the market.
The pointed ears, orange face, and big tail made it stand out even though the design itself was really simple.
That gave me the idea to try making a small fox at home with paper instead of buying another decoration.
I wanted to keep the shape easy enough for kids but still include the features that make a fox instantly recognizable.
Let’s make this fox craft.
- Why Fox Faces Look So Sharp
- Materials Needed:
- Step-by-Step Guide
- 1. Fold Orange Paper
- 2. Create Crossing Creases
- 3. Make Triangle Base
- 4. Shape Fox Ears
- 5. Refine Fox Ears
- 6. Prepare Fox Pieces
- 7. Add Fox Features
- 8. Assemble Paper Fox
- Why Foxes Have Pointed Ears
- Why Foxes Are Usually Orange
- Fun Facts About Foxes
- FAQs,
- Can I Make This Fox Craft With a Different Expression?
- Can I Use This Fox Craft for a Woodland Theme?
Why Fox Faces Look So Sharp
A fox face usually has a narrow muzzle, pointed ears, and sloping features that give it a very different look from many other animals.
These sharp facial features make foxes easy to recognize even when the body is drawn or crafted in a simple style.
The pointed shape also works well in paper crafts because you can build the face using basic triangles and curved pieces.
Keeping the nose small and the ears tall helps the finished craft look more fox-like without adding too many details.
Materials Needed:
- Orange craft paper or cardstock
- White craft paper
- Black craft paper
- Googly eyes or paper eyes
- Pencil
- Scissors
- Glue or craft adhesive
- Black marker
Step-by-Step Guide
1. Fold Orange Paper
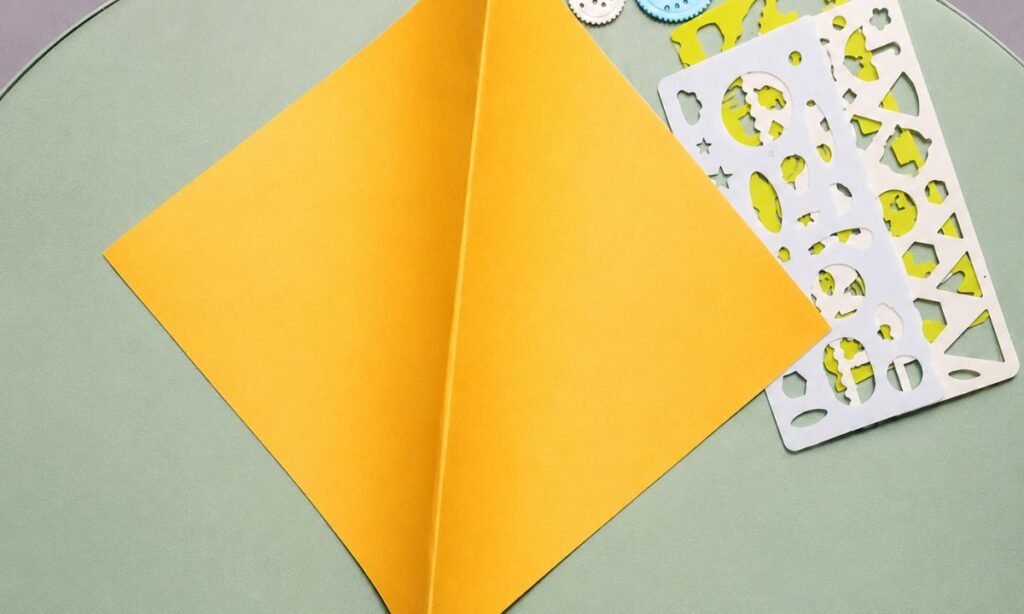
Start with a square sheet of orange craft paper and fold it diagonally, bringing opposite corners together carefully.
Press along the folded edge with your fingers to create a sharp crease that will guide the next steps.
Open the paper again and place it flat, making sure the diagonal fold remains clearly visible across the center.
2. Create Crossing Creases
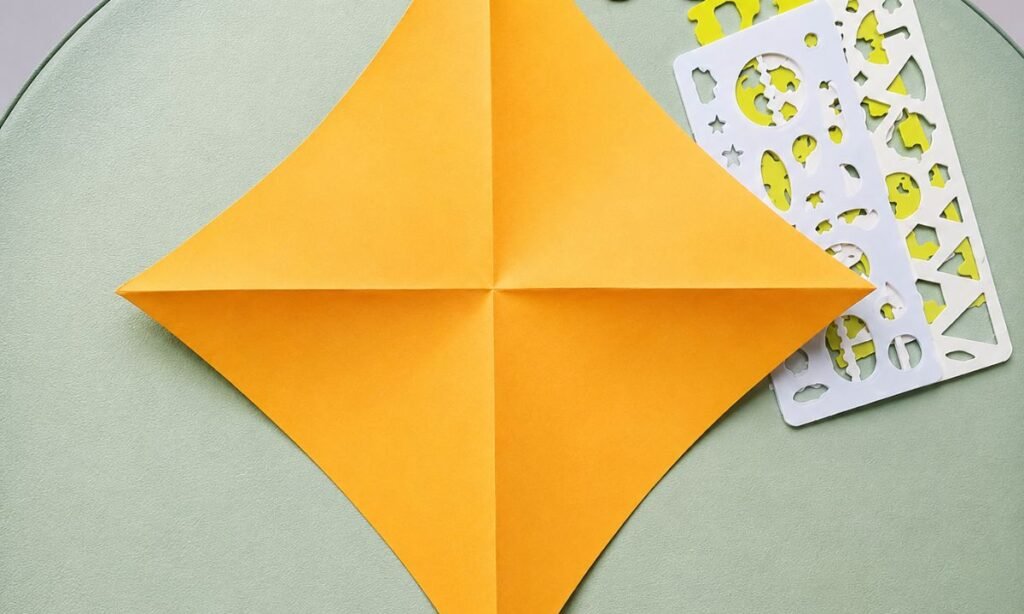
Fold the orange paper in the opposite direction, bringing the remaining corners together to form another diagonal crease.
Open it completely and check that both fold lines cross neatly at the center of the square.
Press the paper flat before continuing, since these crossing creases help guide the fox’s triangular body into shape.
3. Make Triangle Base
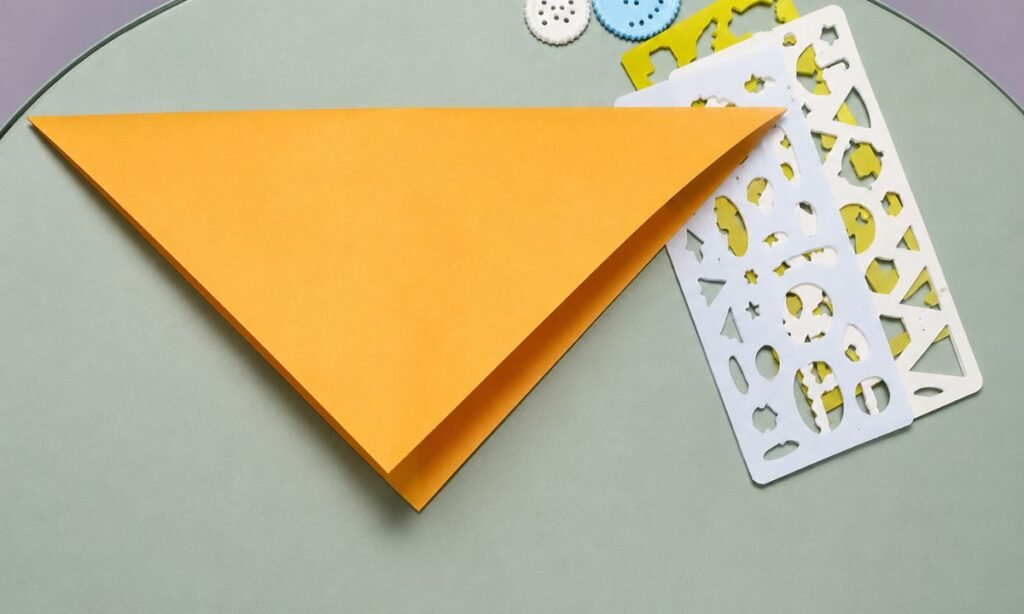
Bring the top corner down toward the bottom corner, folding the orange square into a large triangular shape.
Align both pointed ends carefully and press the horizontal fold firmly to prevent uneven layers during the next step.
Place the triangle with its long edge facing upward, leaving the pointed bottom ready for the following folds.
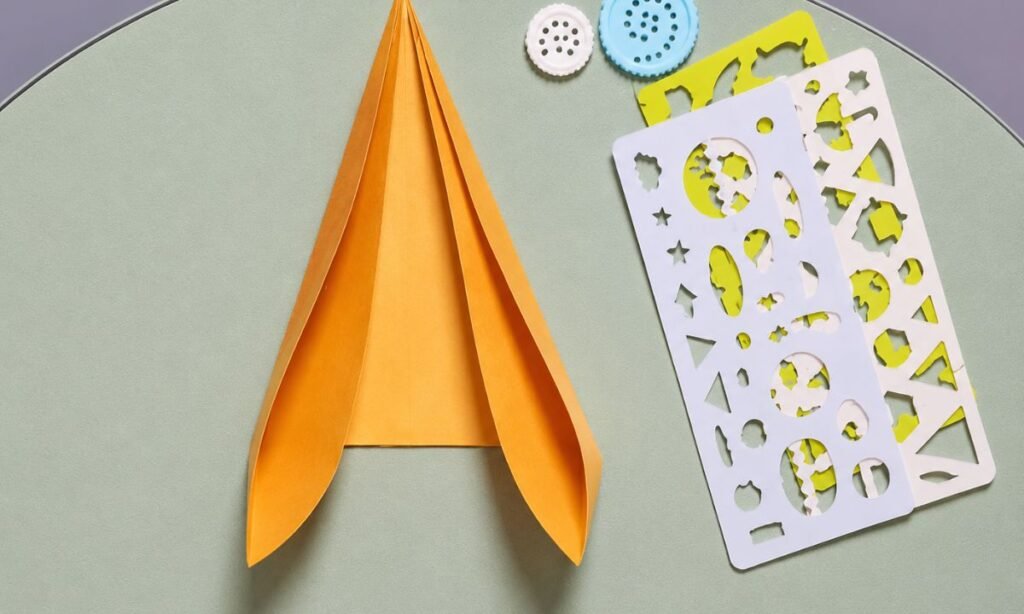
4. Shape Fox Ears
Fold the outer corners upward toward the center, creating two long pointed sections that will form the fox’s ears.
Leave a small triangular section visible between the folded sides so the fox’s face has enough space.
Adjust both folds until the pointed tips look balanced, then press the creases firmly to hold their shape.
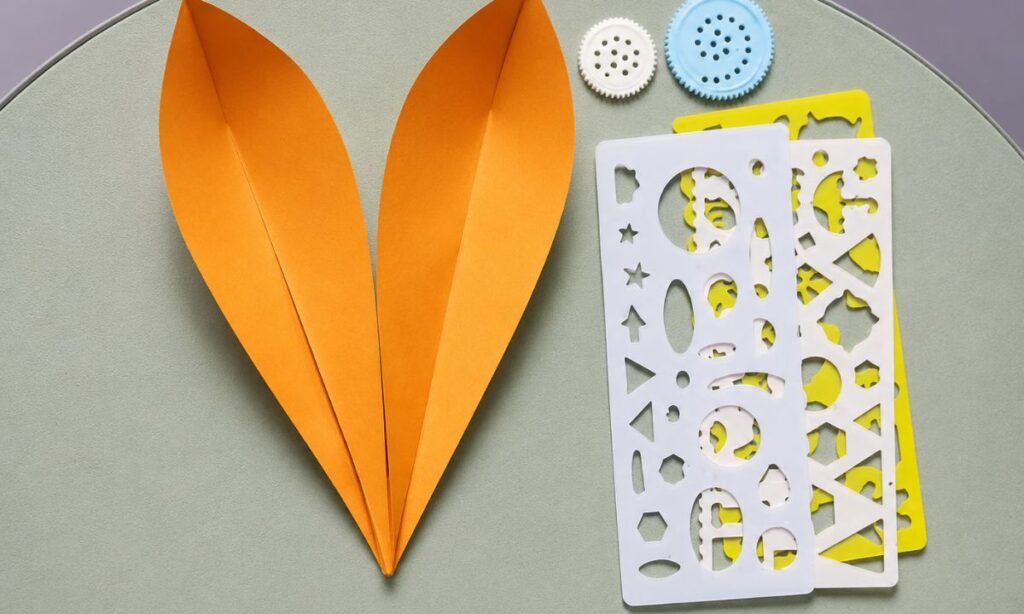
5. Refine Fox Ears
Open the folded orange sections slightly, shaping both pointed ends into tall fox ears with a narrow face underneath.
Press the inner folds gently so each ear curves outward while the pointed bottom remains sharp and centered.
Adjust both sides until they look even, giving the paper fox a balanced shape before adding facial features.
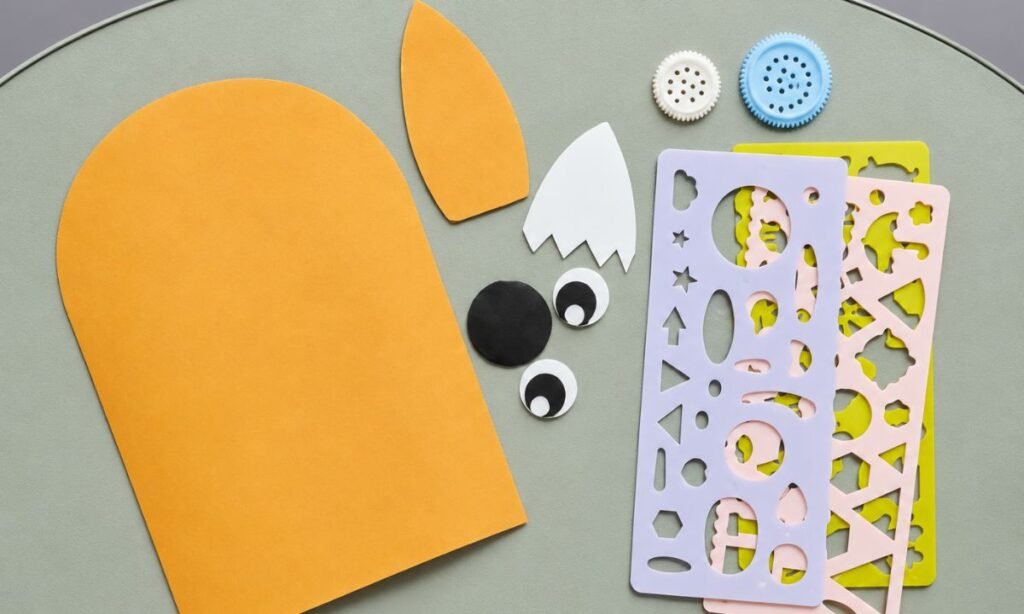
6. Prepare Fox Pieces
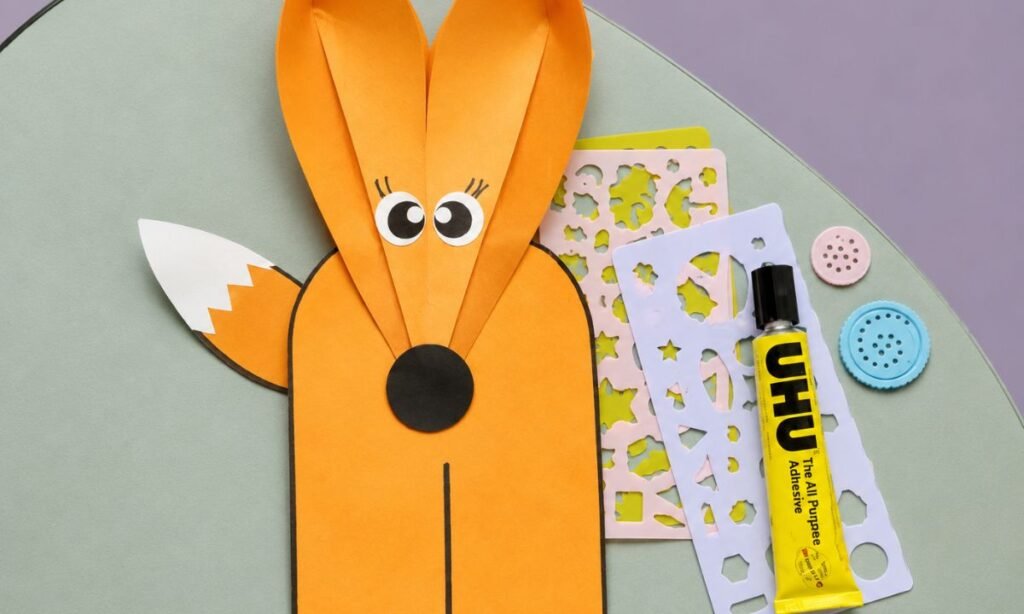
Cut a large rounded rectangle from orange paper to create the fox’s body, leaving the bottom edge straight.
Make a curved orange tail with a white zigzag tip, then cut two paper eyes and a black nose.
Arrange all the pieces on your table before gluing so you can check their sizes against the folded head.
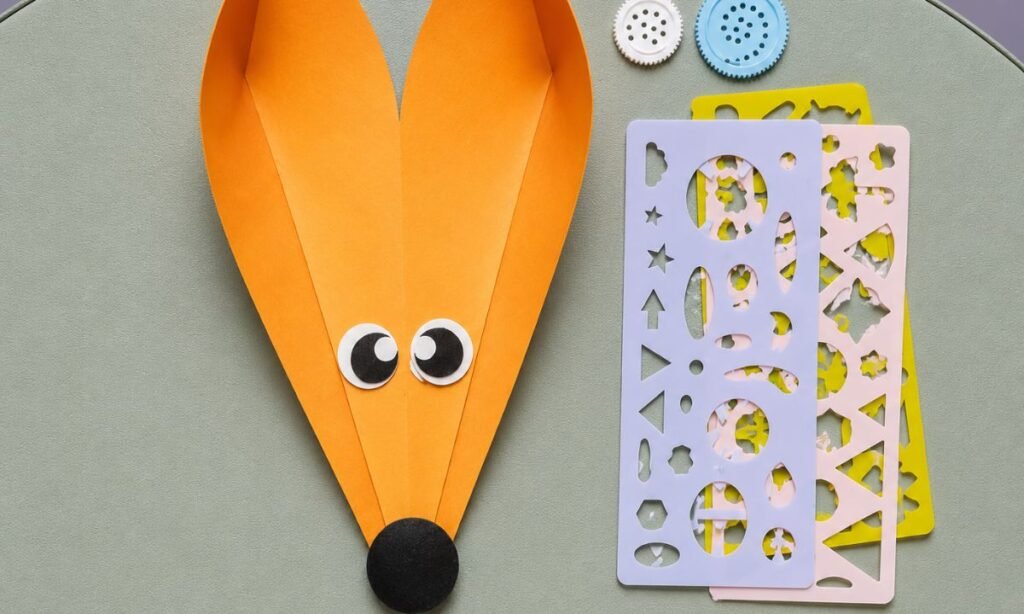
7. Add Fox Features
Glue two round paper eyes near the center of the folded fox face, leaving a small gap between them.
Attach the black circular nose at the pointed bottom, covering the narrow tip where the folded edges meet.
Press each piece gently and allow the glue to dry before attaching the finished face to its body.
8. Assemble Paper Fox
Glue the folded fox head onto the rounded orange body, positioning the pointed nose slightly below the upper edge.
Attach the orange tail behind one side, leaving its white zigzag tip visible beside the fox’s body.
Finish with black outlines, small eyelashes, and a straight body line to give your paper fox its final details.
Why Foxes Have Pointed Ears
Foxes have tall, pointed ears that help them pick up quiet sounds from small animals moving through grass or leaves.
Their ears can turn slightly toward different sounds, making it easier to tell where the noise is coming from.
This helps foxes stay alert while searching for food or noticing movement around them.
Adding pointed ears to the craft gives the face a stronger fox shape even when the rest of the design stays simple.
Why Foxes Are Usually Orange
Many red foxes have reddish-orange fur, although their exact color can vary from light gold to deeper rusty shades.
Their coat can help them blend into forests, grasslands, and areas covered with dry leaves or earthy colors.
Some foxes can also have darker legs, black markings, or lighter fur around the chest and face.
Using orange, white, and black paper together can copy those familiar markings without making the craft too detailed.
Fun Facts About Foxes
- Foxes belong to the same animal family as dogs, wolves, and coyotes.
- Many foxes are most active during the evening, night, or early morning.
- Foxes can use different sounds, including barks, squeals, and short calls, to communicate.
- Their whiskers help them sense nearby objects and movement, especially in low light.
- Foxes can live in forests, grasslands, mountains, deserts, and even areas close to towns.
- Young foxes are called kits, and they usually stay with their mother while they are still growing.
FAQs,
Can I Make This Fox Craft With a Different Expression?
Yes, you can change the eyes, eyebrows, or mouth to give the fox a happy, sleepy, surprised, or playful expression.
Keep the facial pieces small so the pointed ears and narrow fox face still remain the most noticeable features.
Changing only a few face details is enough to make several fox crafts look different without rebuilding the whole design.
Can I Use This Fox Craft for a Woodland Theme?
Yes, this fox craft works well with trees, leaves, mushrooms, owls, deer, and other simple woodland decorations.
You can place it on a larger paper background or combine several animal crafts to create a small forest display.
Using earthy colors around the fox helps the orange body stand out while keeping the whole woodland theme connected.
You may also like to make!



