

I love simple crafts that turn a few basic supplies into something your kids could genuinely excited to make.
This bee paper craft is one of those easy projects that only need color paper, scissors, glue and a little creativity.
You can try this craft i spring afternoons, classroom activites and anytime your kids want a quick hand on project.
In this article, you will see this project step by step how you can make this cute little bee craft yourself from simple meterial to final result.
Let’s jump in!
- Is This Bee Paper Craft Good For Classroom Or Group Activities?
- Material Needed:
- Step-by-Step Guide
- 1. Gather Supplies
- 2. Fold Squares
- 3. Make Pleats
- 4. Join Papers
- 5. Tie Center
- 6. Shape Circle
- 7. Cut Details
- 8. Glue Pieces
- How Can I Make My Bee Craft Look Neat And Professional?
- How Do I Make A 3D Paper Bee That Actually Holds Its Shape?
- FAQs
- Can I use different colors instead of yellow for this bee craft?
- What age group is this bee paper craft suitable for?
Is This Bee Paper Craft Good For Classroom Or Group Activities?
And honestly, you will notice that this bee paper craft is actually perfect for classroom or group activities.
And you can easily use it when you want something simple but still fun for everyone.
You can find that it is easy enough for younger kids to follow, and you will see that it stays interesting and engaging for you and for them, so you don’t have to worry that you or the kids will get bored halfway through.
If you are doing the folding and gluing steps, you will see they are repetitive, and a teacher or parent can easily help you and the whole group at the same time, and you can manage everyone without stress.
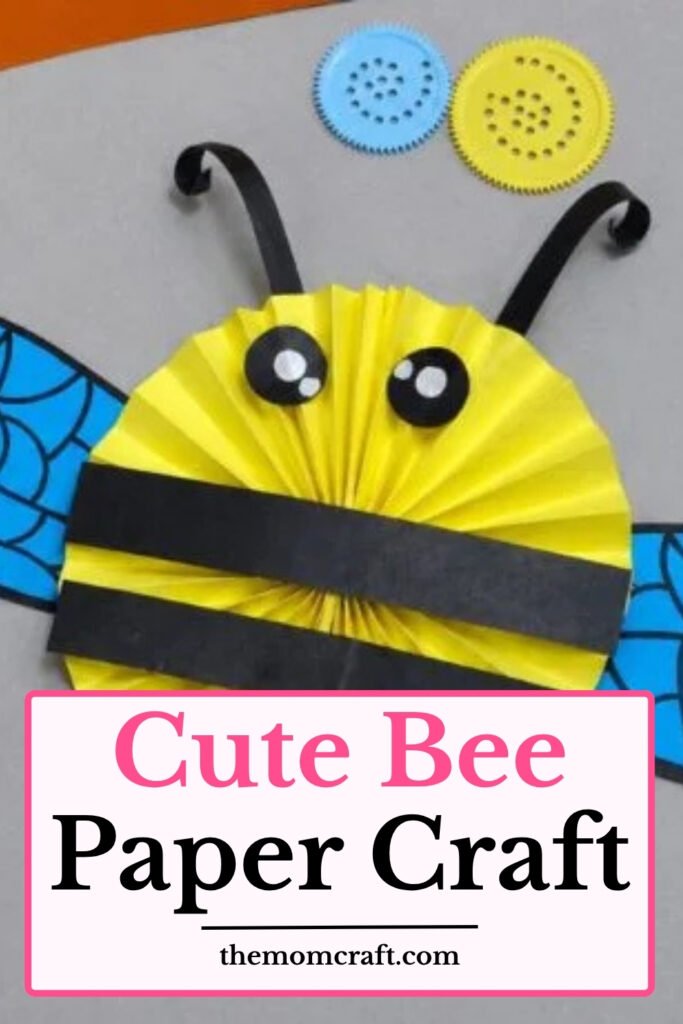
When you turn it into a themed project, you can make it about spring, insects, or nature lessons, and you will notice that you can connect learning with fun in a very simple way.
What you will really appreciate is that when every child makes their bee.
You can see that each one turns out a little different, and you can feel that it becomes more personal and creative for you.
If you are working in a group, you will also see that you can easily collaborate, and you can help each other with folding or assembling.
And it makes the whole activity feel more connected and enjoyable for you.
Material Needed:
- Yellow colored paper
- Black colored paper
- Blue paper (for wings)
- Glue
- Scissors
- Pencil
- Black marker
Step-by-Step Guide
1. Gather Supplies
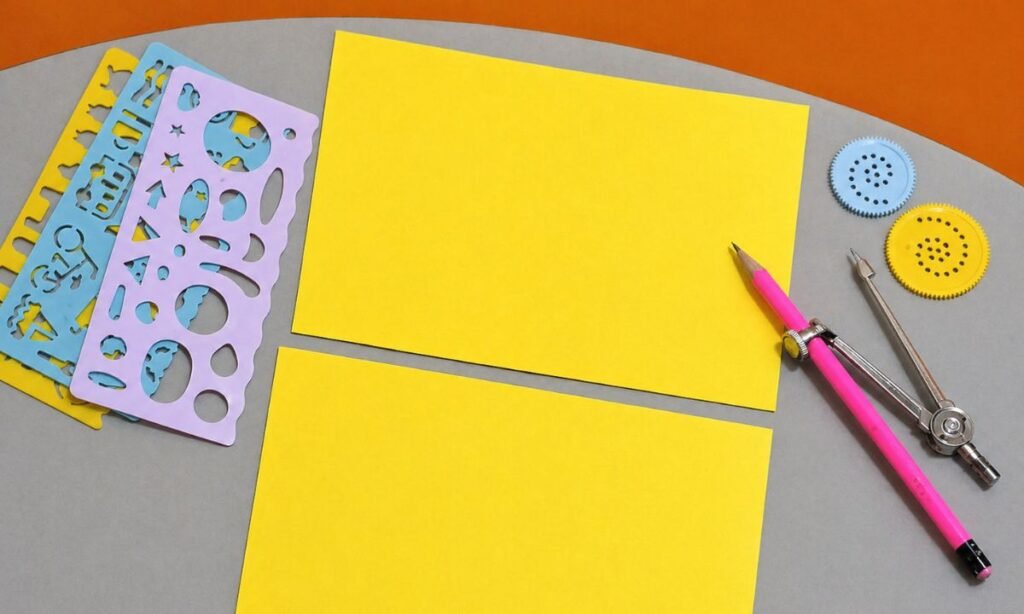
You will want to use two sheets of yellow paper for the body of your bee.
And you can choose a bright yellow paper because you will notice that it instantly gives you that cute honeybee look without you needing to do a lot of extra decorating afterward.
If you start this craft, you should first make sure you have everything ready.
And you can keep your pencil, glue, scissors, thread, black paper, blue paper, and any small craft items close to you so you don’t have to stop again and again.
When you are preparing, you will see that if you keep everything near you, the whole process can feel much smoother, and you can avoid confusion.
Especially if you are doing this with kids and you want things to stay simple for you.
Once you have your supplies ready, you should place everything on a clean table, and you will notice that when you do this.
You can keep your folding process tidy and easy, and you can work without mess or stress.
2. Fold Squares
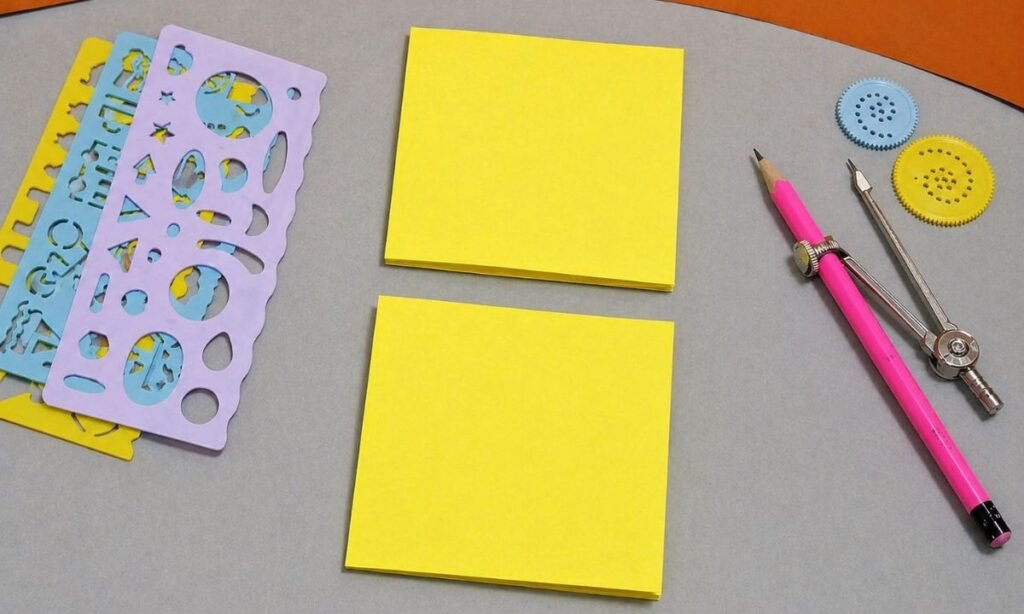
Now you will take your yellow sheets of paper, and you will fold them into squares.
And you should try your best to match the corners as precisely as you can so you get a clean shape.
If you do this carefully, you will see that your bee body can look much more even later, and you can make the whole craft feel more neat and balanced.
You should flatten the folds with your fingertips, and you will notice that when you press them properly.
The paper will stay in place and you can handle it more easily.
When you are doing this step, you might think it is small, but you will realize it actually helps you a lot because it prepares your paper for the accordion folding, and you can avoid mistakes later.
If your folds are uneven or loose, you will see that your final round bee shape might not sit flat.
So you should take your time here, and you can make sure you get a nice and neat base before you move forward.
3. Make Pleats
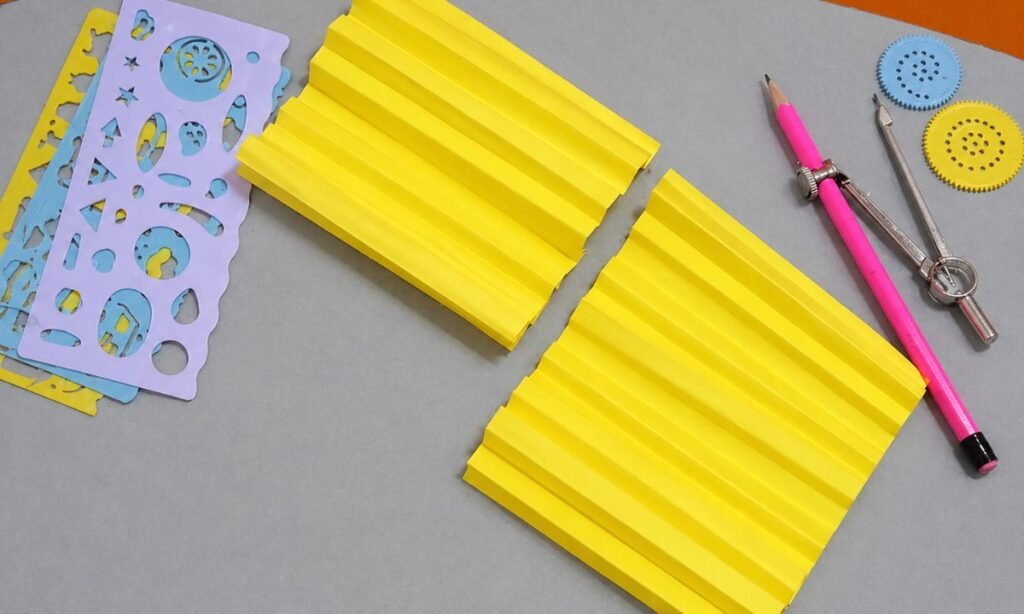
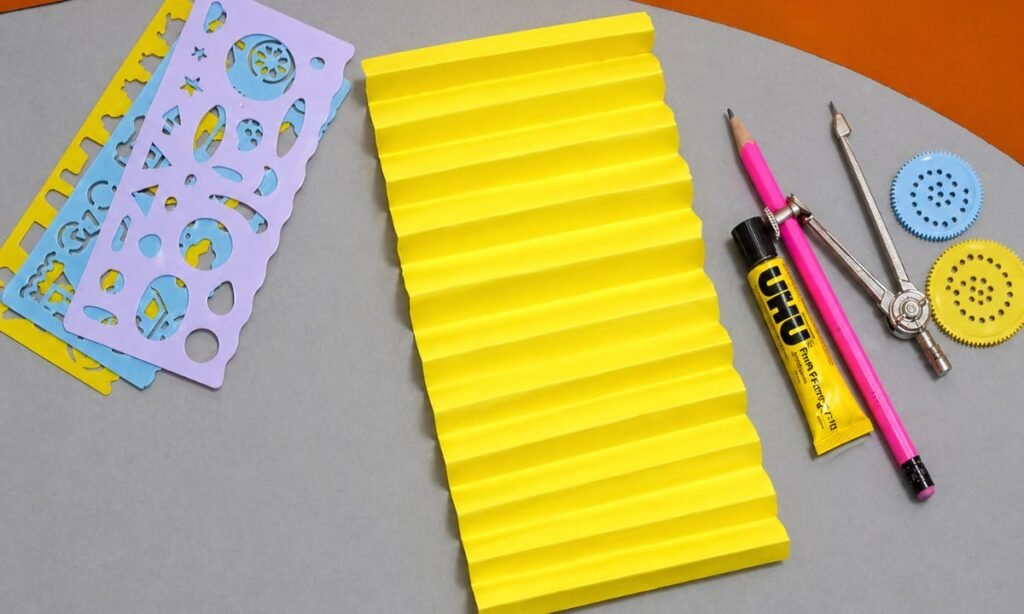
Now you will open your yellow papers, and you can start accordion folding both sheets, and you should fold them back and forth just like you are making a paper fan.
If you keep your folds the same size, you will notice that equal pleats can make your bee body look much cleaner and fuller, and you can get a much nicer shape in the end.
It does not have to be perfect, and mine was not perfect either, but you will see that if you keep it tight and consistent, it can make a big difference in how your bee turns out.
When you are folding, you should press each fold gently, and you will notice that this helps the paper hold its shape better as you go along.
If you finish both sheets, you will see that they should look like long pleated strips, and you can already imagine how they will form the round bee body later.
If you want a small pro tip, you can use a ruler or even the edge of a pencil, and you will find that when you press gently with it, you can make your pleats sharper and much neater.
4. Join Papers
Next, you will fold your two yellow sheets in half, and you will see that this helps you create one long pleated piece that can shape your bee more easily.
If you apply glue on the end of one folded sheet, you should carefully stick it to the end of the second folded sheet, and you will notice that you need to align it properly so it stays neat.
When you join them, you should hold it for a few seconds, and you will feel that it sticks better if you don’t rush, and you can avoid it slipping out of place.
This longer pleated strip will become your bee’s main body, so you should make sure you press it firmly, and you will feel more confident that it will stay connected.
If the papers are not attached properly, you will see that they can open up later when you try to shape the circle, so you should be careful at this step.
When it is clipped and fixed, you can gently pull it out a little, and you will notice that you can check whether the pleats are still sitting evenly and looking good.
5. Tie Center
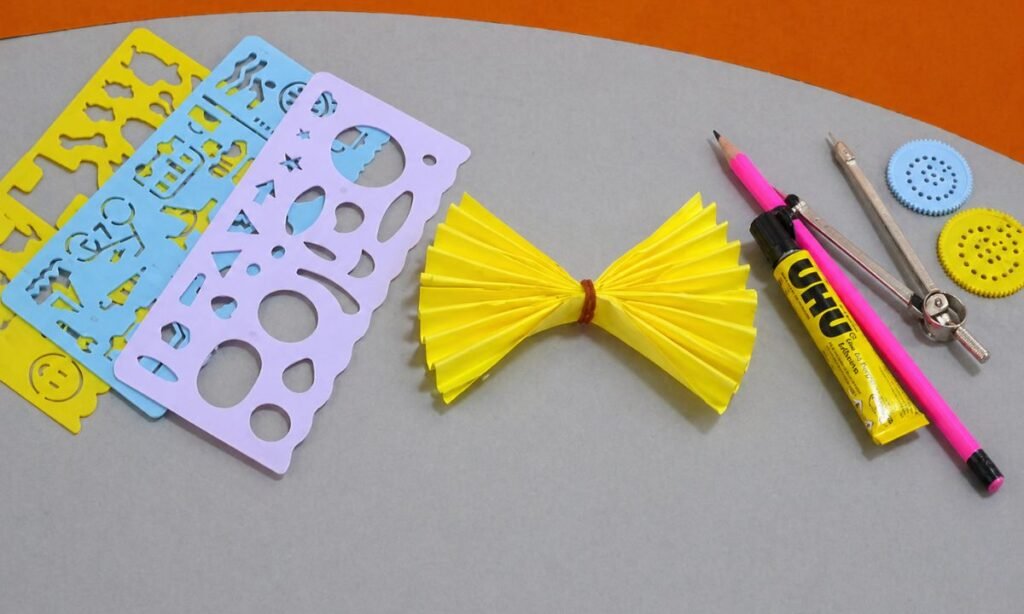
Now you will tie the folded yellow paper from the center using thread, or you can use glue if that feels simpler for you.
If you choose to tie it yourself, you will notice that it can hold the pleats together more neatly, and you can get better control when you open the shape later.
Once you secure the middle, you should carefully open both sides of the folded paper, and you will see the form starting to spread out.
At this point, you will start to notice a fan shape forming, and you will feel that this is honestly the fun part because you can finally see your bee taking shape.
If you open it too quickly or pull too hard, you might break the paper or loosen the folds, so you should be careful and gentle while doing it, and you will get a much cleaner result.
6. Shape Circle
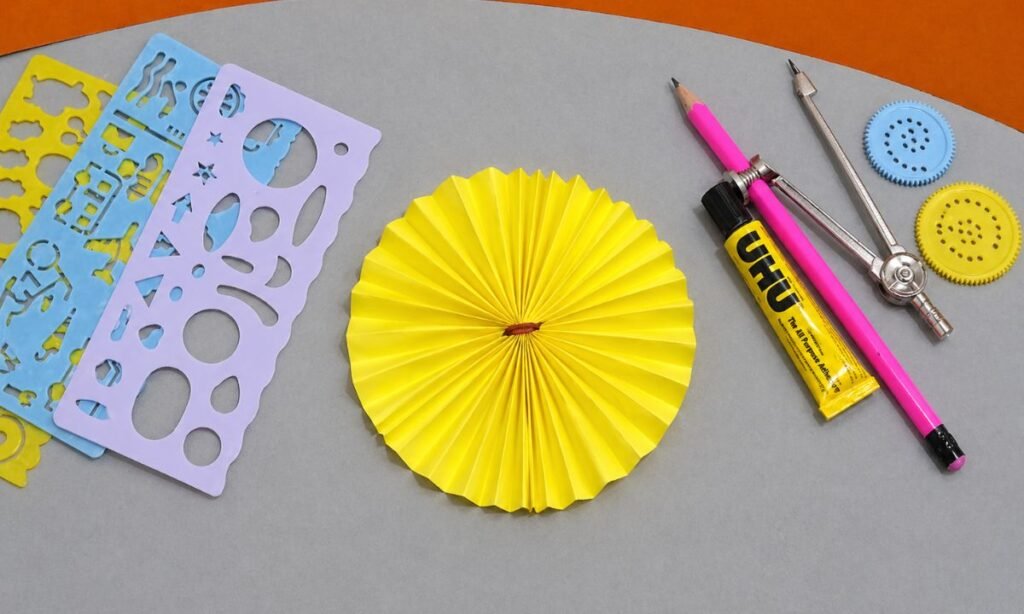
Now you will open the paper and start folding and pressing it into a full circle, just like you are making a paper rosette, and you will see your bee shape slowly coming alive.
This will become the main circular body of your bee, and you can use your fingertips to gently adjust the pleats so the circle looks even all the way around, and you will notice how small changes can make a big difference.
If one side looks a bit larger or smaller, you should simply press and adjust the folds a little, and you will see that you can balance the shape quite easily if you take your time.
When everything looks right, you should add a little glue at the edges where they meet, and you will notice that this helps the circle stay open and flat without falling apart.
This is the step where your bee gets that nice 3D look, and you will really see that handmade charm starting to show in your work.
If you rush this part, you might lose the shape, so you should not rush the drying time, because if the circle moves while the glue is still wet, you will see that your bee body can lose its form.
7. Cut Details
Now it’s time for you to add all the small bee embellishments, and you can really start seeing your bee come to life when you handle these final details.
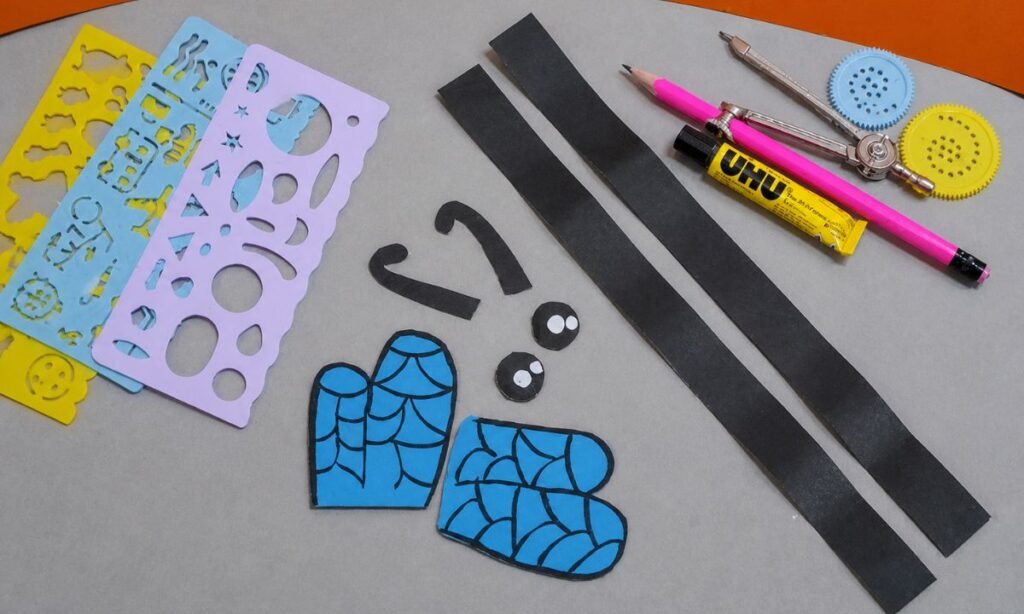
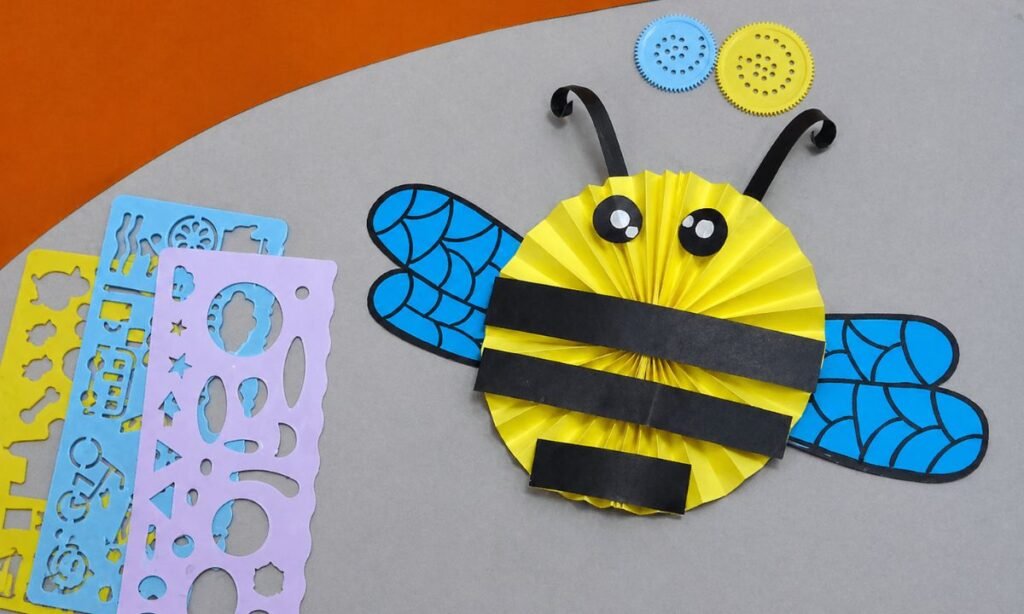
If you are building it from paper, you can cut thin black strips for the bee’s body stripes, and you will notice that even these small pieces can completely change the look for you.
You can also cut little black shapes for the antennae and eyes, and if you have googly eyes, you should feel free to use them, but if you don’t, you can easily make paper eyes and still get a nice result.
When you take blue paper, you can cut out two wings, and you will see that even simple wing shapes can work really well for you. If you want,
You can draw light lines or small patterns on the wings, and you will notice that it makes your bee look even more charming.
You should keep all the pieces small and light, and you will see that this helps your bee body not get dragged down or out of shape.
If you lay everything out first, you will find it much easier to glue everything in the right place without stress.
8. Glue Pieces
Finally, you will glue all the details onto your yellow circle, and you will see your bee slowly turning into a finished little creation right in front of you.
If you start with the black bands, you should place them across the body, and you will notice how they instantly give your bee that classic look.
Then you can add the wings on the side or slightly toward the back, and you will see how the shape starts to feel more complete for you.
After that, you should glue the eyes and antennae at the top, and you will notice how quickly your bee gets a cute little face that brings it to life.
When you press each piece down, you should do it gently so it sticks well, but you must be careful not to press too hard, because you can crush the pleated body if you are not careful.
If everything is attached, you should let your project sit for a few minutes, and you will see that giving it time to dry properly helps everything stay in place.
And then you are done, you will have your cute 3D bee paper creation ready, and you can feel proud of this joyful little craft, especially when you use it for spring decoration or school displays.
How Can I Make My Bee Craft Look Neat And Professional?
If you want your bee craft to feel a bit more professional without you stressing too much, you can easily improve the final look with a few small adjustments that really make a big difference for you.
If you keep your folds even and press them properly, you will notice that your bee automatically looks much tidier.
And you can see the whole form coming together in a cleaner way.
You might also realize that the amount of glue you use matters a lot, because if you use too much, you will see the paper can turn mushy and messy, so you should try to keep it controlled and light.
When you take a moment to line up your black stripes, you will notice how something so simple can instantly make your bee look more organized and well put together.
How Do I Make A 3D Paper Bee That Actually Holds Its Shape?
Really, you will notice that the great 3D effect of your bee comes down to how well you shape and secure the paper, and you can see a big difference just from small careful steps.
If you focus on the accordion folds, you will see that your bee’s volume actually comes from them, so you should make sure they are even and nicely pressed from the beginning so everything holds better for you.
When you tie or glue the center, you should make it tight enough so the folds don’t come undone when you open it, and you will notice that this keeps your structure much more stable.
If you are forming the circle, you should gently pull the pleats instead of yanking them.
And you will see that this helps your bee stay round, balanced, and smooth-looking.
I also like to add a small amount of glue where the ends meet, and you will notice that this simple step helps you lock the shape in place so it stays neat and steady.
FAQs
Can I use different colors instead of yellow for this bee craft?
Of course, if you are making this with kids, you can really go wild with the colors, and you will notice how much fun they have when you let them explore freely.
But if you stick to yellow and black, you will still get that traditional bee look.
You might see pink bees, rainbow bees, or even party-themed versions, and you will realize how creative things can get when you don’t limit you or the kids too much.
If you keep a good contrast between the body and the stripes, you will still clearly see it as a bee, and you won’t lose that recognizable shape even if you experiment with colors.
When you allow kids to choose their own colors, you will see that it becomes a fantastic way for them to show their individuality, and you can feel how personal and fun the craft becomes for everyone involved.
What age group is this bee paper craft suitable for?
This craft is great for you if you are working with youngsters aged 5 and older, especially when you are giving a little help during the folding and cutting steps.
If you are guiding younger kids, you will notice they might need your help with the accordion folds.
But you will also see how much they enjoy it when they get to decorate and assemble their bee.
When older kids are doing it, you will find that they can handle most of it on their own, and you might even see them experimenting and adding their own creative ideas as they go.
You may also like to make!



