

If you need a simple, entertaining activity with kids, You can try this little ant paper craft and you might find you’ll quickly enjoy it as one of your favorites.
When you try it on a slow afternoon with no ideas, you might notice you end up with something that turns out way cuter than you expect.
The best thing for you is that you don’t need fancy resources, you can just use colorful paper, glue, and a few simple tools you already have.
This is the kind of activity that can keep small hands busy and you can let them stay creative while you guide them a little.
Let’s jump in!
- How Can I Turn This Ant Craft Into a Fun Learning Activity For Kids?
- Materials Needed:
- Step-By-Step Guide
- 1. Cut Paper Strips
- 2. Roll Body Parts
- 3. Connect Ant Body
- 4. Glue Everything Neatly
- 5. Prepare Small Parts
- 6. Attach Ant Details
- 7. Add Final Touches
- Why Is My Paper Ant Craft Not Holding Together Properly?
- How Can I Make a 3D Ant Paper Craft That Actually Stands Up?
- FAQs
- Can I use different colors instead of yellow for this ant craft?
- What is the best age group for making this ant paper craft?
How Can I Turn This Ant Craft Into a Fun Learning Activity For Kids?
One of the things you can really appreciate about this little ant activity is how easily you can turn it into a tiny learning
Opportunity without it ever feeling like “study time” for you or the kids.
When you construct it with your kids, you might notice you naturally start talking about how ants live. How they carry food, and how they work together in groups.
You can keep it incredibly easy for you,just ask simple questions as you go, like where do you think ants live or how many legs does an ant have.
As you create, you can also turn it into a counting game for you and your kids, counting legs or other body parts together.
If you have older children, you might even include it in a short story. Or add some fun facts about insects so you can make it more engaging for them.
Materials Needed:
- Yellow colored paper
- Glue
- Scissors
- Pencil
- Black marker (for eyes & smile)
- White paper (for eyes)
Step-By-Step Guide
1. Cut Paper Strips
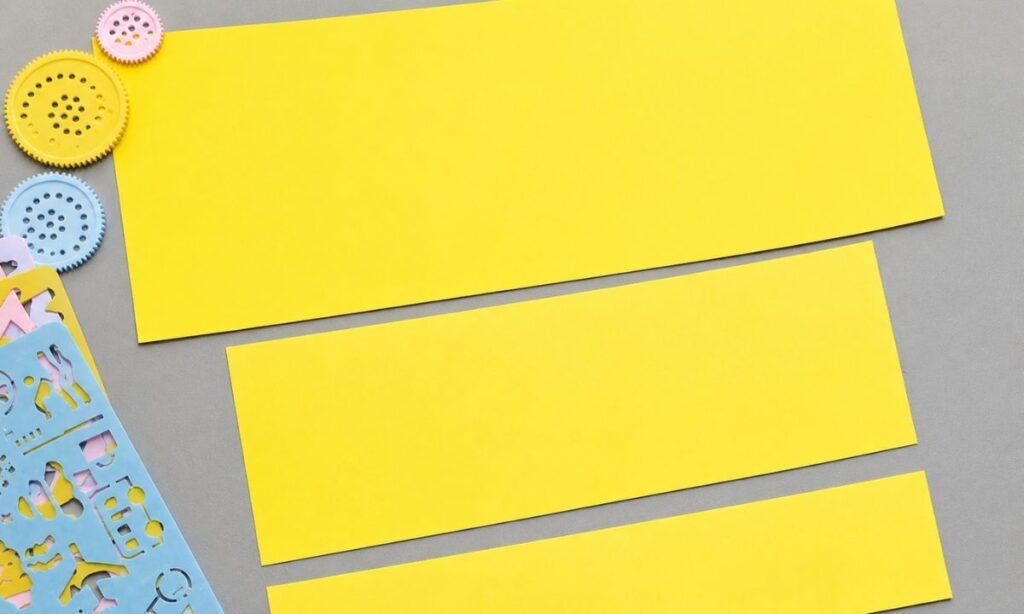
You can cut three strips of yellow paper, and you can make each strip a slightly different size because these will form the three main body parts of your ant.
You can keep one strip a little bigger, you can make one medium. And you can keep one smaller, and if they don’t come out perfectly even, you don’t need to worry.
If you think about it, paper crafts are meant to look handcrafted and a bit charming. So you can just let the little imperfections stay.
I like to lay the strips out on the table first so you can clearly see how your ant body might look before you attach anything.
When you do this, you can also help children understand which piece will be the head, which will be the middle body, and which will be the back section.
2. Roll Body Parts
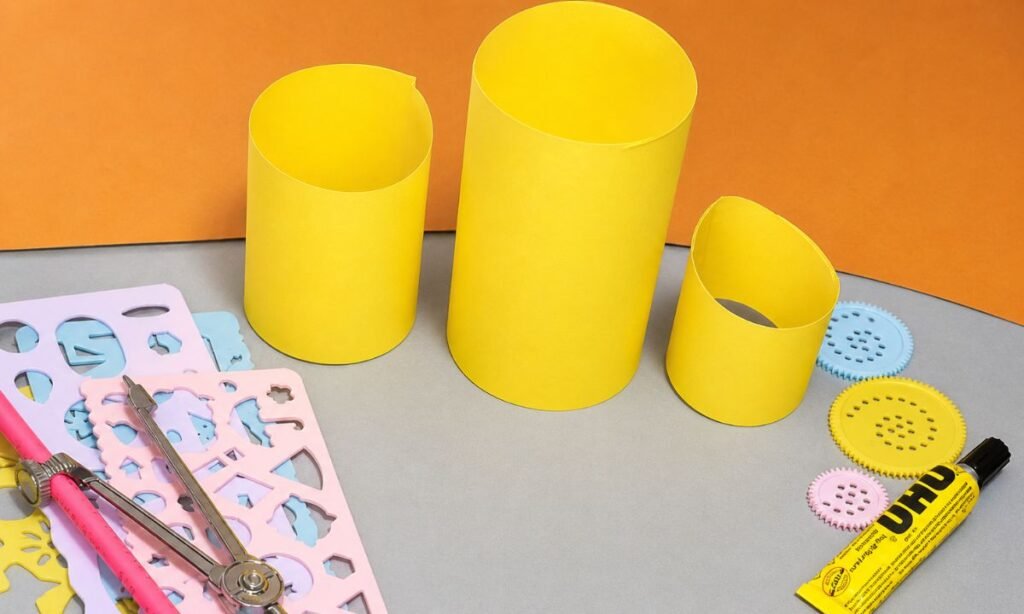
Now you can take each yellow strip and you can roll it into a cylinder shape. And you can gently press the edge down and push it until it sticks.
You should end up with three paper rolls, you can make one big, one medium, and one small so your ant starts to take shape.
Instead of squashing your ant flat, you can let these rolls give it that nice 3D look. So you can actually see the body forming in a fun way.
You can add glue and hold each roll for a few seconds so you can make sure it doesn’t open back up again.
If you’re working with younger kids, you can use a glue stick because you might find it less messy and much easier to control while you work.
3. Connect Ant Body
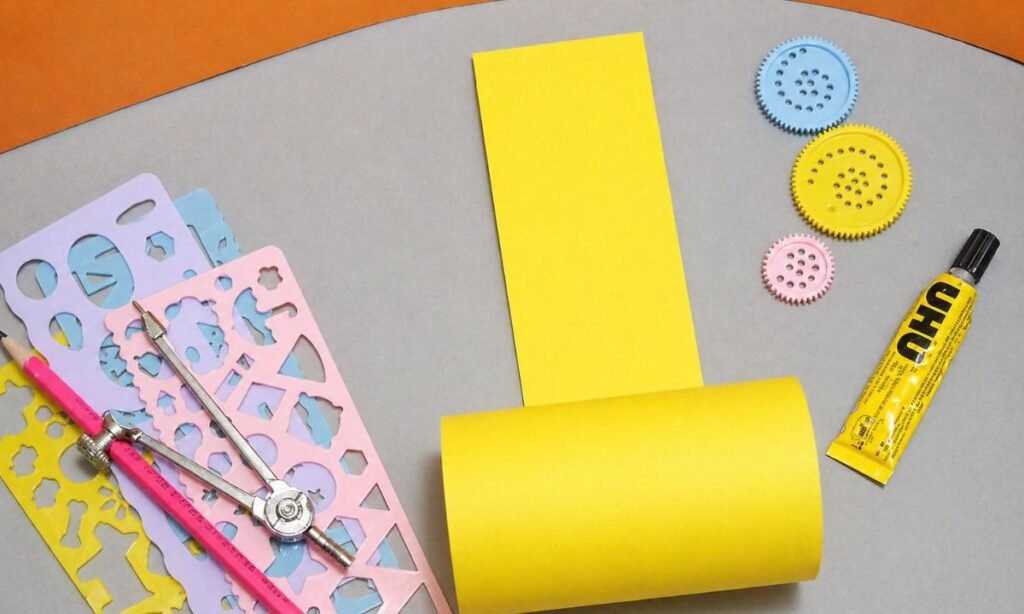
Next you can take a flat yellow strip and you can lay it in between two of your paper rolls so you can start forming the structure of your ant.
You can use that strip as a connector, and you can see how it helps you hold the ant’s body sections together in a neat way.
If you stick the rolls onto the strip one after another, you can make sure you line them up properly so your ant starts looking balanced.
You might find it easier if you begin with the big roll at the back, then you add the medium roll. And finally you place the small roll at the front for the head.
4. Glue Everything Neatly
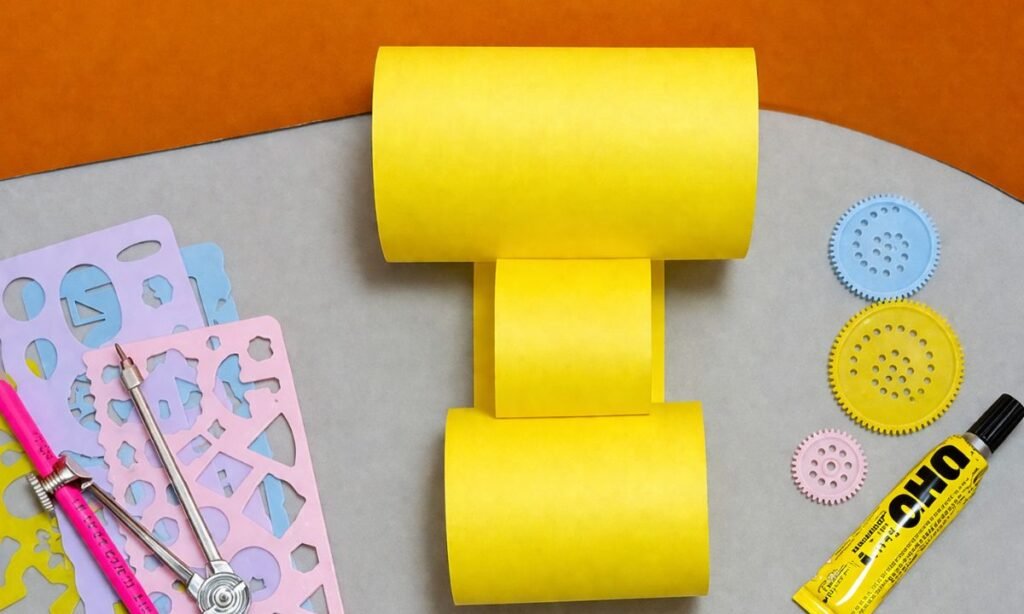
When you get your body parts in position, you can press them lightly so you make sure the rolls and strip stay securely fastened together.
This is the point where you can really see your ant starting to come together, so you shouldn’t rush it and you can take your time here.
If you check the body from the side and from the front, you can easily see whether everything is properly aligned or if you need to adjust it a little.
But you should avoid using too much adhesive because if you use too much glue. It can make the paper soft and your craft might start to look a bit messy or sloppy.
5. Prepare Small Parts
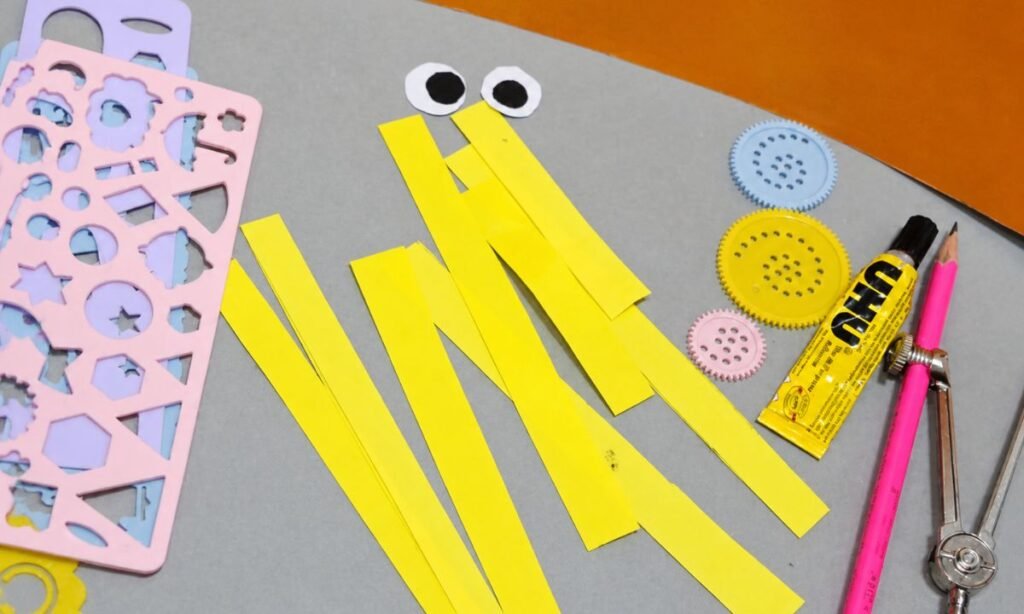
Now you can cut long, thin strips of yellow paper for the ant’s legs and antennae. And you can shape them carefully so your ant starts looking more real.
You may construct two antennae and six small legs, and you can take your time while placing each piece so it feels neat and balanced.
Next, you can prepare the eyes by cutting small white circles, and you can also cut even smaller black circles for the pupils.
These little details can really make your ant look much cuter when you add them.
If it feels difficult for you to cut tiny circles, you can simply use googly eyes, or you can just draw the eyes with a marker instead.
6. Attach Ant Details
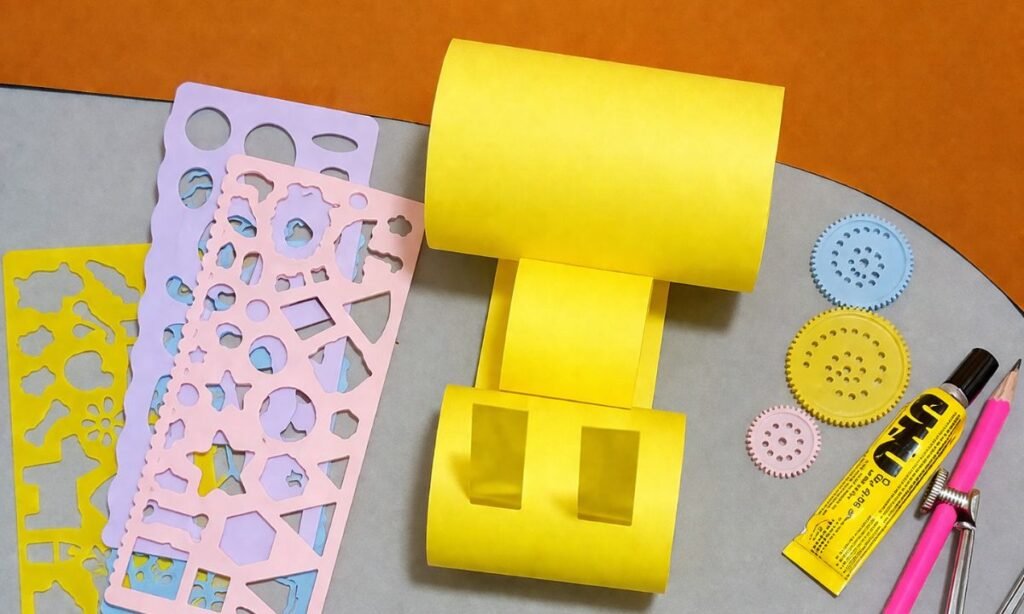
You can paste the legs on both sides of your ant, and you can place three legs on each side so it looks balanced and complete.
Then you can attach the two antennae to the head section, and you can gently adjust them so they sit nicely in position.
After that, you can glue the eyeballs onto the front of the smaller roll. And this is usually the part you might enjoy the most because your ant suddenly starts gaining a little personality.
If children are helping you, you can let them choose where the eyes should go so you can make it more fun and interactive for them.
It may not look flawless, but you can see that is exactly what makes this craft so lovely, natural, and exciting.
7. Add Final Touches
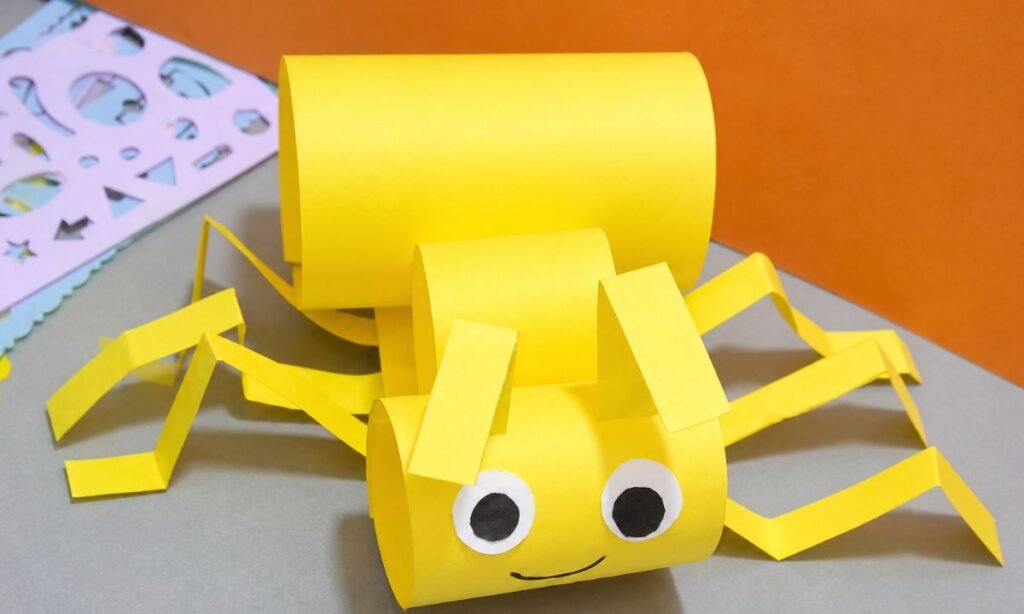
For the final step, you can draw a little smile on your ant’s face with a marker, and you can gently shape it so it starts looking more alive and friendly.
Then you can softly tweak the legs and antennae so they sit neatly in place and your ant looks well-balanced from every angle.
If you let the craft sit for a couple of minutes, you can allow it to dry properly before you handle it or display it anywhere.
And that’s it,you can see your cute 3D paper ant project is now complete. It’s such an easy craft, but you can notice how happy it looks once everything comes together.
You can place it on a table or a shelf, or you can even use it in an insect-themed activity if you want to make it more fun and interactive.
Why Is My Paper Ant Craft Not Holding Together Properly?
So if your ant craft keeps breaking apart, you can relax a bit because you are not the only one going through this.
When you try it, you might notice the same issue at first, just like I did, and you can usually trace it back to two simple things.
Most of the time, you might be using either too much adhesive or not giving it enough drying time. You can use a thin layer of glue instead of soaking the paper.
Because if you use too much, your paper can get soggy very quickly and you’ll see it lose shape.
If you press each piece softly and you give it a few extra seconds, you can make sure everything sticks properly and holds better.
Another thing that can really help you is using slightly thicker paper. Because if you use very thin sheets, you might find your craft becomes harder to control.
How Can I Make a 3D Ant Paper Craft That Actually Stands Up?
If your ant keeps tipping over, you can make a few tiny adjustments and you’ll notice they can go a long way for you.
You might see this happen when your body rolls aren’t evenly placed or when your base feels a little too thin.
If you try placing the biggest roll at the back, you can help your ant stay more stable. And you can also make sure all three body sections stay in a straight line.
You can gently flatten the bottom of each roll a little so you can give your ant a stronger and sturdier base.
If you spread the legs slightly apart, you can also help maintain balance and you can stop the whole structure from wobbling too much.
FAQs
Can I use different colors instead of yellow for this ant craft?
Definitely, you can pick yellow if you want a bright and colorful look. But you should also know that real ants are usually black, brown, or red.
If kids are choosing, you can let them pick their own colors because it can make the craft feel more unique and more personal for them.
You may even create an entire set of colorful ants just for fun, and you can turn it into a little collection activity.
It doesn’t even have to be perfectly accurate, and you might notice that sometimes the most unexpected color choices end up looking the cutest.
What is the best age group for making this ant paper craft?
This craft can be a perfect activity for you and youngsters aged 4 and up, especially when you give them a little help from an adult.
If you have younger children, you might notice they need help with cutting and rolling the paper. But you can still let them enjoy the fun part of gluing the sections together and decorating the ant.
If older kids are doing it, you can let them handle most of the steps on their own. And they can even add their own creative touches to make it more personal.
You can also enjoy it in mixed-age groups, where everyone can join in at their own level and you can make it a shared, fun activity for all.
You may also like to make!



