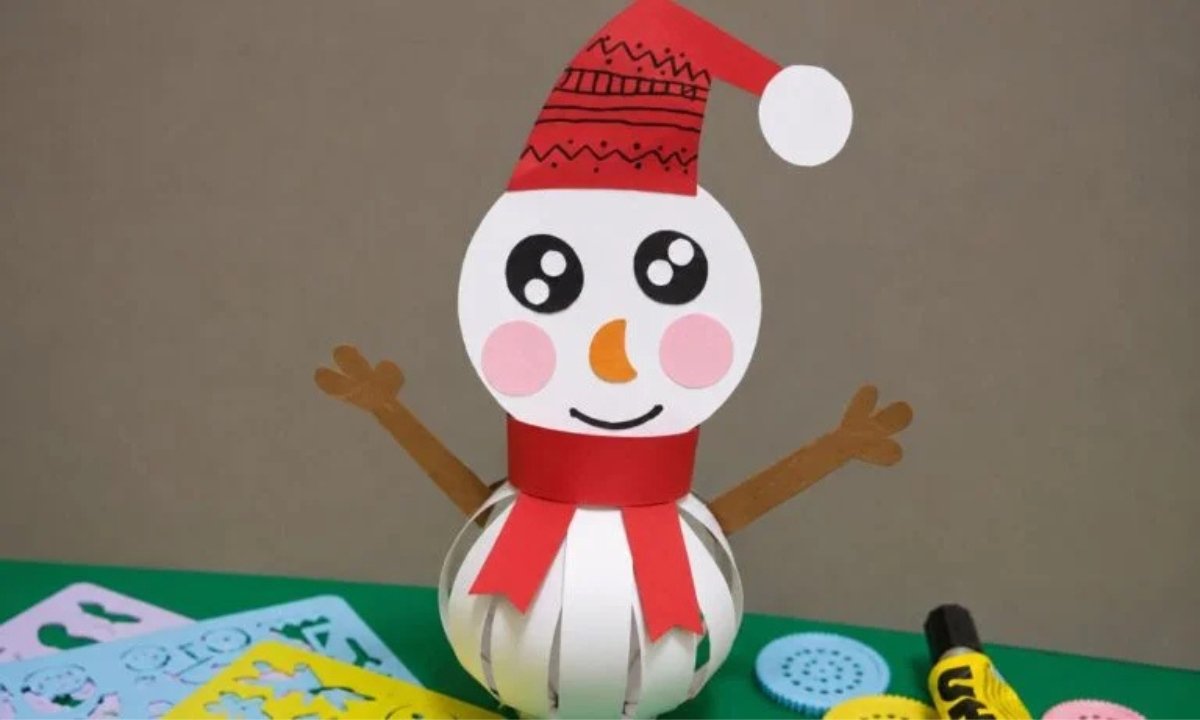
Cold afternoons feel more creative when kids can turn simple paper strips into a cheerful little snowman with a playful 3D shape.
The project needs only basic supplies, making it an easy winter activity when you want something cute without spending much.
Kids can watch the rounded body take shape piece by piece, then personalize their snowman with a face and winter details.
Watching flat strips become a standing snowman adds a satisfying surprise that makes the crafting process just as enjoyable as the result.
Let’s jump in!
- How Can You Use a Snowman Paper Craft for Winter Classroom Decorations?
- Material Needed:
- Step-by-Step Guide
- 1. Cut Paper Strips
- 2. Make Star Shape
- 3. Create First Loop
- 4. Complete Paper Ball
- 5. Add Snowman Neck
- 6. Cut Snowman Parts
- 7. Attach Face Pieces
- 8. Decorate Snowman Craft
- How Do You Make a Snowman Craft Without Making a Huge Mess?
- How Do You Make a Snowman Paper Craft Look Cute Without Fancy Supplies?
- FAQs
- Can I Make This Snowman Paper Craft With Preschoolers?
- What Type of Paper Works Best for a 3D Snowman Craft?
How Can You Use a Snowman Paper Craft for Winter Classroom Decorations?
I love that when you do this snowman paper project, you can easily bring some cheer into a classroom during the winter months.
When you make these small snowmen, you can see how charming they look on bulletin boards, or when you place them on classroom doors.
If you use them in reading corners, you can also hang them from the ceiling with string. And you would notice how nicely they fill the space around you.
This craft is especially ideal when you are doing group school activities, because you can keep everyone involved easily.
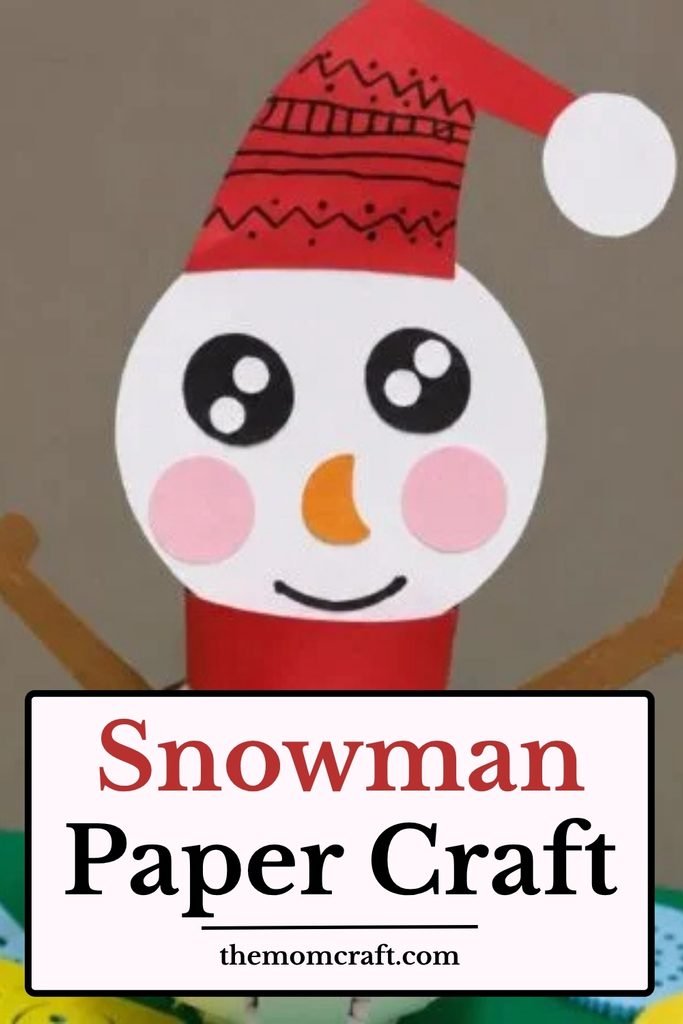
Since you are using simple paper supplies, you can let each child design their snowman differently. And you would see a lot of creativity coming out.
Some kids might want multicolored scarves, or you might see them adding humorous smiles, or even extra winter accessories.
I also think this craft is perfect when you are planning holiday parties or indoor recess craft time. Because you can keep kids busy without making it too difficult for them.
If you construct a few snowmen, you would notice how quickly the whole space starts feeling more festive around you.
Material Needed:
- White paper strips
- Glue
- Pencil
- Pink paper
- Brown paper
- Red paper
Step-by-Step Guide
1. Cut Paper Strips
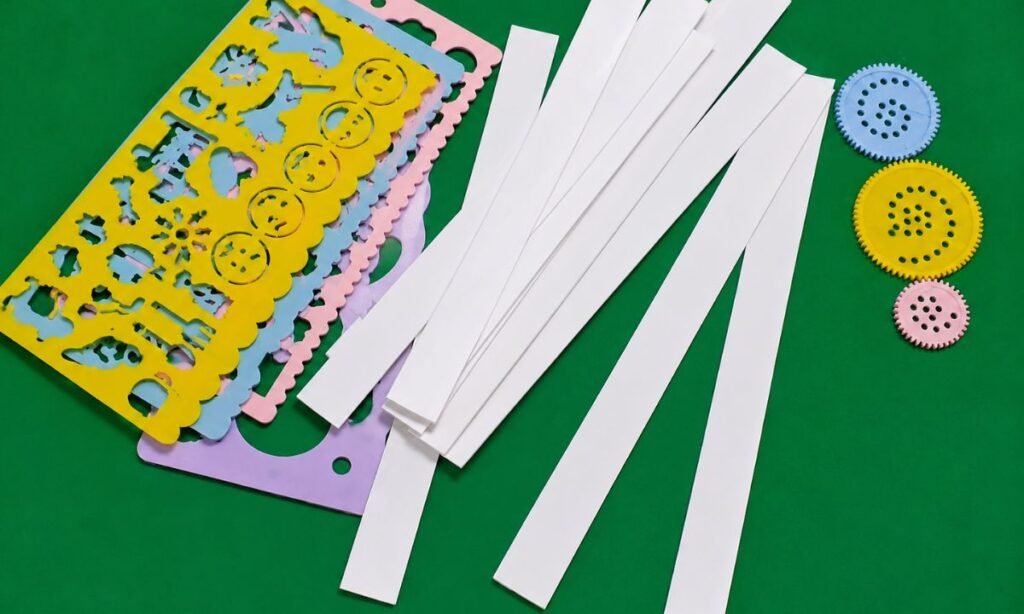
When you cut numerous long strips of white paper, you should try to keep them all the same size, and you can make them as even as you can.
Because these strips will form the round snowball shape of your snowman, you can already start imagining how your snowman will look as you work.
If you use plain white paper, you will notice that simple craft paper works just fine, and you don’t really need anything fancy at all.
When you begin, you should keep your glue ready beside you, so you can easily arrange the strips without any delay.
It is easier for you when you glue as you go, especially when you start shaping your snowman step by step.
2. Make Star Shape
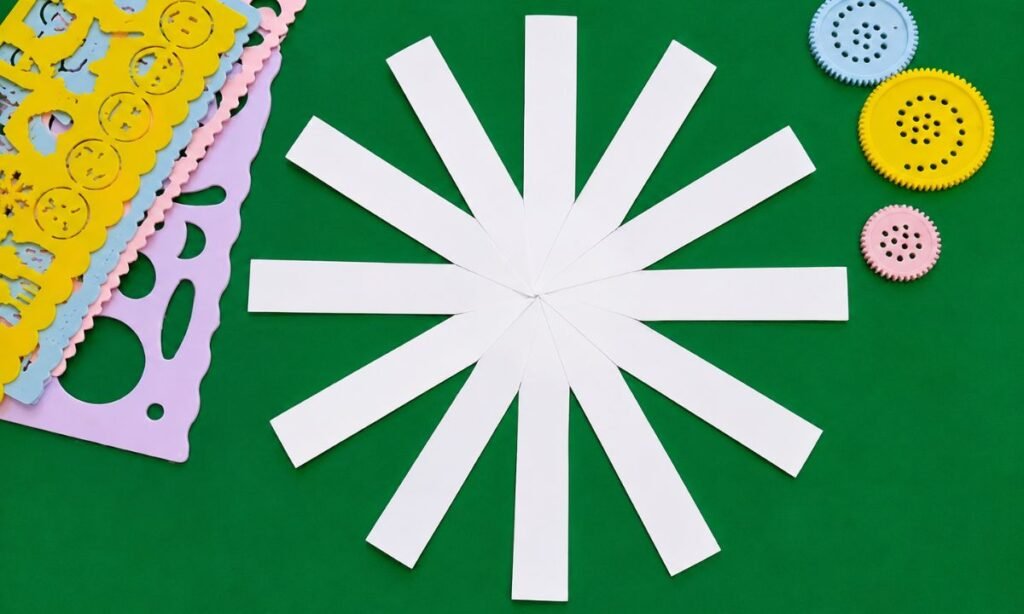
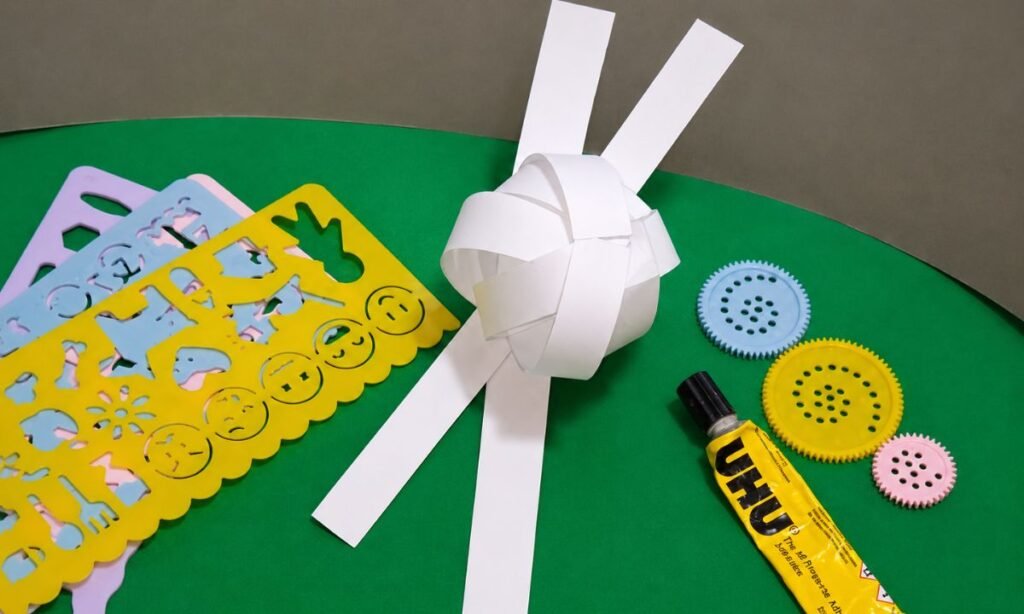
Now you cross the white paper strips from the centre to form a star shape, and you can place one strip horizontally and one vertically so you can see the base forming in front of you.
When you keep placing the other strips diagonally, you will notice how the shape slowly starts building around you.
Until you see them looking like a paper snowflake or star, you can keep adjusting them until you are happy with the shape.
When you are satisfied with the shape, you should add adhesive in the middle where all the strips overlap so you can hold everything in place.
You can press lightly for a few seconds, and you will feel how quickly it starts to stick together for you. This is the phase where you will notice the craft starting to get more fascinating.
And you will see how kids especially enjoy watching flat strips gradually turn into something real in front of them.
If you don’t want to damage your craft, you should not use too much glue in the center, because you might make the paper wet and wrinkly.
3. Create First Loop
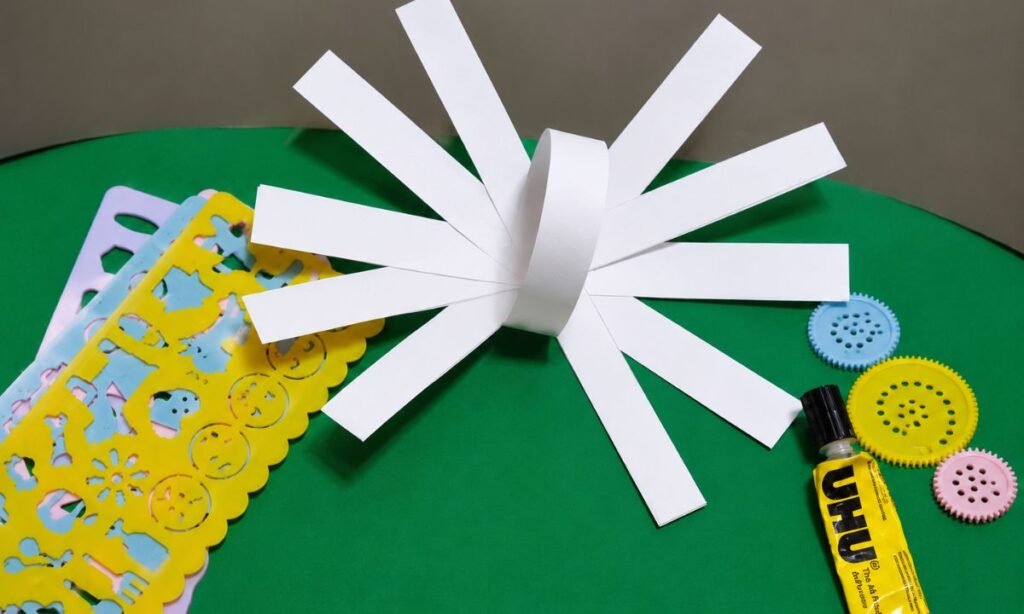
Take a strip of paper and you can join the two ends so you can easily construct a loop in front of you.
When you glue the ends neatly, you should hold them for a few seconds so you can make sure they stick properly for you.
This first loop is really important for you because it starts building the spherical snowball shape. Even if it may sound a bit unusual or a little inconsistent at first for you.
But you don’t need to worry, because when you keep adding more loops, you will see how the shape becomes fuller and much cuter right in front of you.
When you are doing it, you should press the linked ends together slowly instead of rushing, so you can keep better control.
It helps you keep the paper in place, and it also makes sure your ball doesn’t come open later when you handle it.
4. Complete Paper Ball
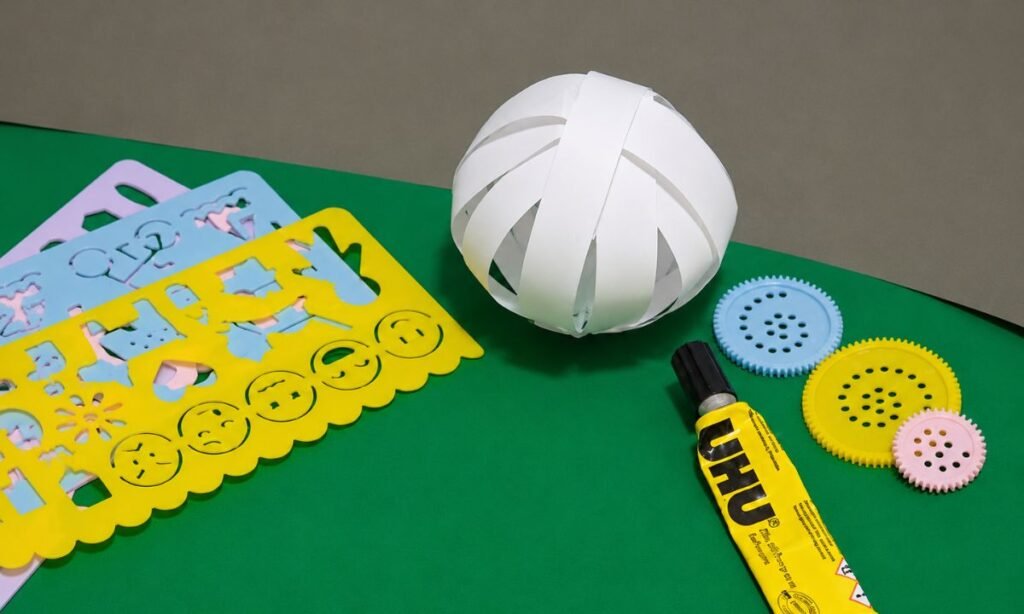
As you take the remaining strips one by one, you can fold each strip into a loop, and you can join the ends together just like you did with the first strip.
As you keep going, you will start to see how the paper slowly begins to take the shape of a full spherical ball.
And you can actually notice the form building right in front of you. This is that favorite phase where you can feel the snowman body really starting to come alive.
And you might even enjoy how you’re the one shaping it step by step. You should try to space the loops evenly so you can make the ball look balanced from every angle.
And if one side looks a bit empty, you can adjust it while you’re still working.
When you notice something uneven, you can carefully re-position the strips before the adhesive has fully dried.
And you will see how easily you can fix the shape while it’s still flexible.
5. Add Snowman Neck
If you want your snowman to look fuller, you can build another smaller spherical white paper ball using the same strip method.
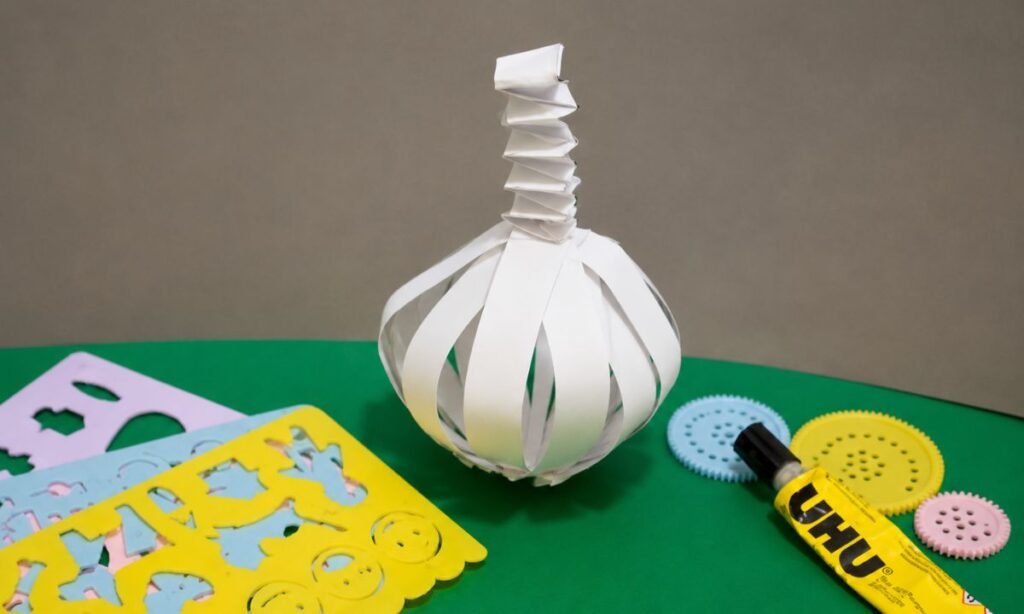
And you can see how it instantly makes your snowman feel more complete. Next, you can take a small piece of white paper and you can fold it back and forth using an accordion technique.
And as you do it, you might notice how simple folds can start to create structure.
This folded piece can become the snowman’s neck, and you can use it to connect the body to the face in a really natural way.
When you paste the folded strip over the top of the paper ball, you can press it lightly, and you will see it stand upright more easily and hold its shape better.
If you look closely, you might even start to appreciate this small accordion touch because it can add a playful, bouncy vibe to your snowman.
Instead of everything feeling flat and still, you can really feel it bringing the whole piece to life.
6. Cut Snowman Parts
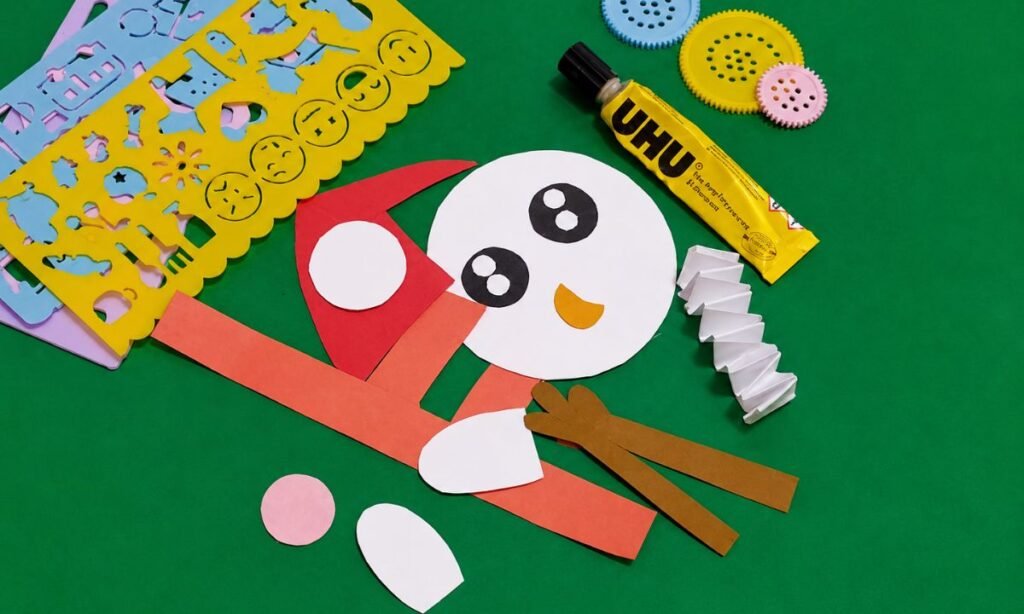
Now it’s time when you can start adding all the lovely little snowman details, and you can cut out the face from white paper so you can shape it exactly the way you want.
You can also cut the hat from colorful paper, and you can pick a scarf in any vivid color you like. And you can even cut out miniature hands if you want your snowman to look more lively.
You can add cheeks, a carrot-shaped nose, eyes, and a smile, and this is the moment where you can really have a lot of fun with the craft because you can decide how your snowman’s personality should look.
I usually try to have all the tiny pieces ready before I start gluing anything. And you can do the same because it makes everything easier for you when you decorate step by step.
If kids are involved, they can also choose their own colors, and you can see how each snowman starts to look a little distinct and full of personality.
Pro tip: if you find the tiny pieces hard to cut, you can draw them first with a pencil, and then you can slowly cut along the lines so you can stay more accurate and in control.
7. Attach Face Pieces
First, you can stick the folded white strip on top of the paper ball, and then you can place the round snowman face right on it so you can build the full shape step by step.
You should make sure you keep the face straight before the adhesive dries out, because you can adjust it easily while it’s still wet.
Then you can glue the scarf around the neck area, and you can see how it neatly covers the connection part and makes your snowman look more finished and clean.
If you look at it closely, you might notice how this small scarf can also add a really nice wintery touch, and you can feel how it makes the craft extra cute.
I like to press each piece lightly instead of rubbing it too hard, and you can do the same because small paper pieces might shift easily if you press too much.
Once you get the face and scarf on, you can already see your snowman starting to look really cute and coming together in a way you can really enjoy.
8. Decorate Snowman Craft
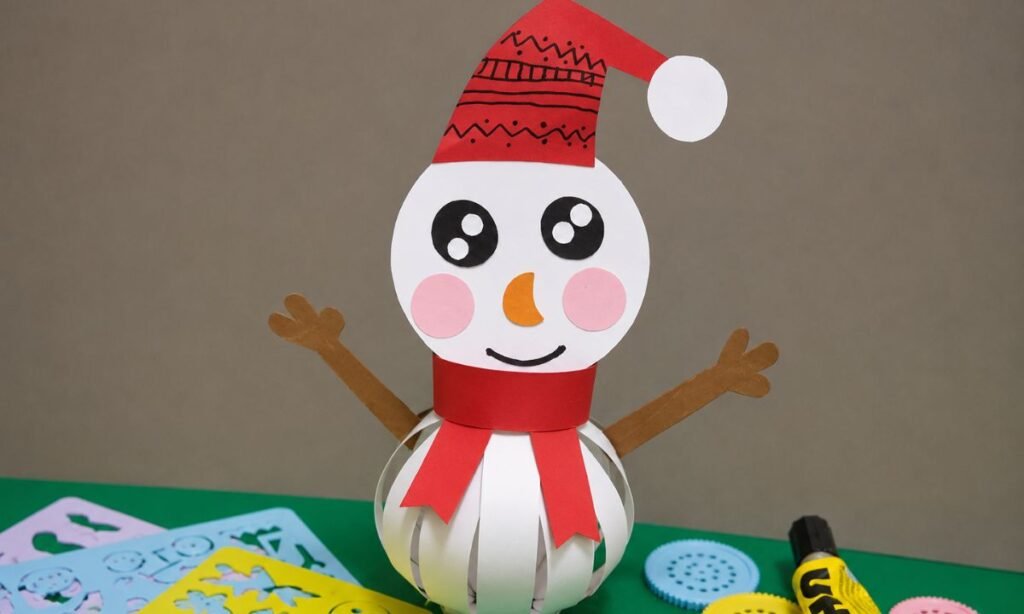
Finally, you can glue on the hat, eyes, nose, cheeks, smile, and hands, and you can feel how this becomes the most fun part of the whole craft.
This is where you can really see your snowman acquiring its little personality, and you can decide how you want it to look.
You can keep the smile small and sweet, or you can make it a bit funny, and you can see how even a small change can make a big difference.
If you are doing this craft with youngsters, you can help them add the hands on both sides, and you can adjust the cap so it sits neatly on the head without slipping.
After you have pasted everything, you should let the craft dry for a few minutes before you move it around, so you can keep all the pieces in place.
How Do You Make a Snowman Craft Without Making a Huge Mess?
One of the reasons you can really love this snowman paper project is that you don’t end up dealing with the huge craft mess that kids’ activities usually create.
You are mostly working with simple paper strips and easy cutouts, so you don’t have to worry about paint, glitter, or any complicated materials being scattered everywhere.
If you plan things properly, you can cut all the paper parts first.
And you can keep them neatly categorized before you even start the actual construction, which makes everything feel much more in control.
Honestly, you might notice how that small step can make the whole process feel calmer and more organized, and you can work with a clearer mind.
Also, if you use a glue stick instead of liquid glue, you can easily avoid sticky tables and messy fingers.
And especially if younger kids are involved, you can keep everything much cleaner and easier to handle.
How Do You Make a Snowman Paper Craft Look Cute Without Fancy Supplies?
The great thing about this snowman paper craft is that you don’t actually need pricey craft supplies to make it look cute, and you can still end up with something really charming.
You can construct yours using basic colored paper, glue, and simple craft tools that you might already have at home, and you don’t need anything fancy to begin with.
If you try it this way, you might notice how the simplest crafts often come out the cutest because you can enjoy the process more and it feels more handcrafted and personal.
You can add bright scarves, colorful paper cheeks, and a small carrot nose. And you will see how quickly your snowman gets a lot of personality without anything complicated.
If you mix up different colors of paper, you can make your creation stand out even more.
And you might find it especially useful for school displays or winter decorations where you want your work to really catch attention.
FAQs
Can I Make This Snowman Paper Craft With Preschoolers?
Yes, you can definitely do this activity with preschoolers, especially when you guide them step by step, and you can make the whole experience more fun and safe for them.
If an adult helps by cutting the paper strips and small embellishment pieces, you can let the kids focus more on the creative part instead of the difficult cutting work.
You might notice how kids really adore winding the strips into loops to form the snowman’s body.
And you can see how excited they get when they start adding hats, scarves, and little smiles on top. If you want to make it even easier for young hands,
you can simplify the design and use fewer paper strips to form the snowman. And you will see how much more manageable and enjoyable the craft becomes for them.
What Type of Paper Works Best for a 3D Snowman Craft?
Regular craft paper or construction paper can work perfectly for this snowman activity.
And you can use it easily because it is flexible enough for you to fold into loops without breaking.
You might notice that when you use a little thicker paper, you can help your snowman hold its spherical shape better, and you can see how much sturdier it looks.
If you try thin printer paper, you can still make it work, but you may find that the finished snowman feels a bit softer and less solid compared to thicker paper.
You may also like to make!