Last weekend, we went to the market, and my niece started asking for a rose as soon as she saw the flower stalls.
She really wanted to take one home, but I do not like bringing flowers home only to throw them away after they dry.
So, instead of buying one, I showed her how we could make our own rose with paper and keep it for much longer.
It also gave her a chance to learn a new craft skill while making something she already wanted.
Let’s make this rose paper craft.
- Why This Rose Lasts Longer
- Materials Needed:
- Step-by-Step Guide
- 1. Create Center Crease
- 2. Fold Into Triangle
- 3. Fold Smaller Triangle
- 4. Draw Petal Curve
- 5. Cut Petal Shape
- 6. Open Flower Shapes
- 7. Cut Petal Slits
- 8. Shape Rose Layers
- 9. Attach Stem Leaves
- 10. Finish Rose Craft
- Why Roses Have So Many Petals
- Why Do Roses Smell So Good?
- FAQs
- Can I Make This Rose Craft in Different Sizes?
- Can I Make a Rose Bouquet With This Craft?
Why This Rose Lasts Longer
Unlike a real rose, this paper version does not wilt or dry out after a few days, so you can keep it much longer.
The layered paper petals also hold their shape well when the folds and glued edges are pressed firmly during assembly.
Keeping the finished rose away from water and heavy objects helps the petals stay neat and prevents the stem from bending.
You can display it on a shelf, desk, or in a small vase without worrying about replacing it after a short time.
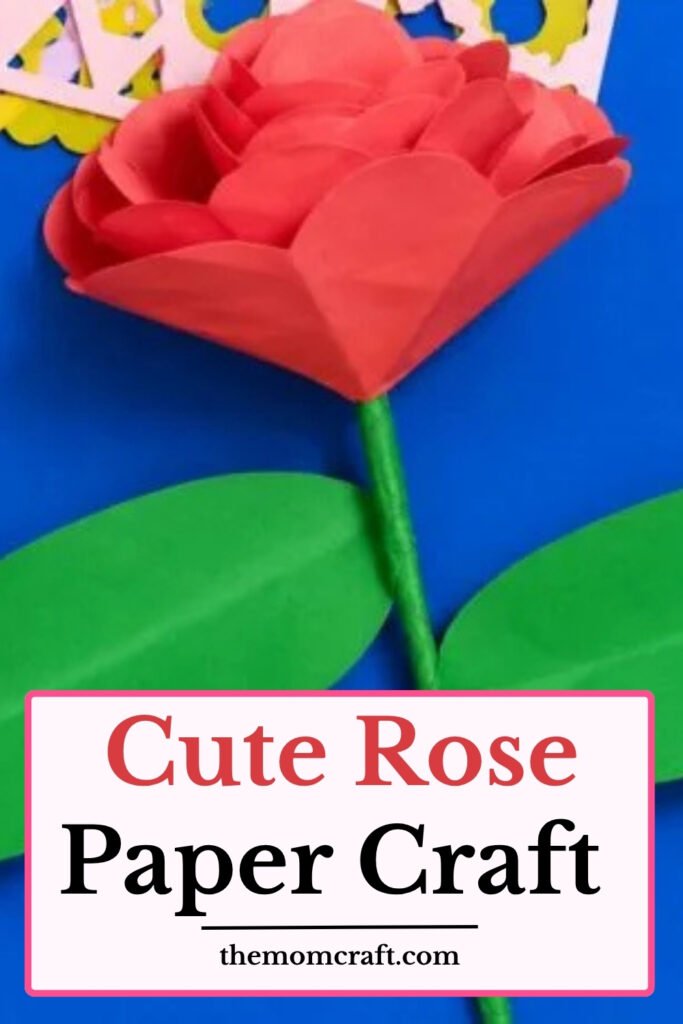
Materials Needed:
- Orange or red craft paper
- Green craft paper
- Glue
- Scissors
- Pencil
- Rolled paper stem
Step-by-Step Guide
1. Create Center Crease
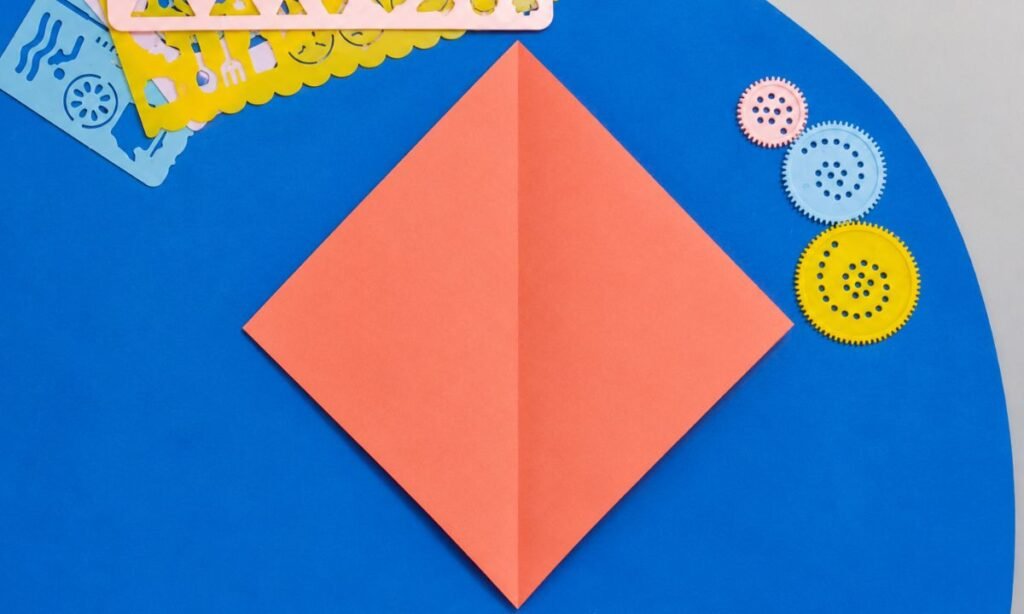
Fold the orange square diagonally from one corner to the opposite corner, then open it again to reveal a clear center crease.
Press firmly along the fold before opening the sheet, keeping the paper flat so the crease stays straight through the middle.
Position the paper like a diamond afterward, with the center line visible so the next folds remain even and properly aligned.
2. Fold Into Triangle
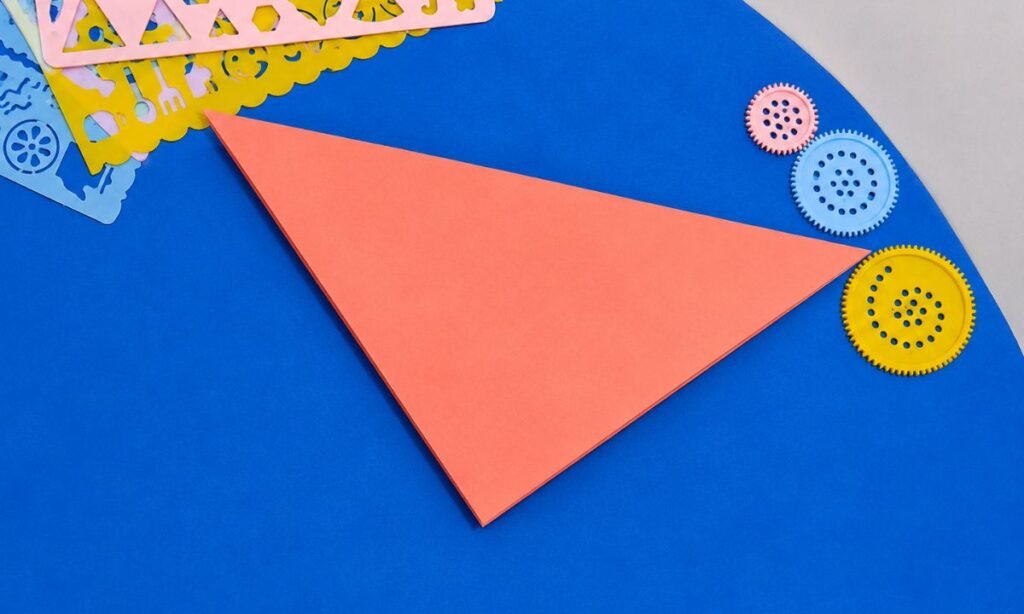
Fold the orange paper along the diagonal crease, bringing the opposite corners together until the sheet forms one neat triangular shape.
Press the folded edge firmly with your fingers, keeping both layers aligned so the triangle stays flat and evenly shaped.
Check that the corners meet cleanly before continuing, because uneven edges can make the later rose folds look slightly off-center.
3. Fold Smaller Triangle
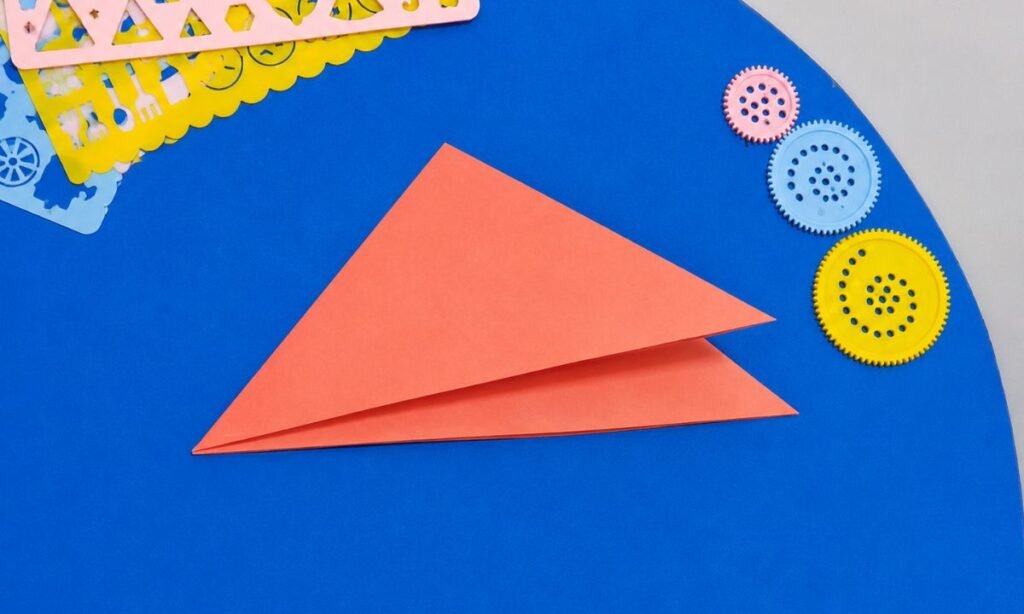
Fold the large triangle again, bringing one pointed corner across to create a smaller layered triangle with neatly stacked paper edges.
Press along the new fold firmly, keeping the layers flat so the shape stays compact without shifting or opening.
Check that the pointed ends remain aligned, because a clean folded triangle makes the curved rose outline easier to draw accurately.
4. Draw Petal Curve
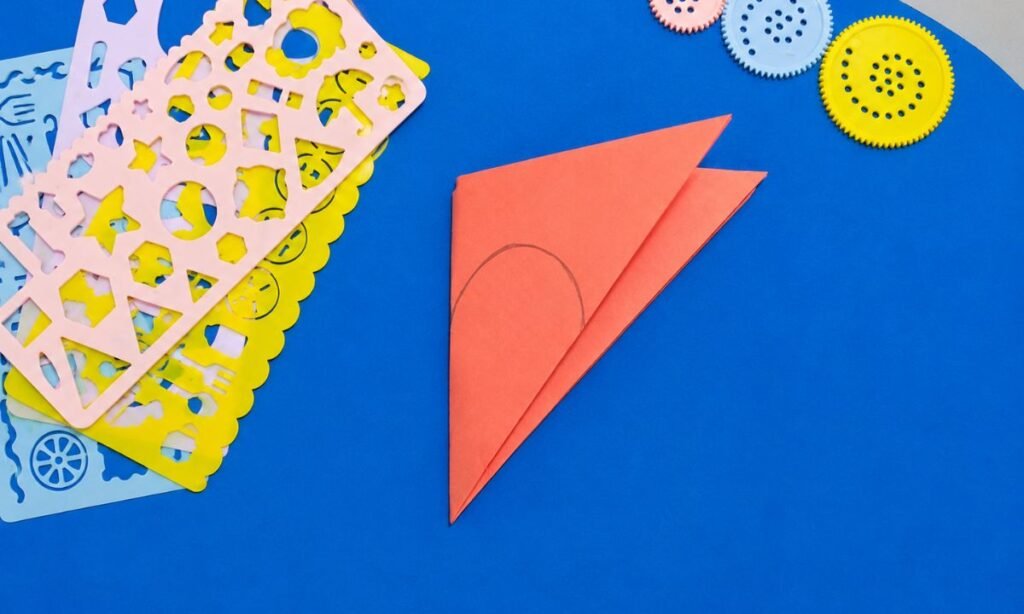
Use a pencil to draw one smooth curved line near the folded edge, creating a rounded petal outline across the triangle.
Keep the curve wide and simple, avoiding sharp corners so the rose shape looks soft once the folded paper is cut.
Check the pencil line before cutting, making sure the curve stays centered and does not reach too close to the outer edges.
5. Cut Petal Shape
Cut along the curved pencil line through the folded layers, keeping the scissors steady so the rounded petal edge stays smooth.
Remove the curved section carefully, leaving the remaining folded piece intact so the petal shape stays clean and evenly formed.
Check the cut edge before unfolding, trimming any rough spots lightly so the finished petals look soft and balanced overall.
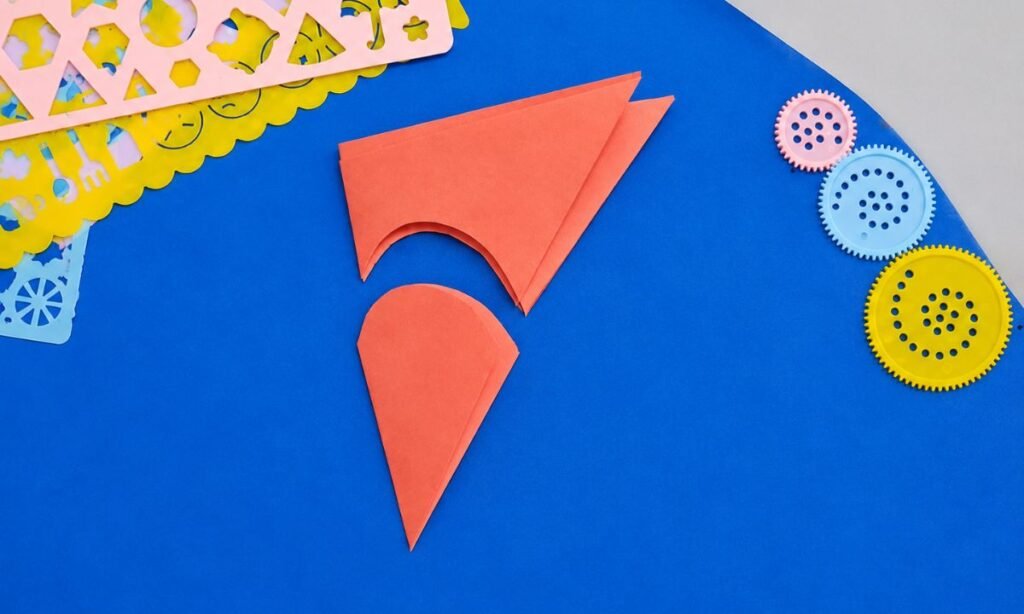
6. Open Flower Shapes
Open each folded piece fully to reveal a flower shape with several rounded petals arranged evenly around the center point.
Flatten the paper gently with your fingers, keeping the crease lines visible without pressing the petals too firmly against the surface.
Prepare all four flower pieces the same way, checking that the petal edges stay smooth and the shapes remain similar.
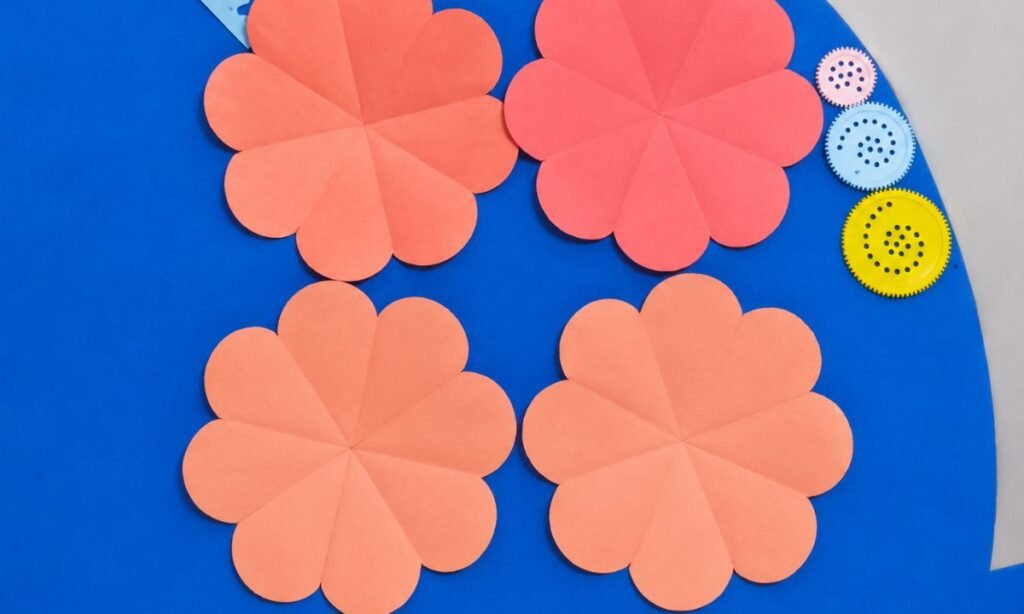
7. Cut Petal Slits
Cut one straight slit from the outer edge toward the center of each flower, stopping carefully before reaching the middle point.
For some pieces, remove a small wedge between two petals, creating enough space for the flower to overlap neatly later.
Keep the cuts clean and centered, because uneven slits can make the rose layers twist or sit unevenly when shaped.
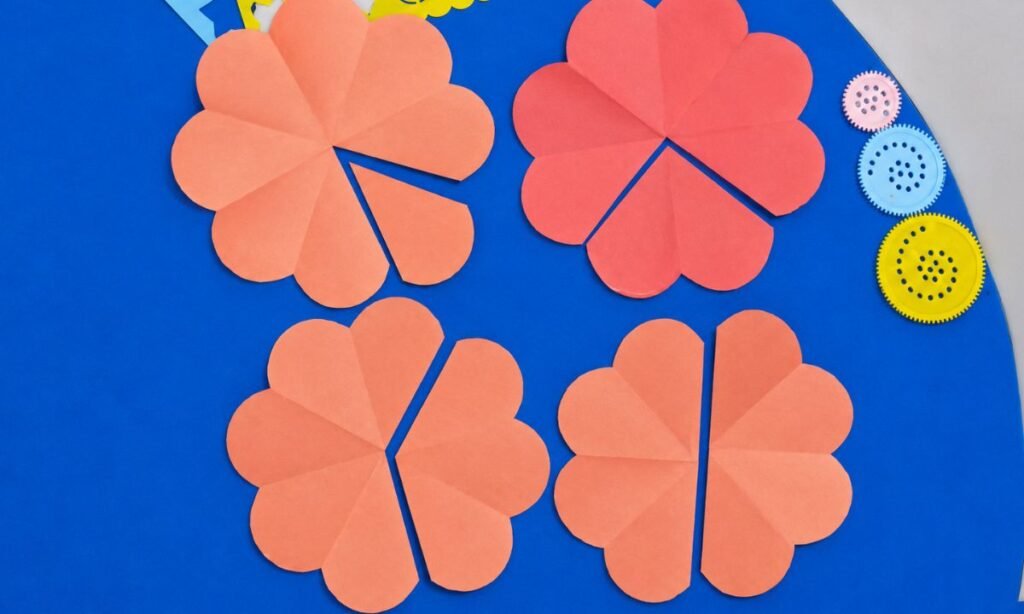
8. Shape Rose Layers
Overlap the cut edges of each flower piece and glue them together, forming small cup-shaped layers with raised rounded petals.
Use more overlap on the smaller pieces to create tighter centers, while keeping the larger layers slightly more open overall.
Press each glued seam firmly for a few seconds, making sure every layer holds its curved shape before assembly begins.
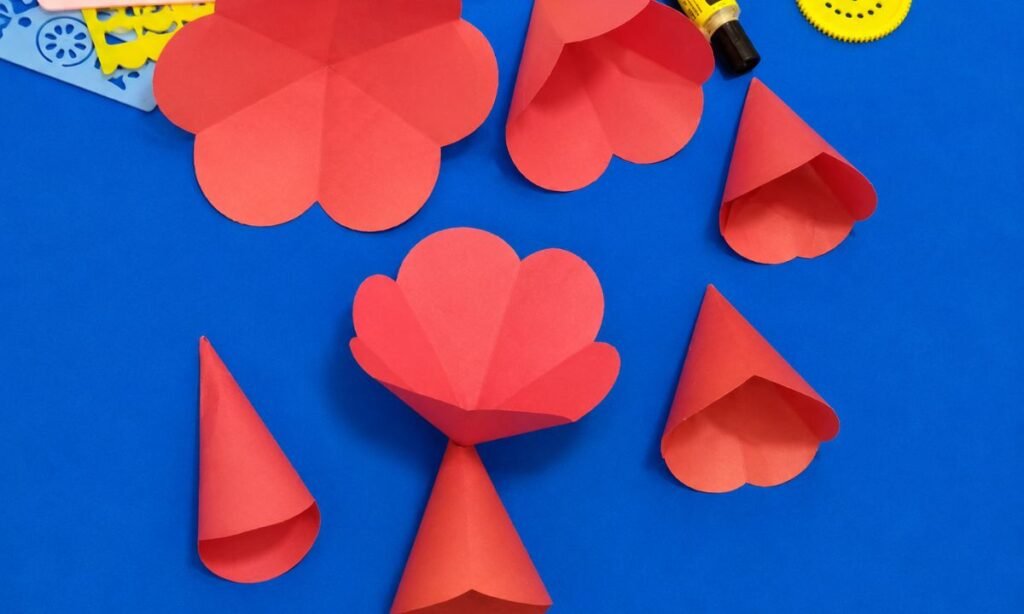
9. Attach Stem Leaves
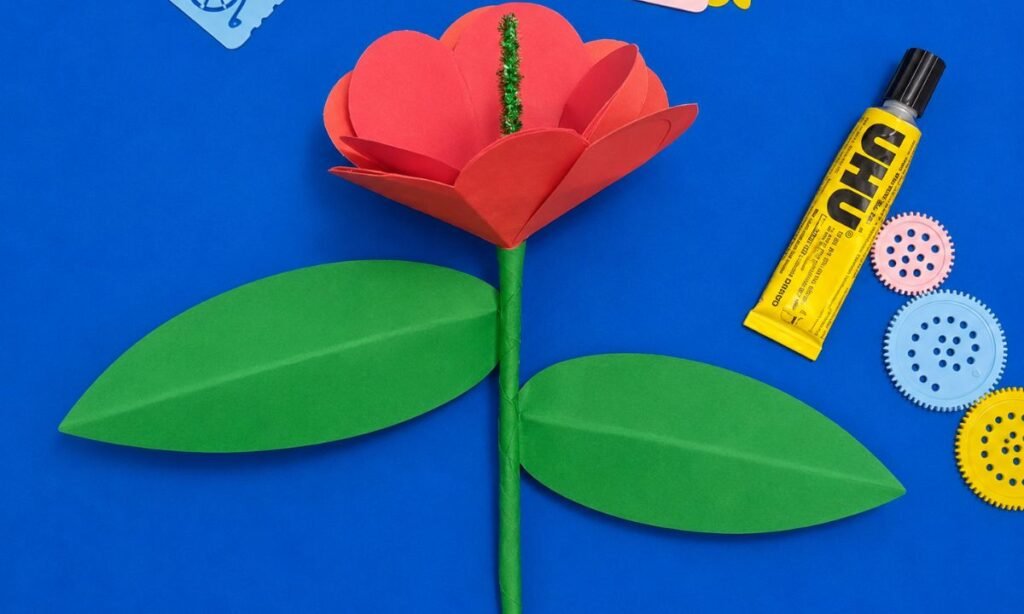
Glue the finished rose bloom onto the green wrapped stem, keeping the flower centered so it sits securely above the stalk.
Attach one green paper leaf on each side of the stem, spacing them apart so both shapes remain clearly visible.
Press the flower base and leaves firmly after gluing, checking that the stem stays straight and the pieces do not shift.
10. Finish Rose Craft
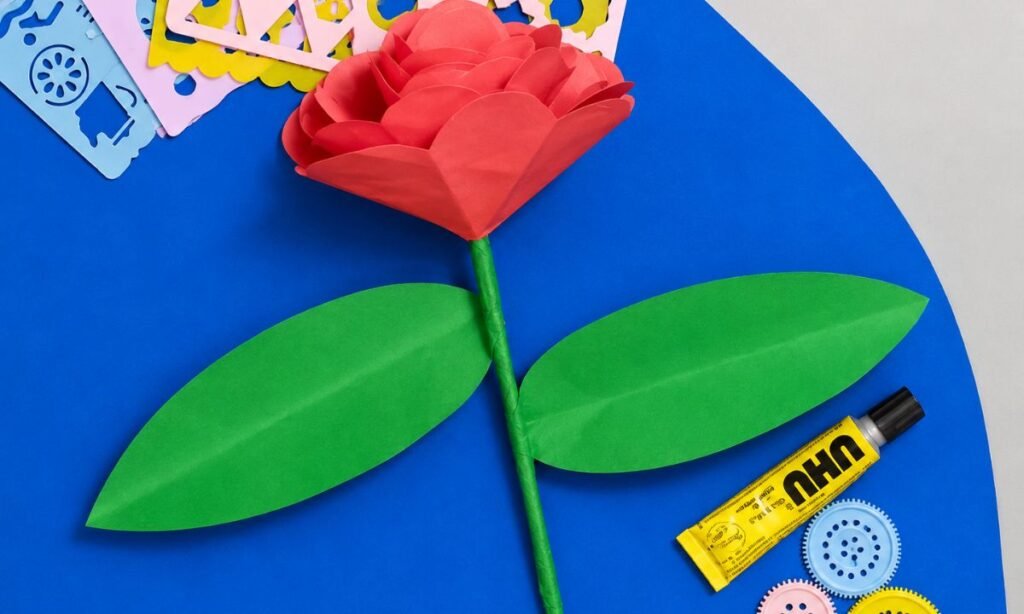
Check the layered rose petals from different angles, adjusting any folded edges so the flower keeps a full rounded shape.
Make sure both green leaves sit evenly along the stem, with their pointed ends facing outward in opposite directions.
Press any loose sections gently, then leave the finished rose flat until the glue dries and all pieces stay secure.
Why Roses Have So Many Petals
Rose flowers have many petals because each layer grows around the center, creating the full and rounded shape people easily recognize.
The outer petals usually open wider, while the inner petals stay closer together and make the middle look more tightly packed.
Different rose varieties can have very different petal counts, so some flowers look simple while others appear much fuller and denser.
These layered petals also protect the center of the flower while adding the soft, overlapping look that makes roses so distinctive.
Why Do Roses Smell So Good?
Roses produce natural scented oils in their petals, which release tiny fragrance molecules into the air around the flower.
Different rose varieties can smell sweet, fruity, spicy, or even slightly citrusy depending on the natural compounds they produce.
Warmer weather can make the scent feel stronger because heat helps more fragrance molecules move from the petals into the air.
The smell also helps attract pollinators, which visit the flowers while searching for nectar and pollen.
FAQs
Can I Make This Rose Craft in Different Sizes?
Yes, you can make the rose larger or smaller by changing the size of the paper circles before folding and cutting.
Keep the petal layers proportional so the center still looks full and the outer petals do not feel too large.
Smaller roses work well for cards or gift decorations, while larger ones look better in vases or room displays.
Can I Make a Rose Bouquet With This Craft?
Yes, you can make several paper roses and group them together to create a small handmade bouquet for display or gifting.
Try using different shades for each rose while keeping the green stems and leaves similar so the bouquet still looks balanced.
Tie the stems together with ribbon or place them in a small vase to turn the finished crafts into one complete arrangement.
You may also like to make!