

After a rainy afternoon, I went outside and noticed a few dragonflies flying low near the plants and wet ground.
They kept moving quickly from one spot to another, and their long bodies and wide wings were really easy to notice.
That little scene made me want to recreate the same look with bright paper and simple shapes at home.
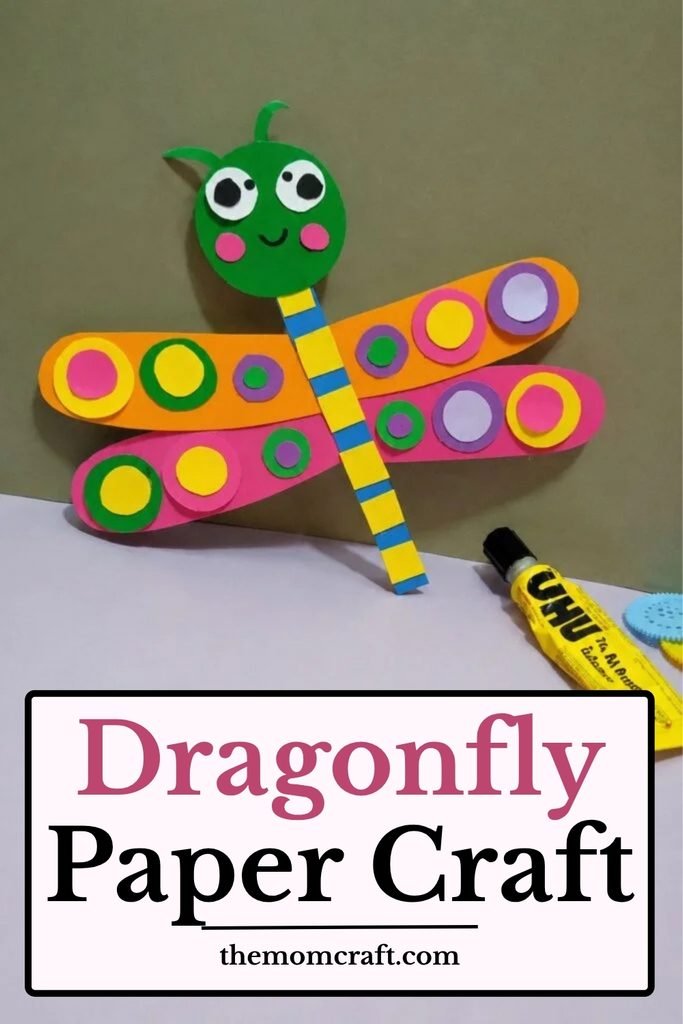
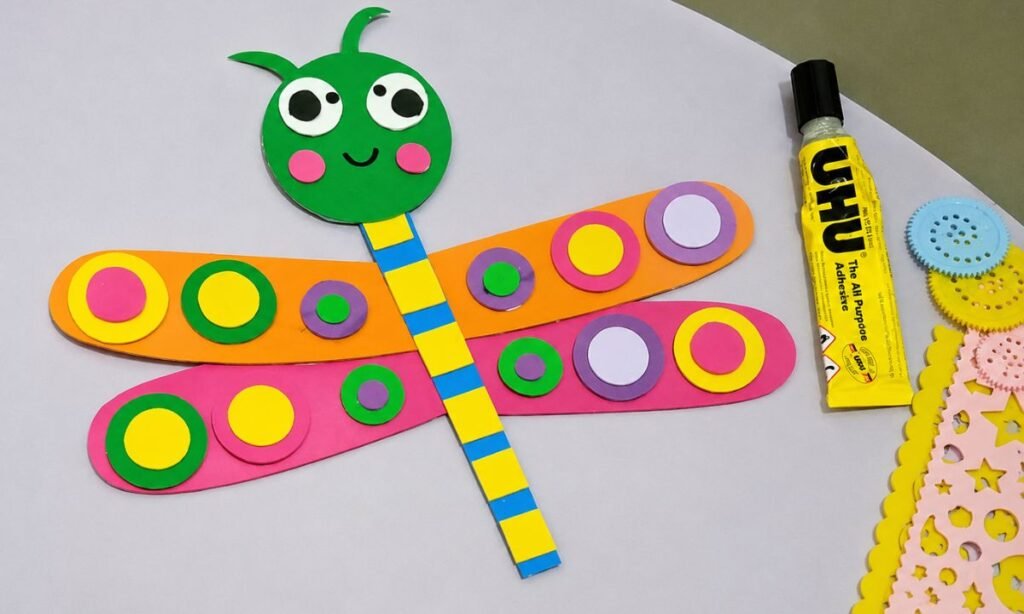
So I turned the idea into this colorful dragonfly craft with four wings, a striped body, and a playful face.
Let’s make this dragonfly paper craft.
- Why Dragonflies Stay Near Water
- Materials Needed:
- How to Make Dragonfly Craft Step By Step?
- 1. Prepare Dragonfly Pieces
- 2. Arrange Wings
- 3. Add Dragonfly Face
- 4. Decorate Dragonfly Wings
- How Dragonflies Fly So Quickly
- Why Their Eyes Look So Large
- Dragonfly Craft Challenges
- FAQs
- Can I Make This Dragonfly Craft Without a Compass?
- Can I Hang This Dragonfly Craft as Decoration?
Why Dragonflies Stay Near Water
Dragonflies often spend much of their lives around ponds, streams, wetlands, and other places where water is nearby.
Their young stage develops in water, which is why adults are commonly seen flying around these areas later.
After rain, extra moisture and insect activity can make dragonflies easier to notice around plants and open spaces.
That water connection makes this craft a nice fit for a rainy-day or nature-themed activity.
Materials Needed:
- Green craft paper
- Orange craft paper
- Pink craft paper
- Yellow craft paper
- Blue craft paper
- Purple craft paper
- White craft paper
- Black craft paper or black marker
- Pencil
- Scissors
- Glue
- Compass or round tracing objects
How to Make Dragonfly Craft Step By Step?
1. Prepare Dragonfly Pieces
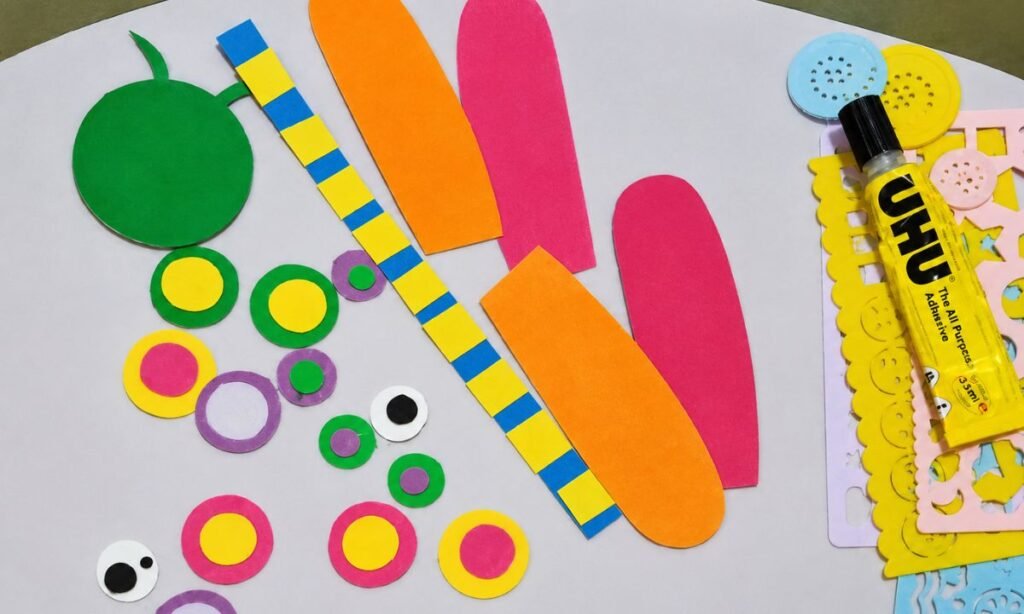
Cut one green circular head, a long striped body strip, four rounded wings, and several small colorful circles for decoration.
Prepare two paper eyes, pink cheek circles, and small curved antenna pieces so the face can be assembled neatly afterward.
Keep all pieces grouped by color and size, checking their proportions before gluing anything onto the dragonfly body.
2. Arrange Wings
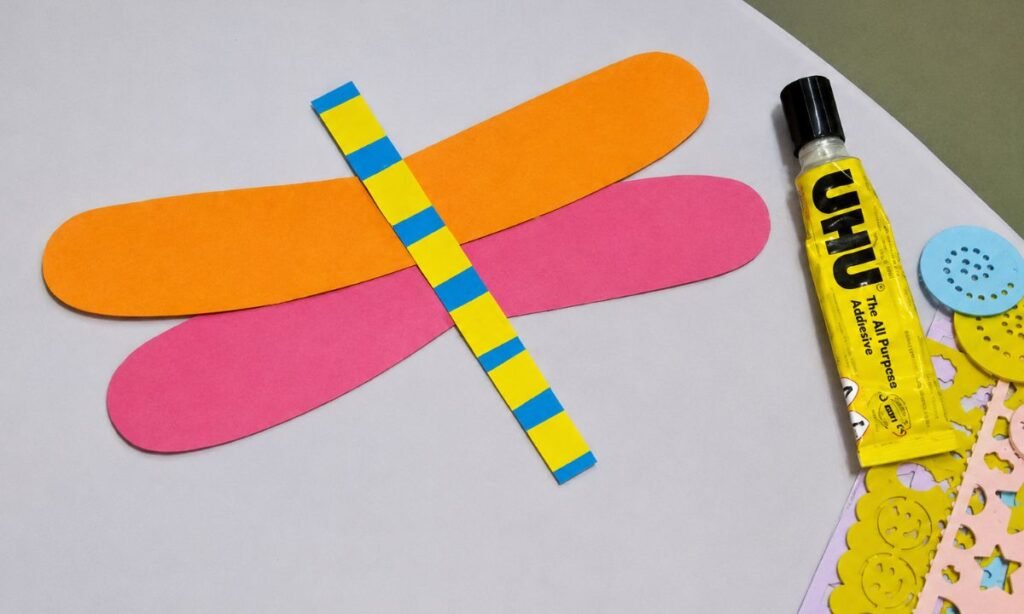
Cross the orange and pink wing pieces behind the striped body, keeping both pairs spread evenly on opposite sides.
Place the long body strip vertically through the center so the wings stay balanced and clearly visible from each side.
Glue the overlapping sections securely, pressing the center gently so the wings remain flat without shifting out of position.
3. Add Dragonfly Face
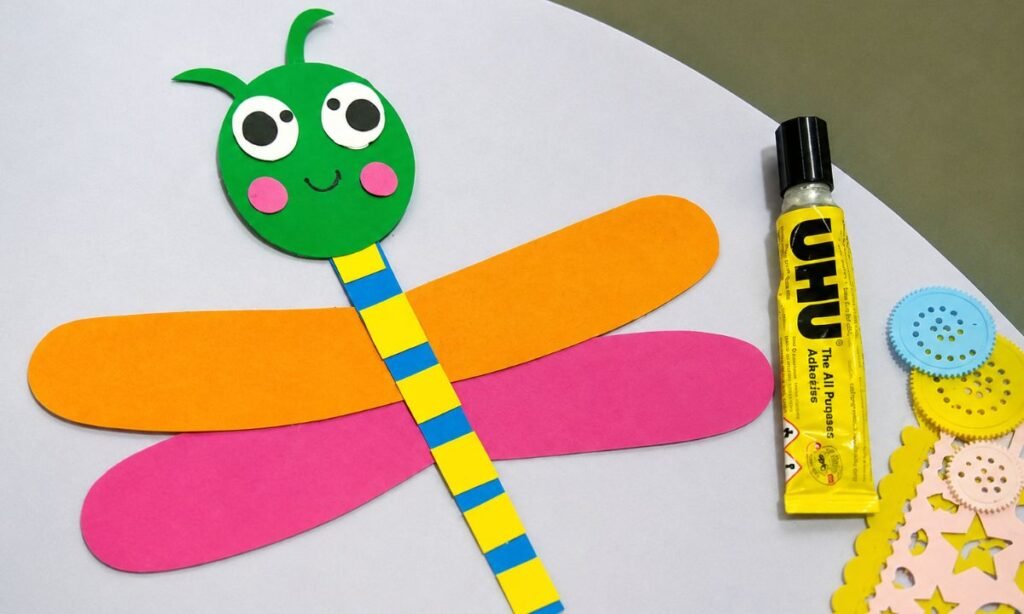
Attach the green circular head to the top of the striped body, keeping it centered above the wings and body strip.
Glue the white and black eyes onto the face, then add pink cheeks and draw a small curved smile underneath.
Attach the two green antenna pieces at the top, adjusting their angles so the finished face looks balanced and playful.
4. Decorate Dragonfly Wings
Glue the layered colorful circles across all four wings, spacing the decorations evenly so each side looks bright and balanced.
Mix yellow, green, purple, pink, and white circles to create simple repeated patterns without covering too much of the wings.
Press each paper circle firmly after gluing, then check the full dragonfly and adjust any decorations that look uneven or crowded.
How Dragonflies Fly So Quickly
Dragonflies have four wings that can move with a high level of control, helping them turn, hover, and change direction quickly.
They can move forward, backward, and sideways much more easily than many other flying insects.
That fast, flexible movement is one reason they often seem difficult to follow when they are flying close to the ground.
Using four separate paper wings in this craft helps show the feature that gives dragonflies such impressive movement.
Why Their Eyes Look So Large
Dragonflies have very large compound eyes that cover much of the head and help them detect movement in many directions.
Those eyes are made up of thousands of tiny visual units, giving them a very wide field of view.
This helps dragonflies spot prey and react quickly while flying through open areas near water and plants.
The oversized paper eyes in this craft make the face playful while still matching one of the insect’s most noticeable features.
Dragonfly Craft Challenges
Keeping all four wings evenly spaced can be tricky because one small shift can make the whole body look off-center.
The long striped body also needs to stay straight so the head and wings remain properly aligned from top to bottom.
Small circular decorations can become crowded if they are placed too close together across the paper wings.
Laying out every piece before gluing helps keep the finished dragonfly balanced and neat.
FAQs
Can I Make This Dragonfly Craft Without a Compass?
Yes, you can trace around bottle caps, cups, or other round objects to create the head, eyes, and decorative circles.
Choose different sizes so the layered paper details stay easy to arrange without making the wings look too crowded.
This method also works well for younger kids who may find drawing small circles with a compass difficult.
Can I Hang This Dragonfly Craft as Decoration?
Yes, you can attach a small loop of string behind the head or upper body and hang the finished dragonfly carefully.
Make sure the wings and circular decorations are glued securely before lifting it so the smaller pieces do not come loose.
It can work nicely near a window, classroom board, or nature-themed corner where the bright colors stay easy to see.
You may also like to make!



