

A few days ago, I was looking at dinosaur skeleton pictures from a museum, and their huge size caught my attention right away.
The long neck, strong legs, and pointed back made the dinosaur look so different from the animals we see today.
That made me want to turn those bold shapes into a simple craft that was easy to recognize without adding too many details.
The paper version felt like a fun way to bring a tiny piece of prehistoric life into craft time.
Let’s make this dinosaur craft.
- How the Spikes Add Shape
- Material Needed:
- Step-By-Step Guide
- 1. Create Center Crease
- 2. Draw Dinosaur Outline
- 3. Cut Dinosaur Shape
- 4. Prepare Dinosaur Details
- 5. Stand Dinosaur Body
- 6. Add Dinosaur Details
- Fun Ways to Customize
- Dinosaur Craft Challenges
- Why This Dinosaur Stands Up
- FAQs
- Can I Use This Dinosaur Craft for a School Project?
- What Paper Works Best for This Dinosaur Craft?
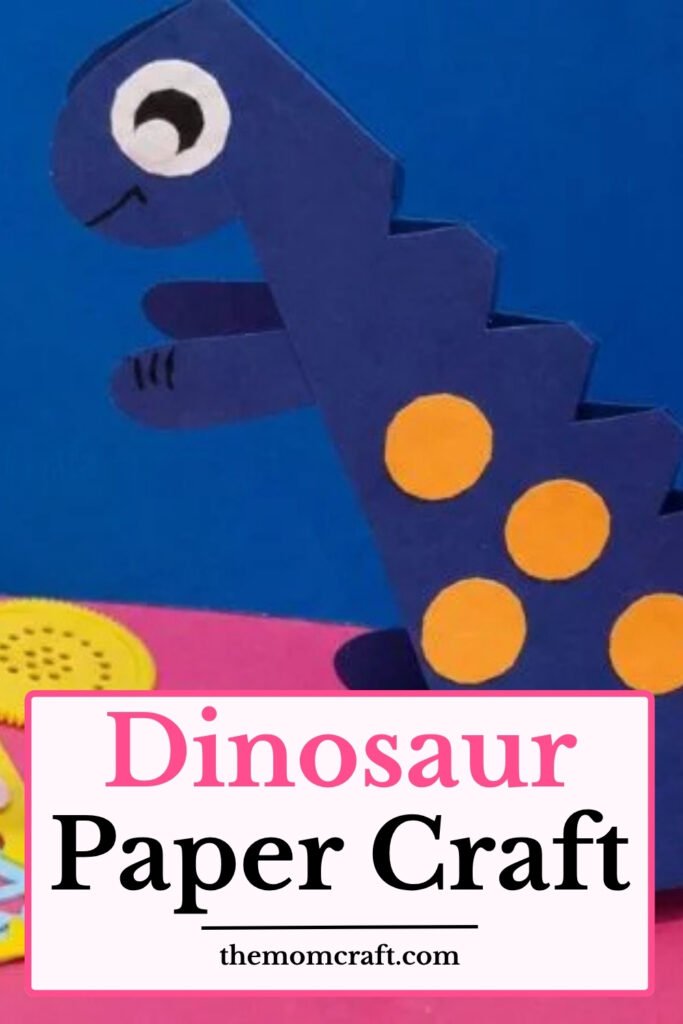
How the Spikes Add Shape
The pointed back spikes make the dinosaur silhouette easier to recognize and give the craft more detail without adding many extra pieces.
Keeping the spikes similar in size helps the back look neat while still giving the dinosaur a playful prehistoric appearance.
You can make the spikes slightly larger or smaller depending on the paper size and the overall shape of the body.
Sharp, clean cuts also help each spike stand out clearly instead of blending into the curved back edge.
Material Needed:
• Blue chart paper
• Orange and white paper
• Black paper
• Pencil
• Scissors
Step-By-Step Guide
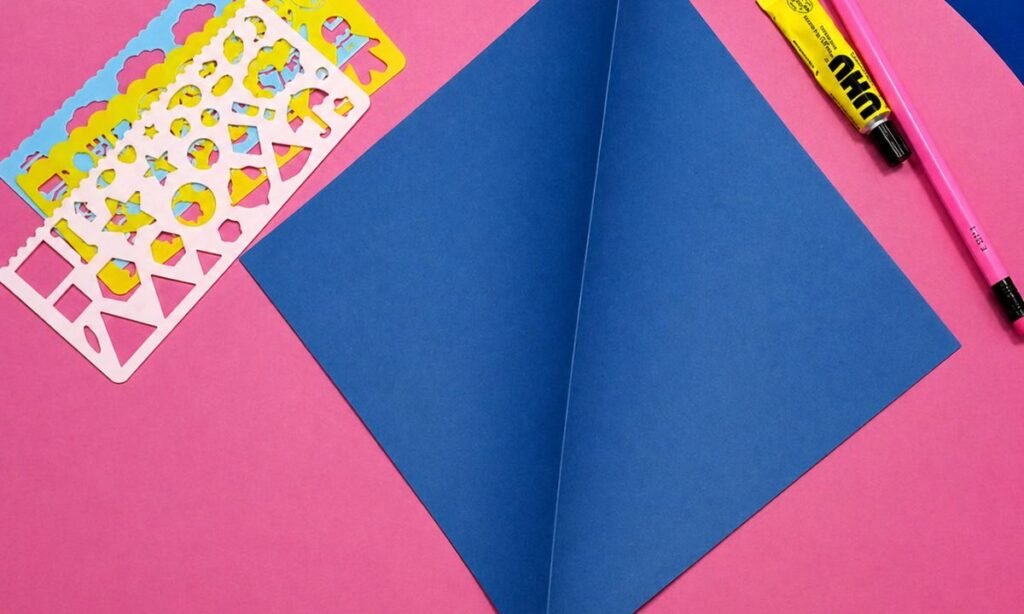
1. Create Center Crease
Fold the blue square diagonally from one corner to the opposite corner, then open it again to reveal a clear center crease.
Press firmly along the fold before opening the sheet, making sure the crease runs straight through the middle of the paper.
Keep the paper positioned like a diamond, with the center line visible so the next folds stay even and properly aligned.
2. Draw Dinosaur Outline
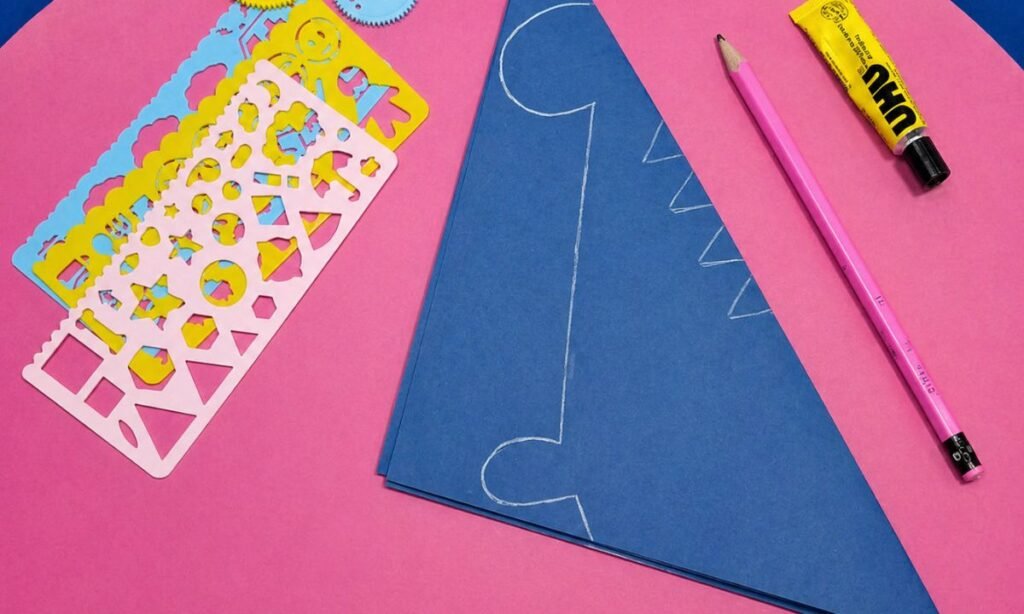
Use a pencil to sketch the dinosaur shape on the folded blue paper, including the rounded head, long neck, and legs.
Add several small triangle shapes along the outer edge to create the dinosaur’s pointed back spikes in a simple row.
Keep the pencil lines clear and smooth, checking the outline before cutting so both folded layers stay properly aligned together.
3. Cut Dinosaur Shape
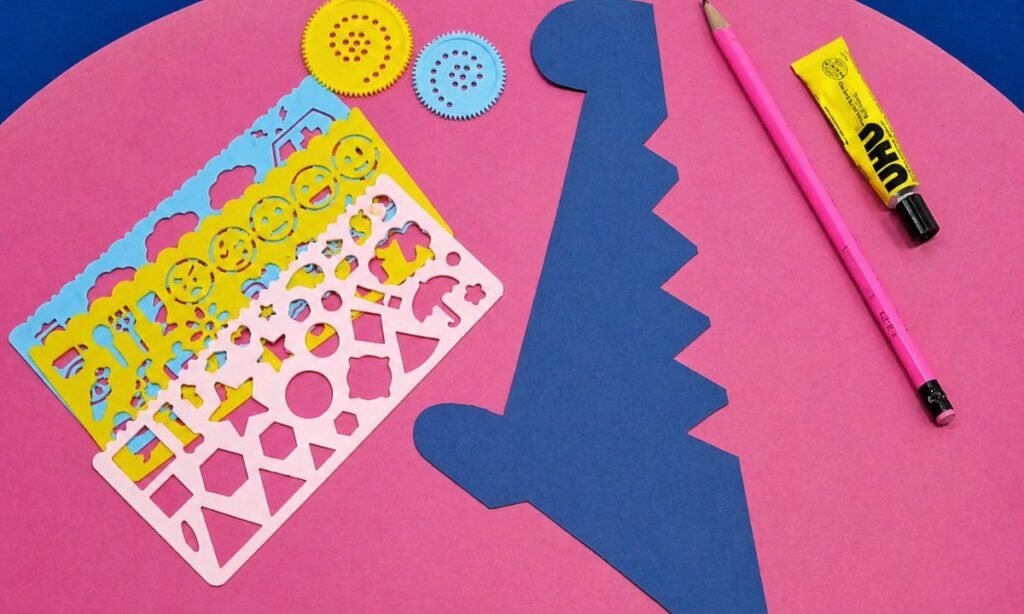
Carefully cut along the dinosaur outline, following the rounded head, long neck, legs, and pointed back spikes without trimming inside.
Turn the folded paper slowly while cutting around each curve, keeping both layers together so the matching dinosaur sides stay even.
Check the finished shape for rough edges, then trim any uneven sections lightly while keeping the spikes sharp and clearly defined.
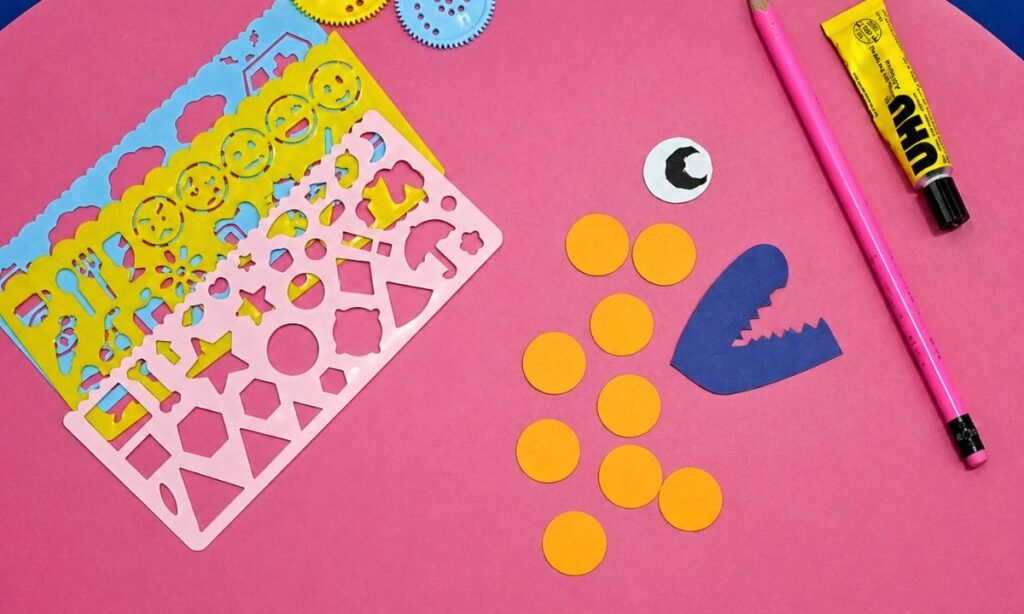
4. Prepare Dinosaur Details
Cut several orange circles for body spots, keeping them similar in size so the decoration looks balanced across the dinosaur.
Prepare one layered eye using white and black paper, making the pupil large enough to remain clearly visible on the face.
Cut a separate blue mouth piece with small pointed teeth, checking that the upper and lower edges stay neat and clean.
5. Stand Dinosaur Body
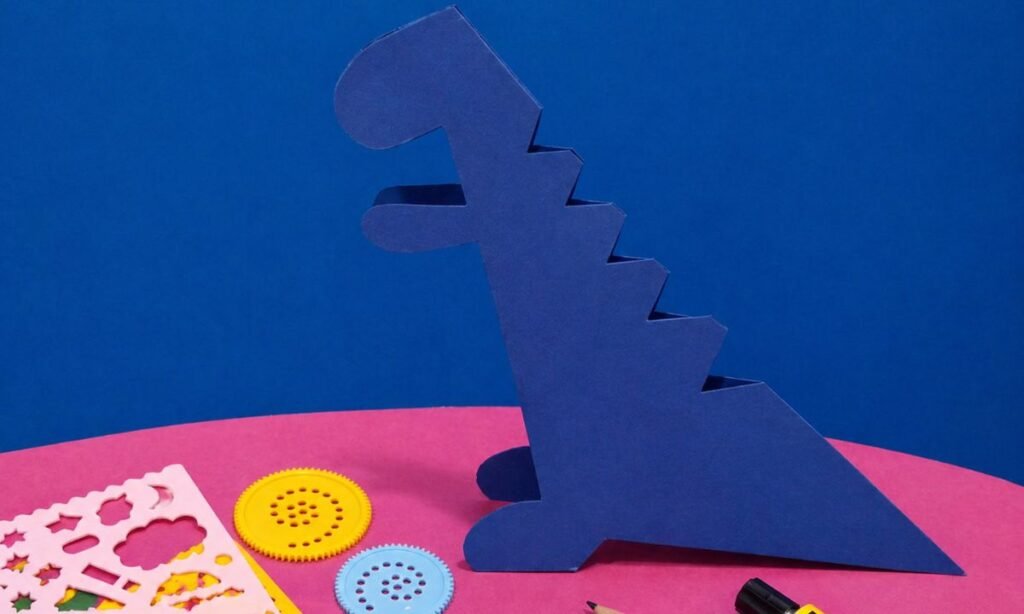
Open the folded dinosaur shape and stand it upright, keeping both paper sides separated enough to support the body evenly.
Adjust the legs and lower edges carefully so the dinosaur stays balanced without leaning forward, backward, or toward either side.
Check the long neck, pointed back spikes, and tail from the side, making sure the full silhouette remains clearly visible.
6. Add Dinosaur Details
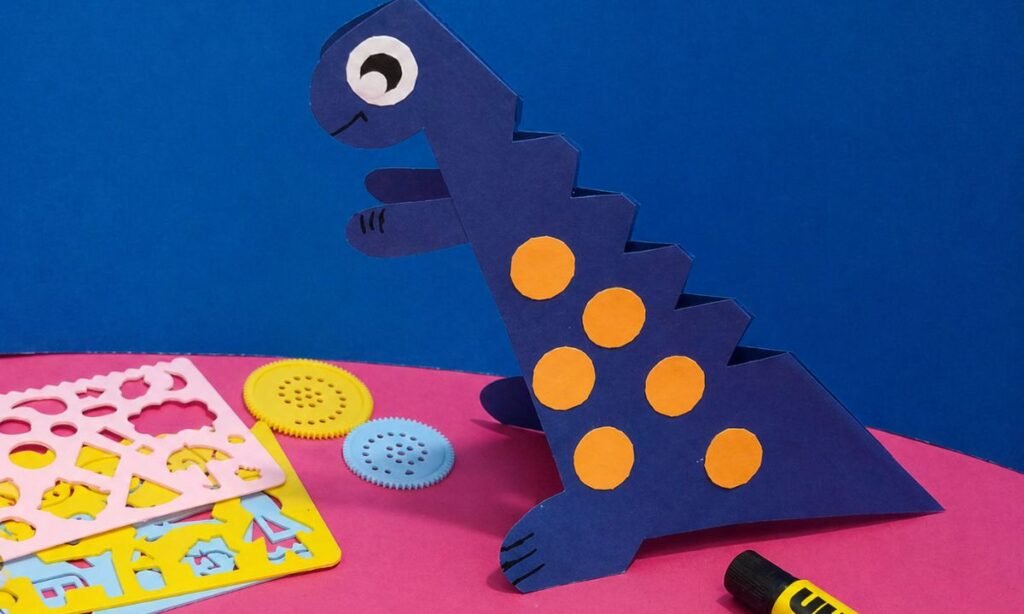
Glue the orange circles across the dinosaur body, spacing them apart so the spots look balanced from top to bottom.
Attach the layered eye near the head, then draw a small smile and short black lines on the front legs.
Press every paper detail firmly in place, checking that the spots, eye, and leg markings stay clear and neatly positioned.
Fun Ways to Customize
Change the body color, spots, or eye details to create a dinosaur that looks completely different from the original version.
You can add more spots, use small triangles, or mix two colors if you want the body to look more playful.
Changing the eye or mouth expression also gives the dinosaur a different personality without changing the main folded shape.
If you make several dinosaurs, use different colors and patterns so each one looks like its own little character.
Dinosaur Craft Challenges
The long neck can bend if the paper is too thin, especially when the folded body is opened too wide.
Uneven legs may also make the dinosaur lean, so both bottom edges should sit flat before adding the smaller details.
The back spikes can be tricky to cut neatly, especially near the smaller points where the paper can tear easily.
Using firm paper and making slow cuts helps the finished dinosaur keep its shape and look much cleaner.
Why This Dinosaur Stands Up
The folded paper body gives the dinosaur two sides, which helps it balance instead of lying flat like a regular cutout.
Its wide legs create a steady base, especially when both bottom edges are trimmed evenly and kept at the same height.
Using slightly thicker paper helps the long neck stay upright while still allowing the folded body to open enough for support.
Once both sides are balanced, the dinosaur can stand on a flat surface without needing any extra support underneath.
FAQs
Can I Use This Dinosaur Craft for a School Project?
Yes, this dinosaur craft can work well for a school project because its shape is clear and easy to recognize.
You can add a small label with the dinosaur name, body features, or a few facts beside the finished craft.
Because the dinosaur stands upright, it also works nicely on a project table or classroom display without needing a separate stand.
What Paper Works Best for This Dinosaur Craft?
Lightweight cardstock works well because it is firm enough to support the long neck while still being easy to fold.
Regular craft paper can also work, but very thin sheets may bend or make the dinosaur harder to keep upright.
Choose paper that folds cleanly without cracking, especially because the center crease helps the finished dinosaur hold its standing shape.
You may also like to make!



