

Today, we had a lot of rain in our area, and later at night, we started hearing frogs calling outside.
My niece quickly became curious and kept asking what the sound was and why the frogs were making so much noise.
Since she had so many questions, a frog craft felt like a fun way to explain the animal while keeping her interested.
It also gave her something she could look at closely while learning about the frog’s face, body, and simple features.
Let’s make this frog craft.
- What Makes This Frog Bounce?
- Materials Needed:
- Step-By-Step Guide
- 1. Prepare Green Strips
- 2. Join Green Strips
- 3. Fold Accordion Strips
- 4. Shape Paper Spring
- 5. Prepare Frog Pieces
- 6. Assemble Frog Face
- 7. Assemble Frog Craft
- Why the Big Eyes Work
- Is a Frog’s Heart Like a Human Heart?
- FAQs
- Can I Make This Frog Craft in Different Sizes?
- Can I Change the Frog’s Facial Expression?
What Makes This Frog Bounce?
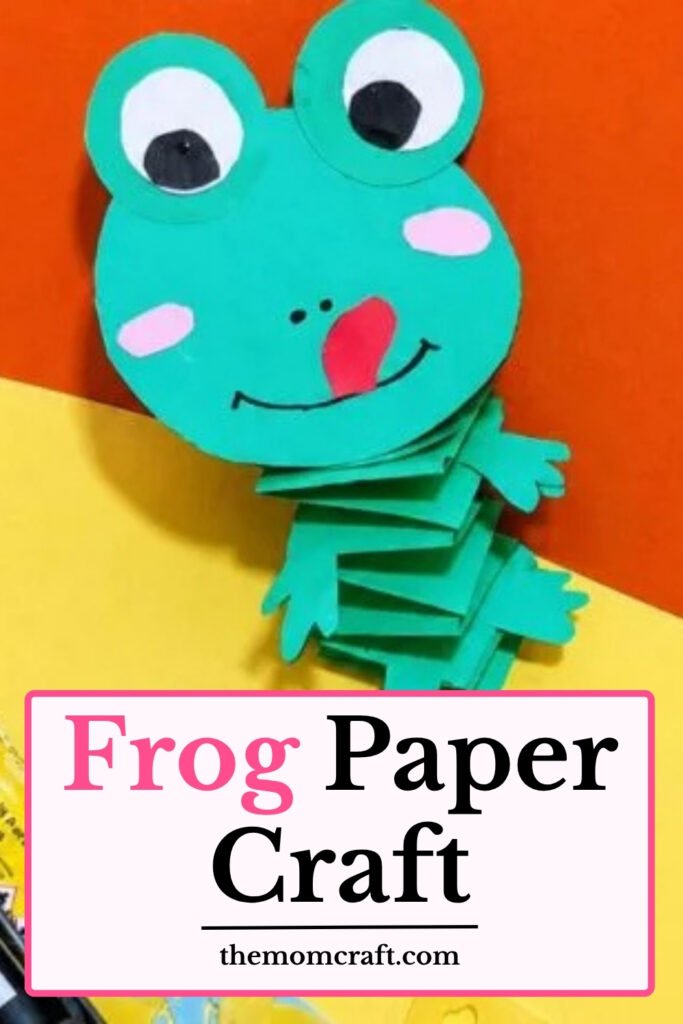
The folded accordion body acts like a paper spring, letting the frog compress and rise again when you press it gently.
Because the folds stack on top of each other, they create movement without needing any extra parts, strings, or complicated mechanisms.
The tighter and more even the folds are, the better the body keeps its shape while still giving the frog a bouncy feel.
Using slightly firmer paper can also help the accordion hold its form and stop the body from collapsing too quickly.
Materials Needed:
- Green paper
- White paper
- Black paper
- Pink paper
- Red paper
- Glue
- Scissors
- Black marker
Step-By-Step Guide
1. Prepare Green Strips
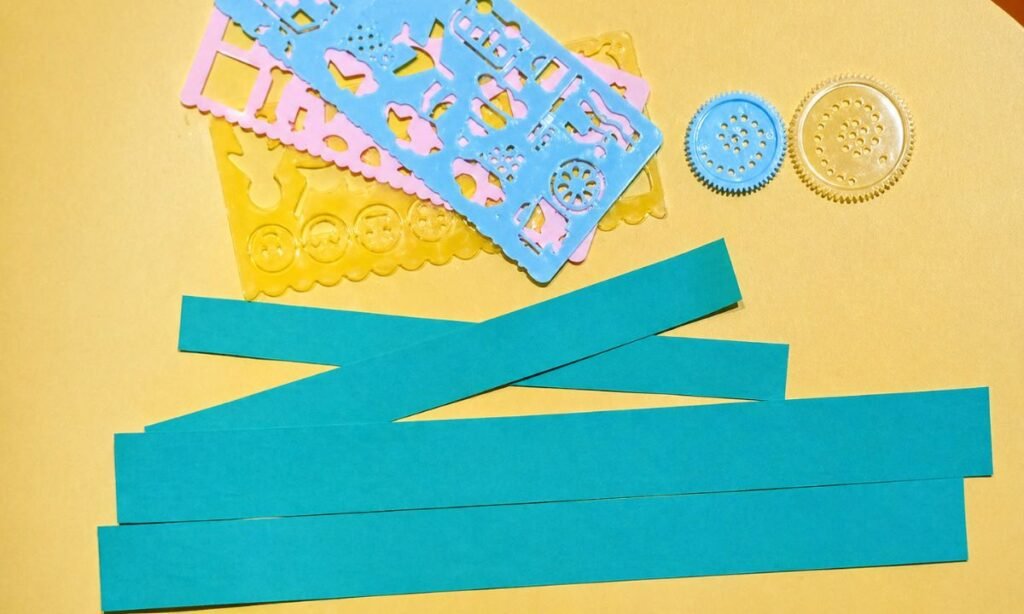
Cut several long green paper strips, keeping each one similar in width so the frog pieces stay neat and consistent.
Lay the strips flat on your work surface and separate them slightly so each piece remains easy to see and handle.
Check the edges before using them, trimming any uneven sections so all the strips look straight and ready for folding.
2. Join Green Strips
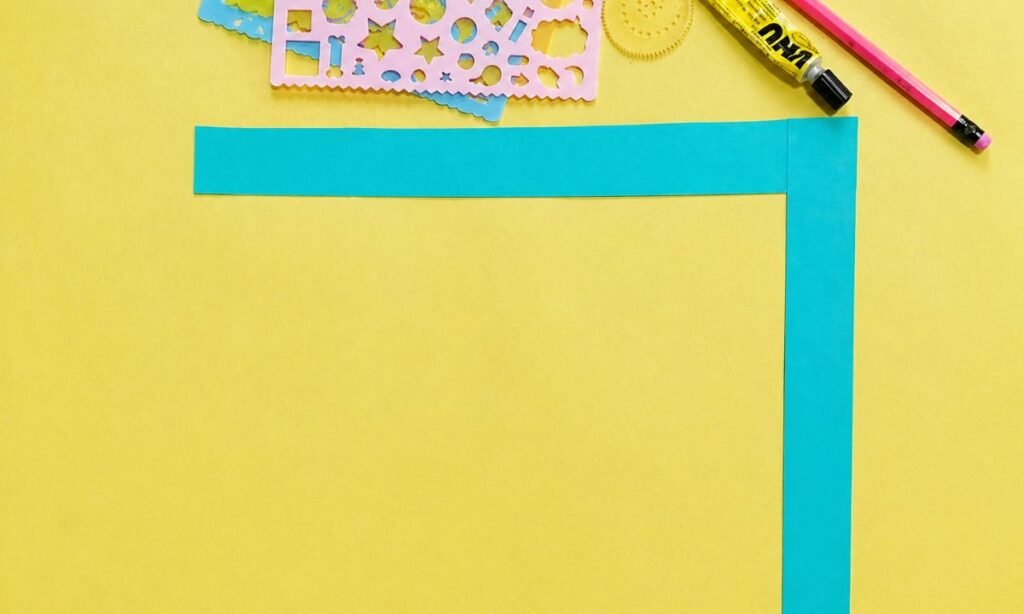
Place two green paper strips at a right angle, overlapping their ends neatly to create one clean corner for folding.
Glue the overlapping ends together firmly, keeping both strips straight so the connected corner stays flat and properly aligned throughout.
Check the strips form a clear L shape before folding, because uneven placement can make the accordion body twist later.
3. Fold Accordion Strips
Fold each joined pair of green strips back and forth over one another, creating a neat accordion pattern from bottom to top.
Press every fold firmly as you work, keeping the edges aligned so the finished accordion stays straight instead of twisting sideways.
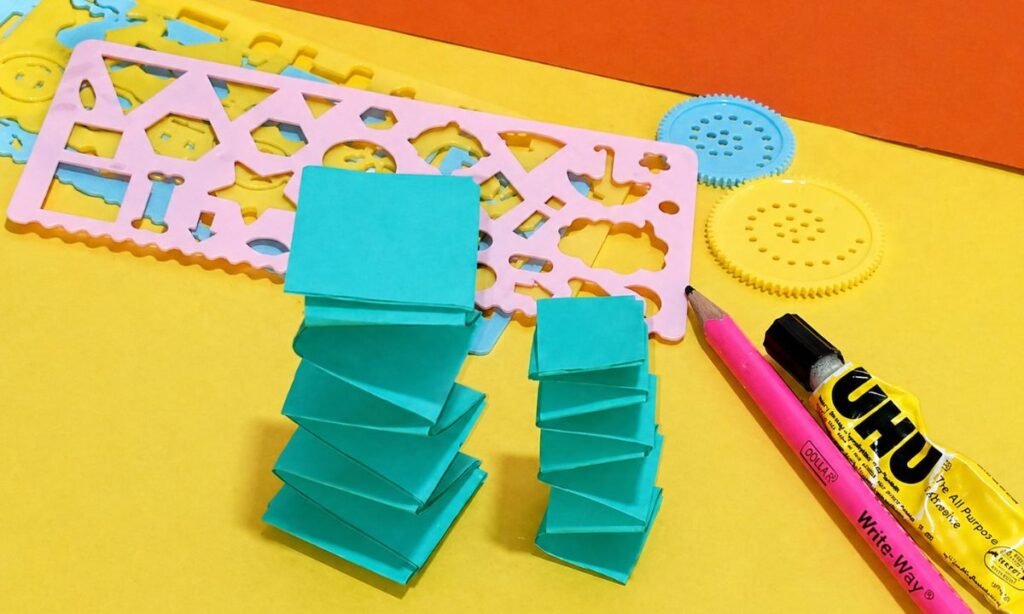
Make two folded pieces in different sizes, keeping both compact and even so they can be used neatly in the frog craft.
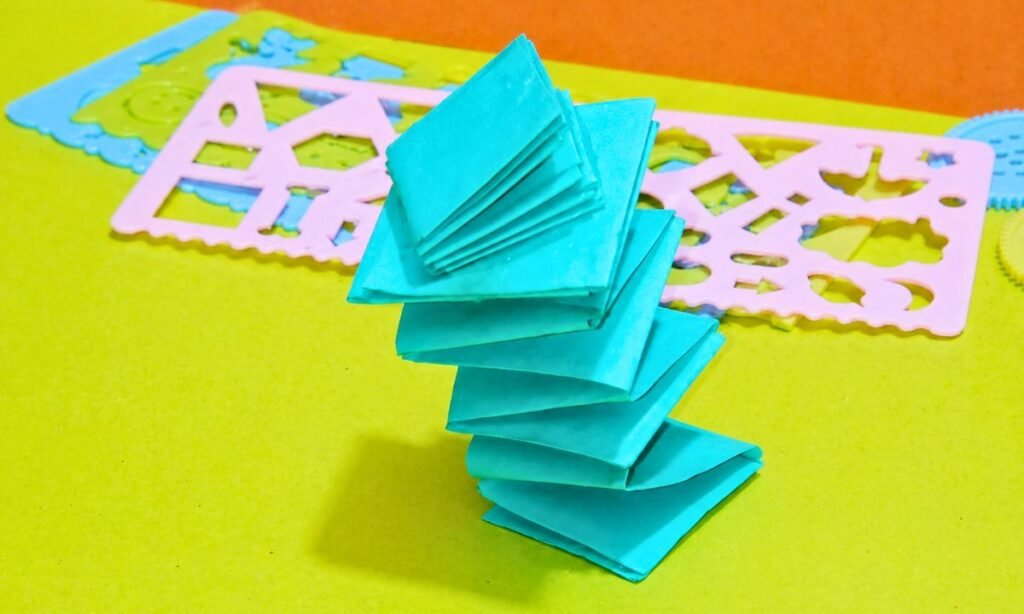
4. Shape Paper Spring
Stand the folded green accordion upright, letting the stacked layers open slightly so the spring shape becomes clearly visible from the side.
Keep the folds pressed evenly and aligned, because uneven layers can make the paper spring lean or lose its balanced shape.
Check the top and bottom squares carefully, making sure both ends stay flat enough to support the frog pieces securely.
5. Prepare Frog Pieces
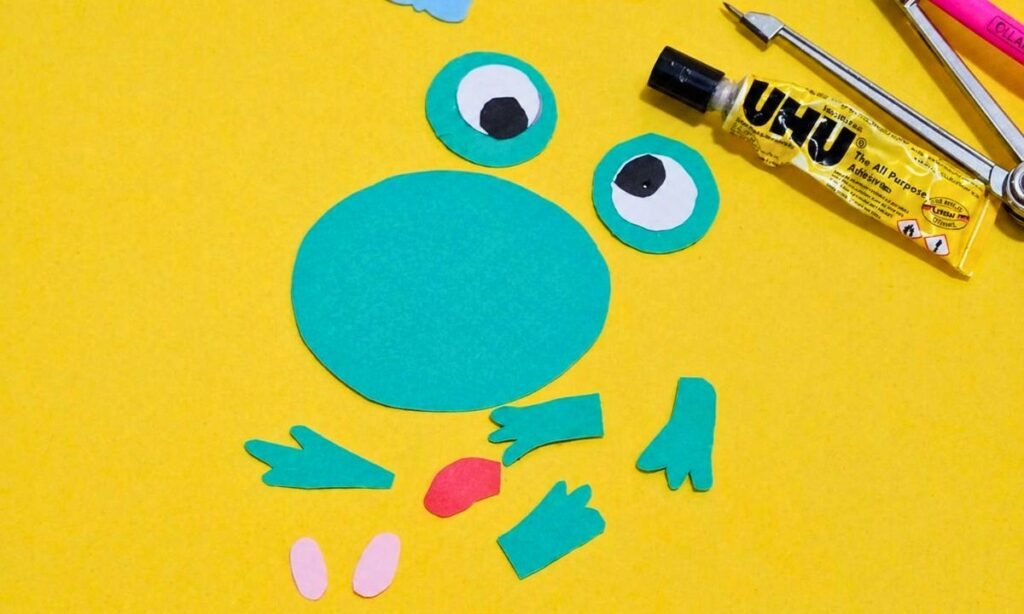
Cut a large green oval for the face, then prepare two round eye pieces with white and black centers inside each.
Cut four green feet with simple toes, keeping the shapes similar so both sides of the frog look balanced when assembled.
Prepare a small red tongue and two pink pieces, placing all the cut shapes together before gluing anything in place.
6. Assemble Frog Face
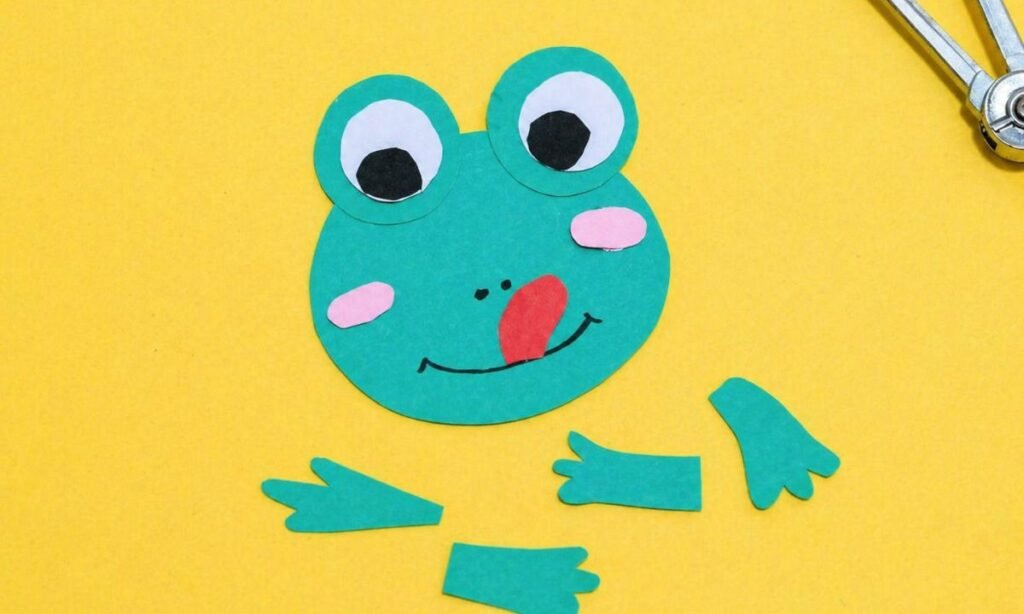
Glue the two large eyes above the green face, keeping both circles slightly raised so the frog looks bright and playful.
Add the pink cheeks, red tongue, and small black nose details, then draw a curved smile across the lower face.
Keep the facial pieces centered and evenly spaced, checking that nothing overlaps too much or hides the frog’s main features.
7. Assemble Frog Craft
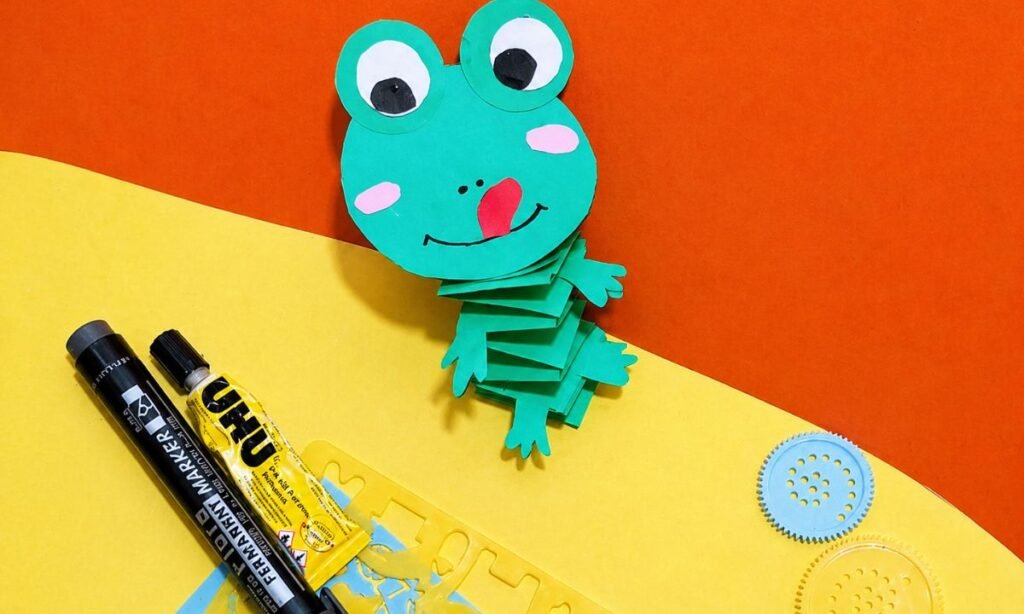
Glue the finished frog face onto the top of the accordion body, keeping it centered above the folded green layers.
Attach the four green feet around the accordion body, placing two near the upper section and two closer to the bottom.
Press each attached piece firmly, then stand the frog upright and adjust the folds until the body looks balanced and steady.
Why the Big Eyes Work
The large eyes make the frog face easy to recognize, even though the rest of the craft uses simple paper shapes.
Placing the eyes above the head also gives the frog a playful look and helps the face stand out more clearly.
The white and black layers create enough contrast, so the eyes stay visible against the bright green paper.
Because the eyes are one of the biggest features, they give the finished frog more character without needing many extra details.
Is a Frog’s Heart Like a Human Heart?
Frogs and humans both have hearts that pump blood around the body, but their hearts are built a little differently.
A human heart has four chambers, while most frogs have three chambers with two upper chambers and one lower chamber.
Because of this difference, oxygen-rich and oxygen-poor blood can mix more in a frog’s heart than in a human heart.
Even with fewer chambers, a frog’s heart still does the important job of moving blood and oxygen through its body.
FAQs
Can I Make This Frog Craft in Different Sizes?
Yes, you can make the frog larger or smaller by changing the length and width of the green paper strips.
Keep both accordion sections in proportion so the body still looks balanced and the head does not feel too large.
Smaller frogs work well for cards or displays, while larger versions are easier for younger kids to handle and decorate.
Can I Change the Frog’s Facial Expression?
Yes, you can change the mouth, eyes, or cheeks to make the frog look happy, surprised, sleepy, or silly.
Try moving the pupils in different directions or changing the mouth shape to give each frog a different personality.
This works especially well if several kids make the craft and want their finished frogs to look different from one another.
You may also like to make!



