
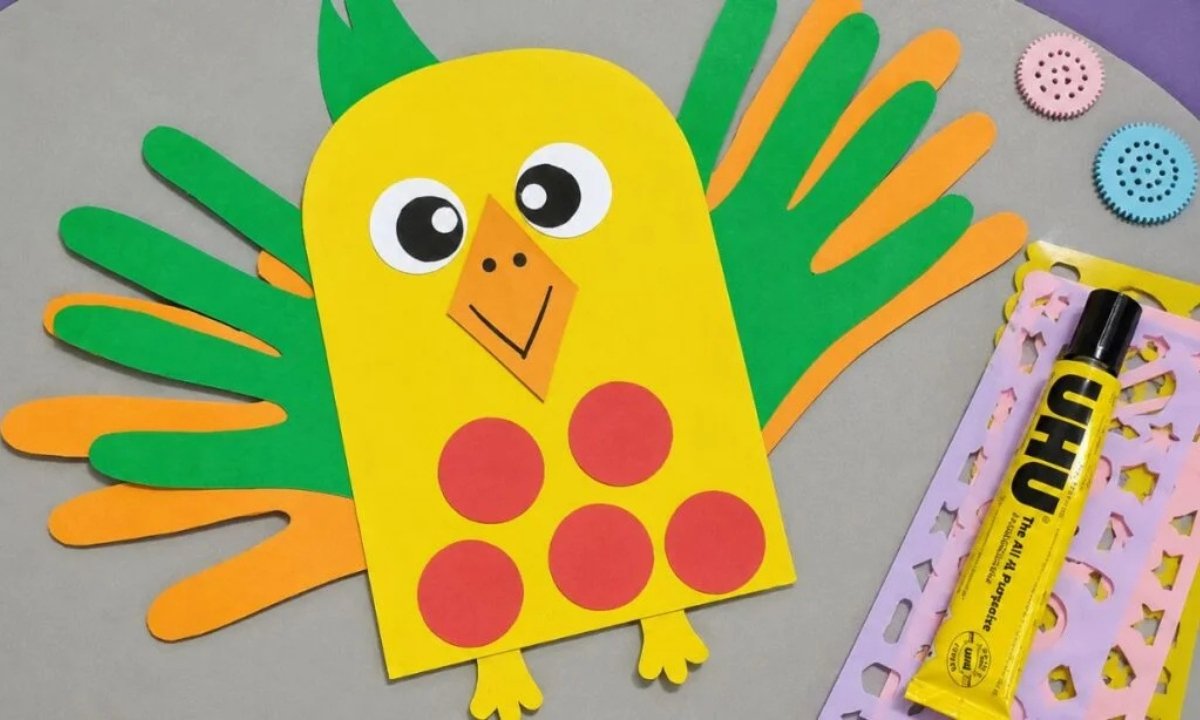
Bright feathers and playful details make a paper parrot the kind of craft that brings energy to the table from the start.
Cut, fold, and layer colorful paper pieces to build the bird gradually, giving kids plenty of room to experiment with different combinations.
Basic supplies and manageable steps make the project approachable without requiring expert skills or a carefully stocked craft cupboard.
The best moment arrives when the final feather goes into place and a pile of paper suddenly has a colorful personality of its own.
Let’s jump in!
- What Makes a Parrot Paper Craft a Fun Weekend Activity With Kids?
- Material Needed
- Step-by-Step Guide
- 1. Trace Hand Shape
- 2. Cut Handprints Carefully
- 3. Prepare Parrot Pieces
- 4. Layer Wing Pieces
- 5. Attach Body Wings
- 6. Add Final Details
- Why Does My Parrot Paper Craft Not Look Like a Parrot?
- What Small Details Can Make a Parrot Paper Craft Look Extra Cute?
- FAQs
- Can I Make a Parrot Paper Craft Without Using Handprints?
- How Long Does a Parrot Paper Craft Usually Take to Make?
What Makes a Parrot Paper Craft a Fun Weekend Activity With Kids?
Weekend crafts always feel more special when you choose something that you can let you and your kids enjoy together without letting you turn the whole house upside down.
If you pick a parrot paper craft, you will notice how it fits that sweet spot perfectly where you and the kids can stay creative without any stress.
When you start, you can give little tasks like bright color selection, hand tracing, cutting, and gluing.
And you will see how these simple steps can keep kids busy while still making them feel creative and proud of what they are building.
I have noticed that you can use this kind of craft especially on slow afternoons, when you and everyone at home just want something fun to do without screens.
And you might realize how quickly the time passes when you are all involved in it.
Since parrots already come with cheerful, bright colors, you will see how children naturally get excited while you let them pick different paper shades.
And you can even let you add tiny personal details so they feel more connected to their work.
Material Needed
- Green craft paper
- Orange craft paper
- Yellow craft paper
- Red or pink paper
- White and black paper or googly eyes
- Pencil
Step-by-Step Guide
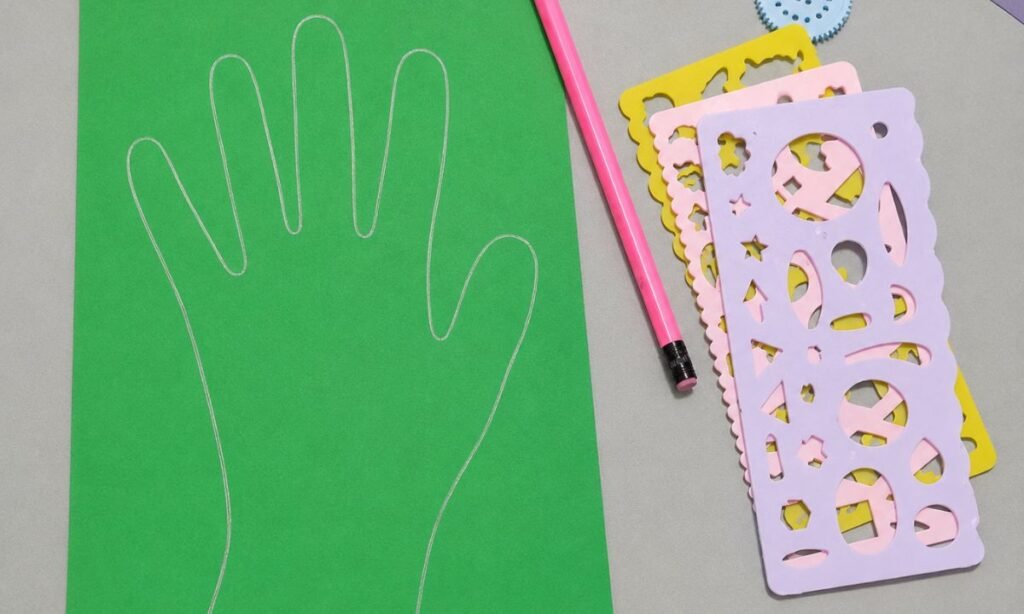
1. Trace Hand Shape
When you start, you can place your child’s hand gently on green craft paper and you can trace around it with a pencil, and you will notice how simple it feels when you just follow the shape step by step.
If you keep the fingers slightly open, you will see how you can make the wing feathers look fuller and more playful, and you might like how this small detail changes the whole look of the craft.
I like this step because you will see how kids instantly feel involved, almost like you are letting their own little handprint become part of the parrot.
And you can notice how excited they get when they see that connection.
You do not need to worry if your tracing is not perfectly neat, because you can let those tiny natural shapes stay, and you should know that handmade crafts always look sweeter when you allow those small imperfections.
When you finish tracing, you can check the outline once, and if you see any very uneven edges, you can gently fix them before you start cutting, so you and your child can move to the next step with a clean shape.
2. Cut Handprints Carefully
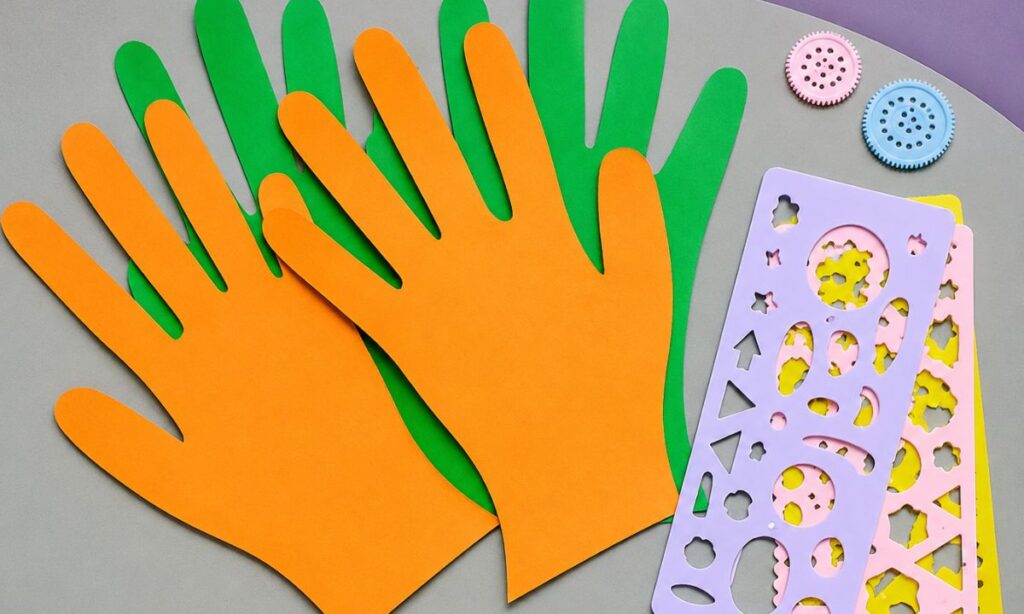
Now you can start by cutting out the green hand shape slowly, and you should follow the pencil outline carefully so you can keep the shape neat and smooth.
After that, you can make another hand-shaped cutout using orange craft paper, or you can simply trace the same hand again if you want you both wings to match nicely.
These handprints will become the parrot’s colorful feathers, and you will notice how important it is to keep the edges clean because you want your final craft to look more finished and polished.
If younger kids are doing it, you should help them with the cutting, especially around the finger shapes, because you can make it easier and safer for them.
You can also keep the cuts slightly rounded instead of sharp, and you will see how soft feather edges make your paper parrot look even cuter and more natural.
Once you have both handprints ready, you can place them together, and you will immediately see how the wing layers will look when you put you everything into one design.
3. Prepare Parrot Pieces
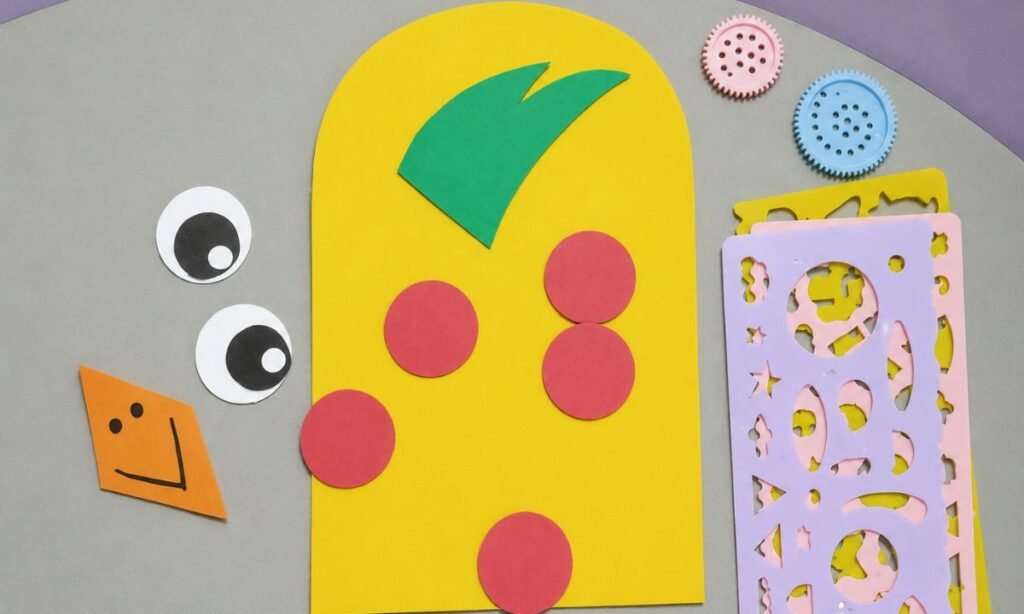
Next, you can start cutting out all the small parrot parts from colored craft paper, and you will see how the craft slowly starts turning into something real in your hands.
You will need a yellow body shape, and you should keep it simple so you can focus on the fun part of building the parrot.
You can also cut a beak, eyes, cheek circles, feet, a head feather, and any extra feather pieces you want to add, and you will notice how each small piece starts giving your parrot more personality.
This is the step where you will feel the craft actually becoming a parrot instead of just random paper cutouts, and you might even enjoy how everything starts coming together.
You should keep the body slightly rounded so you can make it look soft and friendly, and you can choose an orange or red beak depending on how bold you want your parrot to look.
If you lay all the pieces on the table first before gluing, you will find it much easier to adjust the placement, and you can keep shifting things until you feel everything looks just right for your design.
4. Layer Wing Pieces
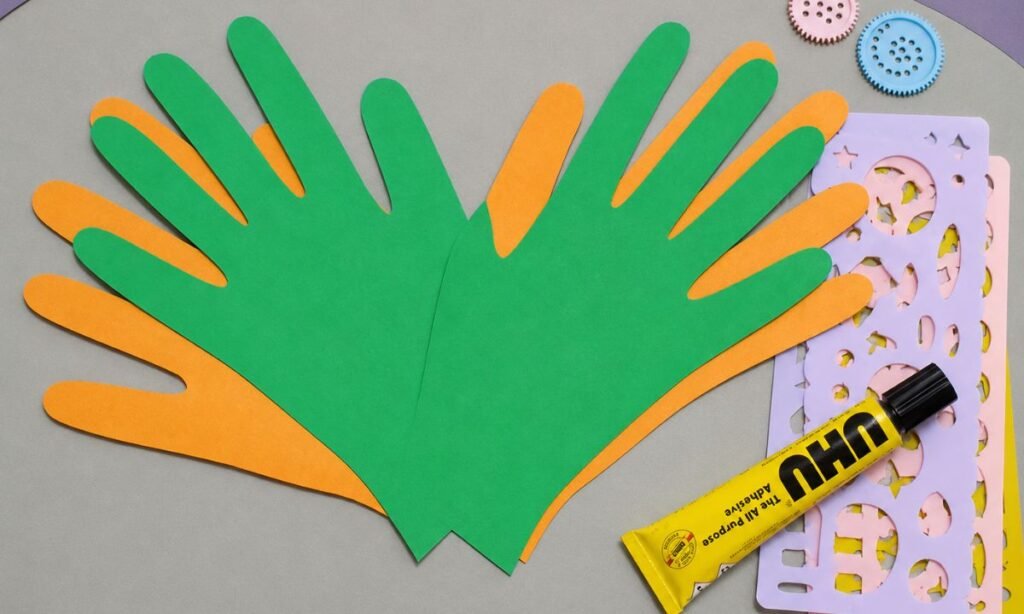
Now you can take the green and orange hand cutouts and you can glue them together, and you will start seeing how your parrot wings slowly come alive with a layered look.
If you let one handprint sit slightly behind the other, you will notice how the fingers start looking like colorful feather tips, and you can actually see how this small change makes a big difference.
This simple layering trick can give your parrot more movement, and you will feel like you are making something fuller and more detailed without needing any complicated supplies at all.
When you glue them, you should press the area gently for a few seconds, and you will see how the paper sticks nicely and stays flat in place.
If you use too much glue, you might notice wrinkles forming, so you should try to keep it light and controlled so you can keep your craft neat and clean.
5. Attach Body Wings
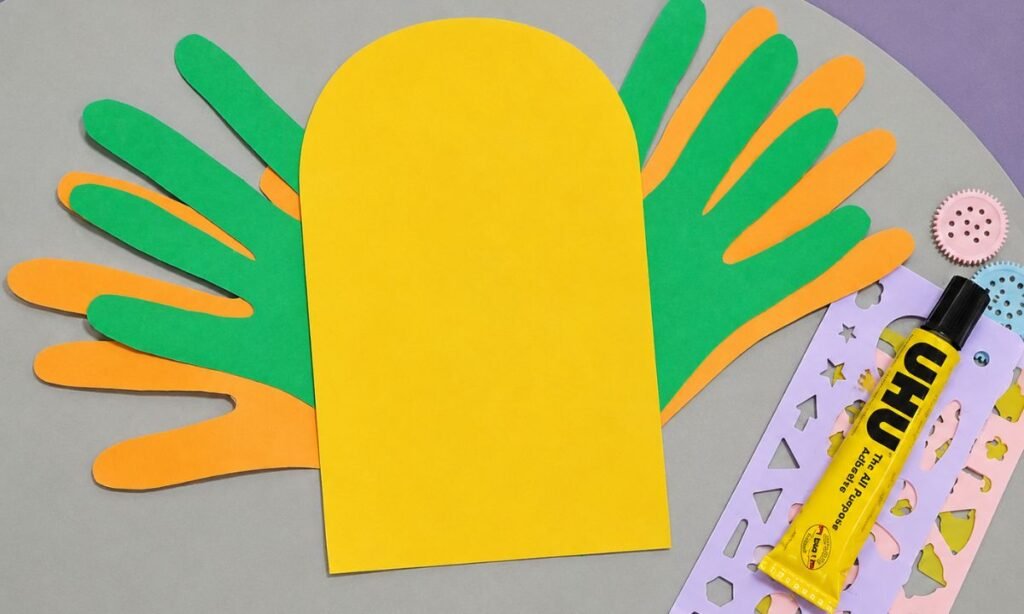
Now you can glue the hand-shaped wings behind the yellow parrot body, and you will see how everything slowly starts coming together in your hands.
If you place them carefully, you can let the finger feathers spread out from the sides, and you will notice how they peek nicely around the body, making the parrot look more lively and full of color.
This is the step where the craft really starts to feel complete, and you can actually see your parrot turning into a proper colorful figure instead of separate pieces.
You should make sure the body stays centered, and you can adjust the wings so they are not too low or too high, because balance here will make your parrot look much better overall.
If the paper feels a bit loose after gluing, you can press it under a book for a few minutes, and you will see how that helps everything settle properly and dry flat.
When you do that, you can prevent bending or curling, and then you should let it rest for a bit before you move on to adding the smaller details.
6. Add Final Details
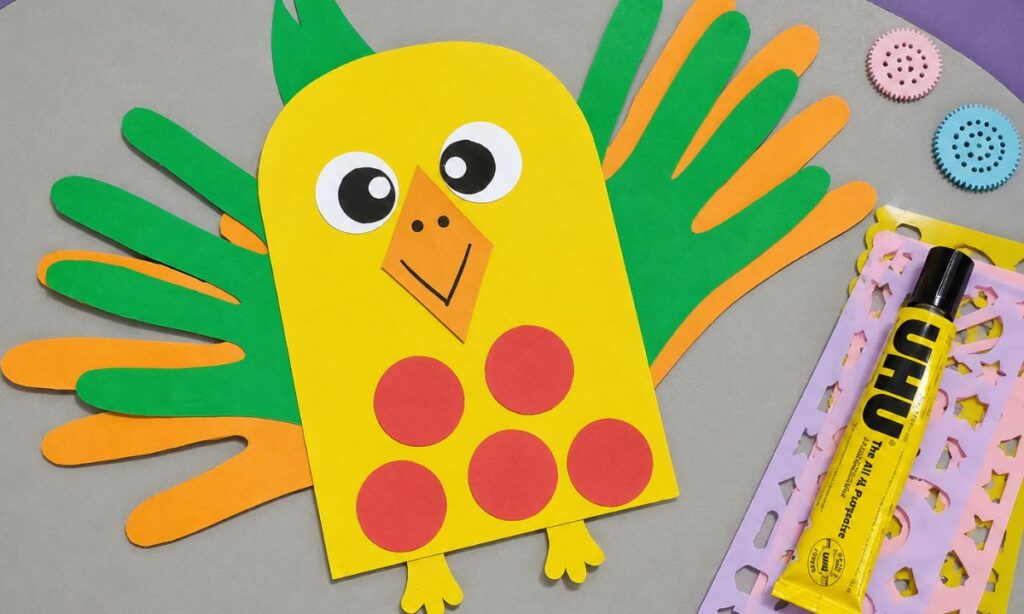
Now you can finish your parrot by gluing on the eyes, beak, cheek circles, feet, and that little head feather, and you will finally see your craft turning into a complete little character in your hands.
If you start with the eyes first, you will notice how much easier everything becomes because you can use them as a guide, and you will naturally understand where the beak and cheeks should go.
Then you can place the beak slightly below the eyes, and you will see how the face instantly starts forming, and if you add the cheek circles on both sides, you can make the parrot look even more cute and friendly.
You should put the feet at the bottom of the body, and you will feel how this small detail makes your parrot look more balanced, while the head feather on top will give it that playful finishing touch.
If you want extra detail, you can also draw tiny lines on the wings or feathers with a marker, and you will notice how those small touches make everything look more lively and detailed.
When everything is done, you should let it dry properly, and if you wait a little before displaying it, you will see how your finished parrot craft stays neat and beautiful.
Why Does My Parrot Paper Craft Not Look Like a Parrot?
Sometimes when you make a paper parrot, you might notice how it ends up looking more like a random bird shape.
And you can feel a bit unsure about what went wrong, but you should know that tiny details usually make the biggest difference in how your craft turns out.
If your body shape is too narrow, you will see how the whole parrot can start looking slightly off, and you might want to adjust it next time so you can keep it a bit more rounded and balanced.
When the wings sit too low, you can notice how it throws off the whole look, and you should try placing them a little higher so you can keep the parrot feeling more lively and properly shaped.
Bright color choices also matter a lot, because you will see how parrots naturally feel cheerful and full of color.
And if your craft looks plain, you can easily fix it by mixing greens, yellows, oranges, or reds so you can make it more playful and fun.
Facial placement is also very important, and if your eyes sit too high or your beak feels awkwardly placed.
What Small Details Can Make a Parrot Paper Craft Look Extra Cute?
Cute little details are usually what turn your simple paper craft into something that you feel is extra special, and you will notice how even small changes can completely change the final look.
If you add layered feathers by slightly overlapping colorful paper pieces on the wings, you can give your parrot more texture, and you will see how it suddenly looks more alive and detailed.
Tiny pink cheek circles can instantly make the face look sweeter, especially if you are crafting with younger kids, and you might enjoy how such a small detail changes the whole expression.
I also love adding a playful head feather because you will see how it gives your parrot a bit of personality without you needing any extra complicated effort.
If you use a black marker to draw tiny feather lines or soft wing details, you can make the whole craft feel more finished, and you will notice how it starts looking more polished.
FAQs
Can I Make a Parrot Paper Craft Without Using Handprints?
Yes, you can easily make a parrot paper craft without handprints if you want you to keep things simpler, and you will notice how you still get a cute result without extra steps.
If you skip tracing hands, you can just cut basic wing shapes from colorful paper, and you will see how you can still build a nice parrot by simply gluing them onto the body.
Handprints only add a playful feather effect, but you should know that regular paper wings can still look just as cute, and you can decide based on how much time or effort you want you to spend.
If you are doing this in classroom activities or quick craft sessions, you can easily choose the simple wing method, and you will find it much faster while still keeping the craft fun and creative.
How Long Does a Parrot Paper Craft Usually Take to Make?
A simple parrot paper craft usually takes you around 20 to 40 minutes.
And you will notice how the time can change depending on how many details you decide you want to add and whether kids are helping you.
If you take your time with cutting, you might find that this step takes a little longer, but you should not rush it because you will get cleaner shapes when you move slowly.
The fun part, though, is when you start decorating your parrot with colorful feathers and tiny details.
And you will see how those small touches can make your craft feel unique and full of personality.
You may also like to make!



